Had some trouble with your computer lately? You may have seen CHKDSK recommended as a solution for fixing file system-related issues that your drive is suffering from, whether it be on your system drive or one you use for external storage. This is all well and good, but there are times when CHKDSK can fix one issue and create another. In this case, we’re talking about CHK files.
While the appearance of CHK files may cause concern at first, don’t worry too much. I’ve found there to be a number of proven solutions you can use to revert CHK files. In this guide on CHK file recovery, I’m going to explain what CHK files are, how they’re created, and what methods I tested that managed to restore them to their original file format.
What Are CHK Files?
The primary function of CHKDSK is to identify file system errors on the storage device it’s scanning. It also has the ability to fix the problems it finds. In doing so, it will attempt to recover the data located in a damaged sector. This data could be part of a file, an entire file, or even parts of multiple files.
Data that CHKDSK recovers during its scan will be turned into a CHK file, containing part or all of the original file, just in a different format. Opening CHK files is impossible in this current format, but data from the original file will still reside within.
How to Recover CHK Files
Because the CHK file contains data from the original file, there’s a chance that you can restore it to a working state. You can figure out the original format by checking the file signature (also known as magic numbers and Magic Bytes,) a series of bytes that sit at the beginning of the file to determine its format. For example, PDF is 25 50 44 46. Understanding the file signature allows you to determine what the original file was, similar to how file reconstruction works with signature-based recovery methods.
There are several ways you can restore the original file, but the best solution for you will depend on how many files you’re trying to restore, your comfort level working with specific tools/functions, and the availability of a backup.
You should be aware that none of the solutions I’ve presented below have a 100% success rate. In some cases, a file is simply corrupted beyond repair. However, these fixes have proven useful in some cases, so they’re worth giving a shot. Additionally, if your CHK files have been lost or deleted, you will need to recover them first using a data recovery tool. My preferred tool for recovering CHK files is Disk Drill, but you can also check out some Disk Drill alternatives, like Recuva, a free recovery tool suited for beginners.
Option A: Identify and Update the File Extension Manually
Once you identify the file format that the CHK file is meant to be, it’s as simple as updating the file extension in File Explorer. Doing so will allow you to open the file in the program it is intended for. I would recommend this solution if you only have one or two files that need to be restored, as it quickly becomes tedious for large sets of data.
Step 1: Make a Backup
I cannot stress this enough – do not modify the original file. Instead, make a copy of the CHK file (or even the entire folder). Doing this ensures the original file is available in case something goes wrong or doesn’t work as intended.
Here’s how you can make a quick and easy backup (copy) of the files:
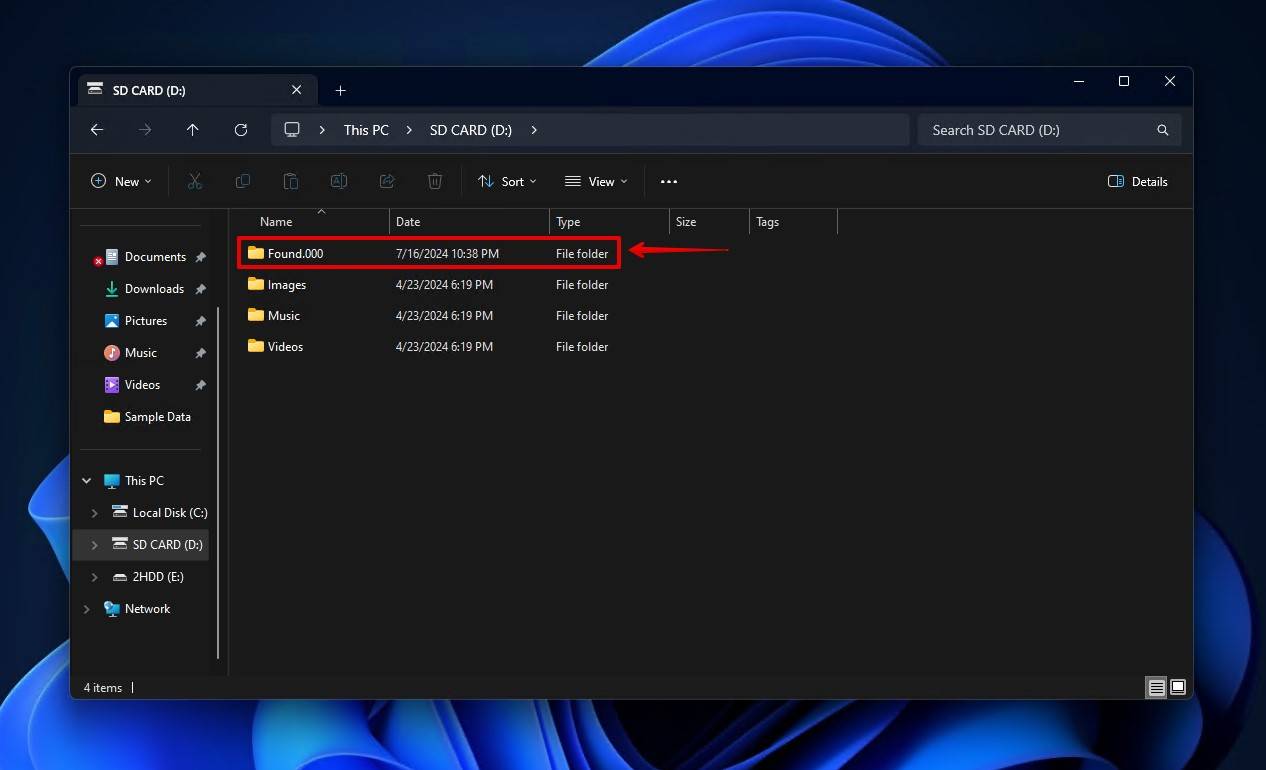
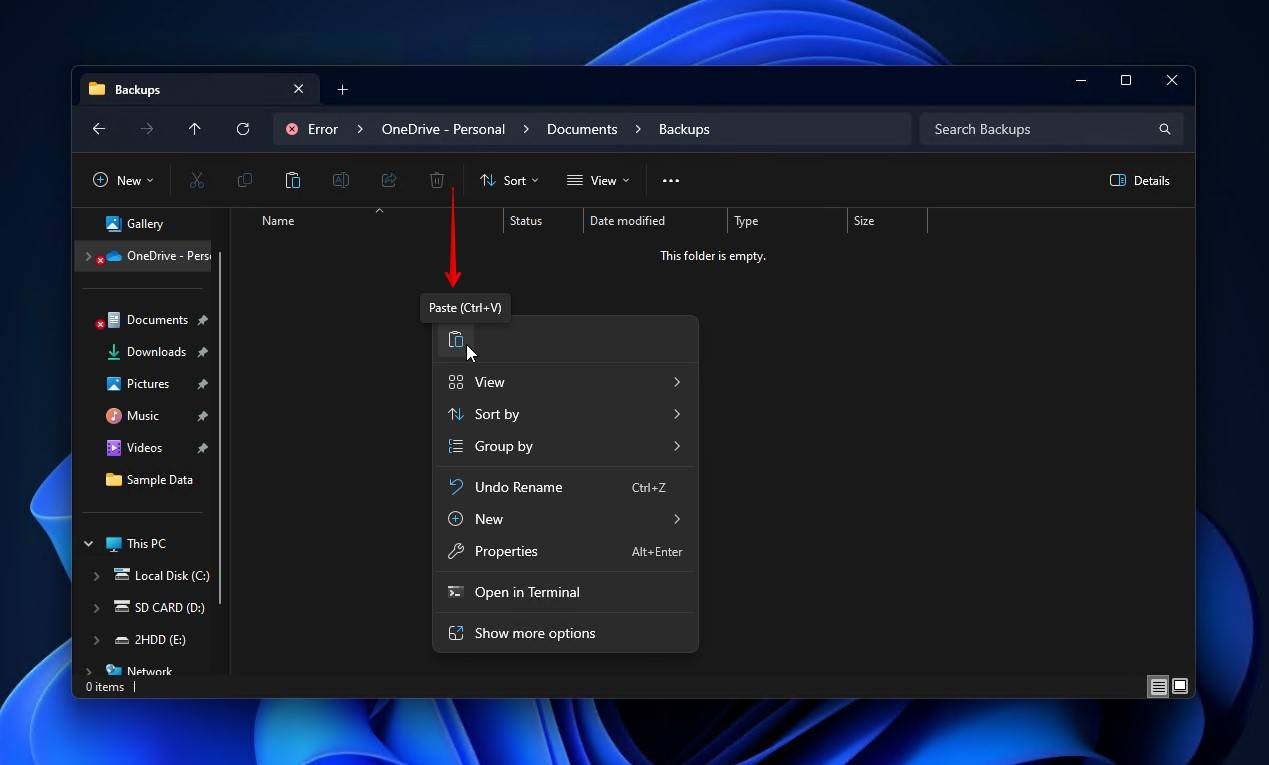
- Locate the Found00X folder, which will be located on the root directory of the partition CHKDSK was run.
- Right-click and Copy (or select it and press Ctrl + C).
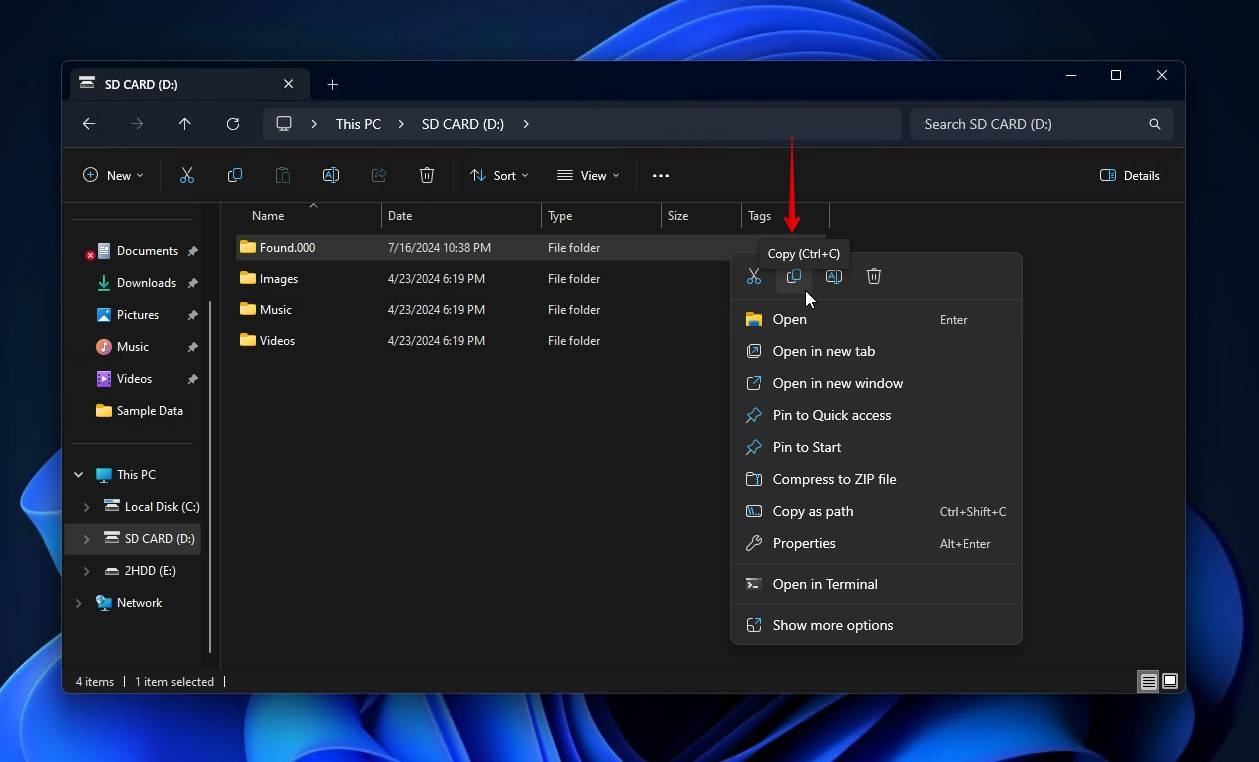
- Go to where you want to store the copied folder. Right-click and Paste (or press Ctrl + V).
Step 2: Inspect the CHK File
Now you need to check the raw data of the file. As one Reddit user experienced, it’s difficult to identify the original file formats by file size alone. Unless you already have a HEX viewer installed, you’ll need to download one. HxD is a very popular and community-recommended HEX editor which you can use to inspect the CHK files for free.
I’ll demonstrate how to inspect a CHK file using HxD:
- Download and install HxD.
- Click the Open icon and select the CHK file.
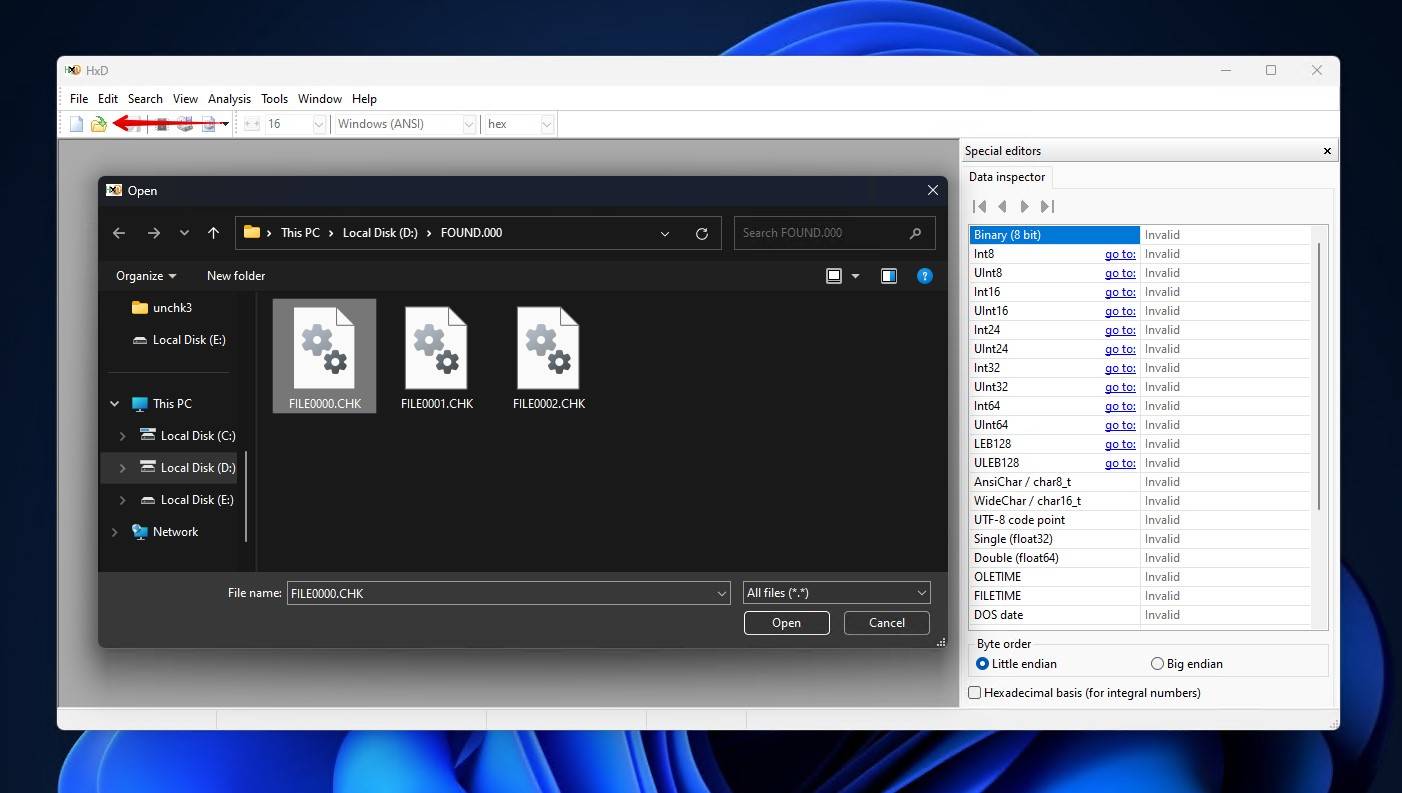
- Make note of the first few bytes of the file. The number of bytes pertaining to the file signature depends on the file format, so it’s best to take a screenshot of all of them.
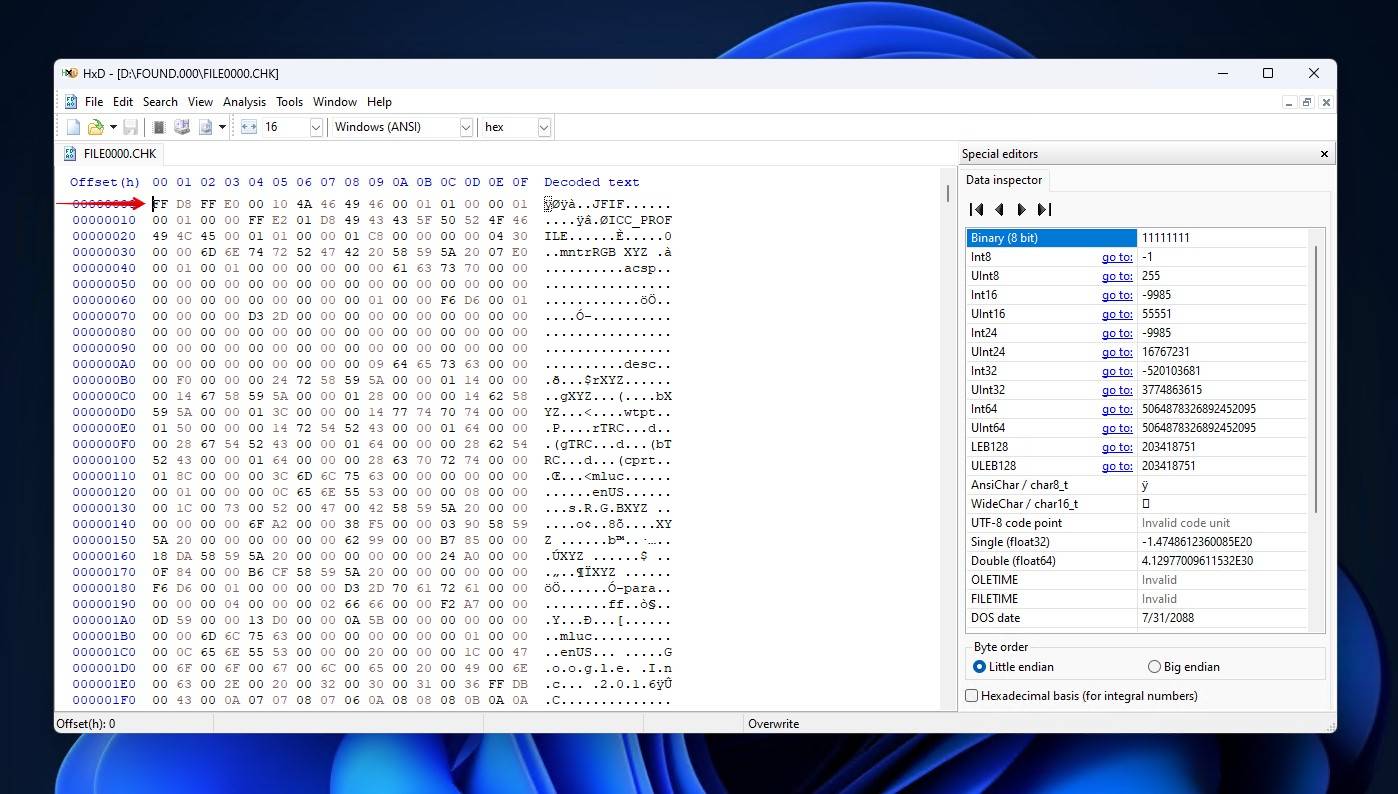
From here, you need to use the file signature to figure out what format the file is. GCK’s File Signatures Table is useful, as you can use your browser’s search function (Ctrl + F) to scan the page with the file signature. If you don’t get any results, try removing a byte until there’s a match.
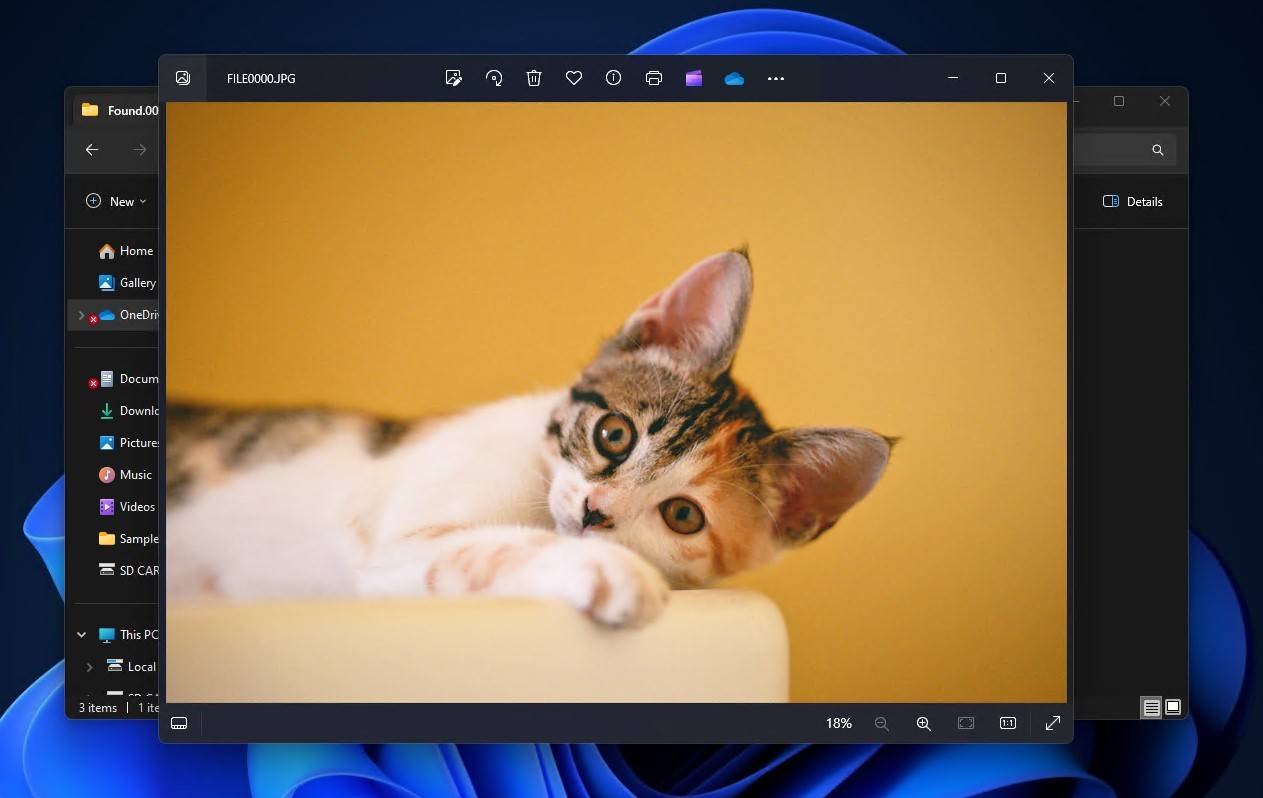
According to the table, all of my CHK files were originally JPG based on the first two bytes being FF D8.
Step 3: Change the File Extension
Now you can update the file extension. I’ll show you how to do this in File Explorer.
Here’s how you update the file extension of a CHK file:
- Open File Explorer and click View, Show, and make sure File name extensions is ticked.
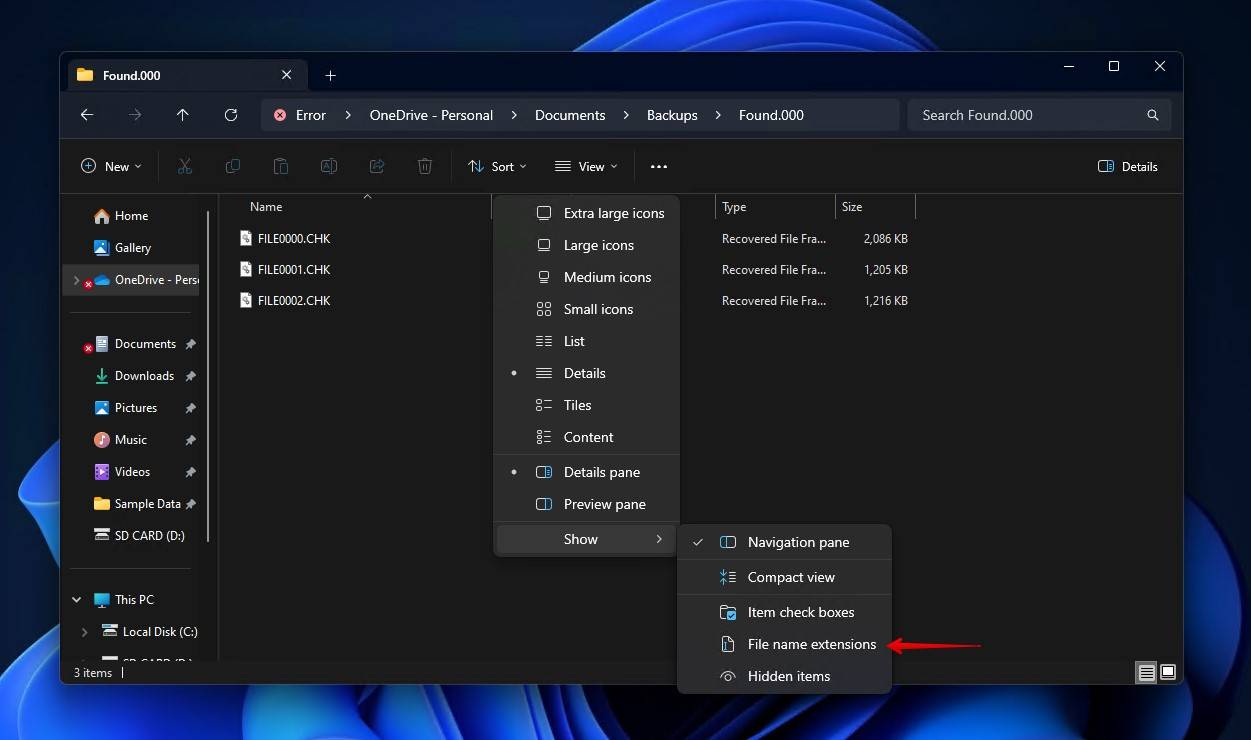
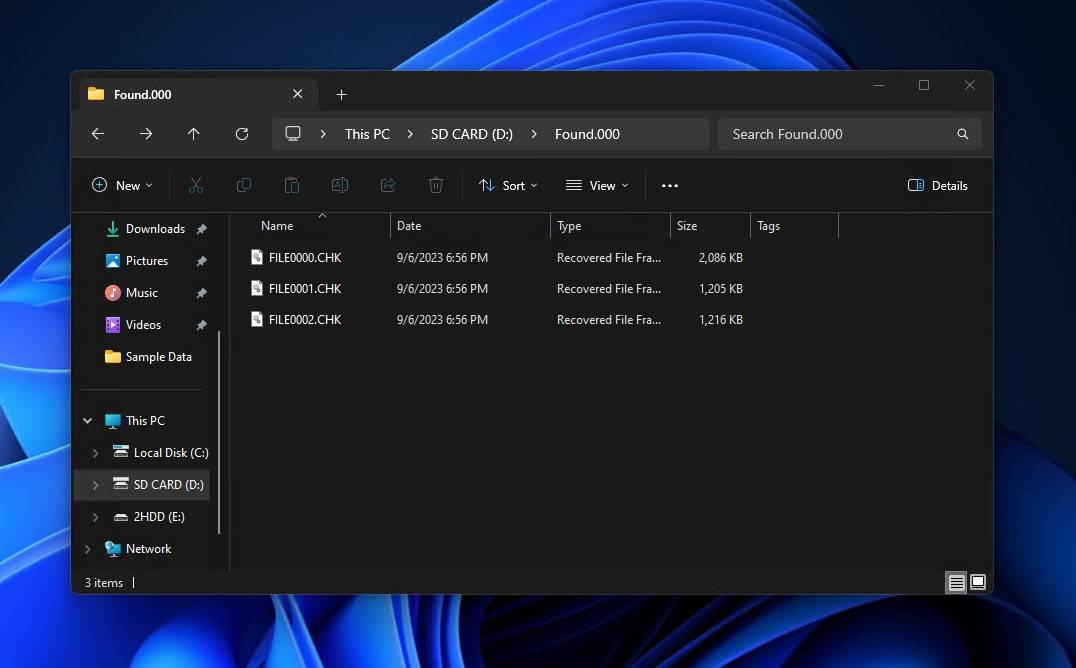
- Click the file and press F2 to update the file extension. For example, mine is going from FILE0000.CHK to FILE0000.JPG.
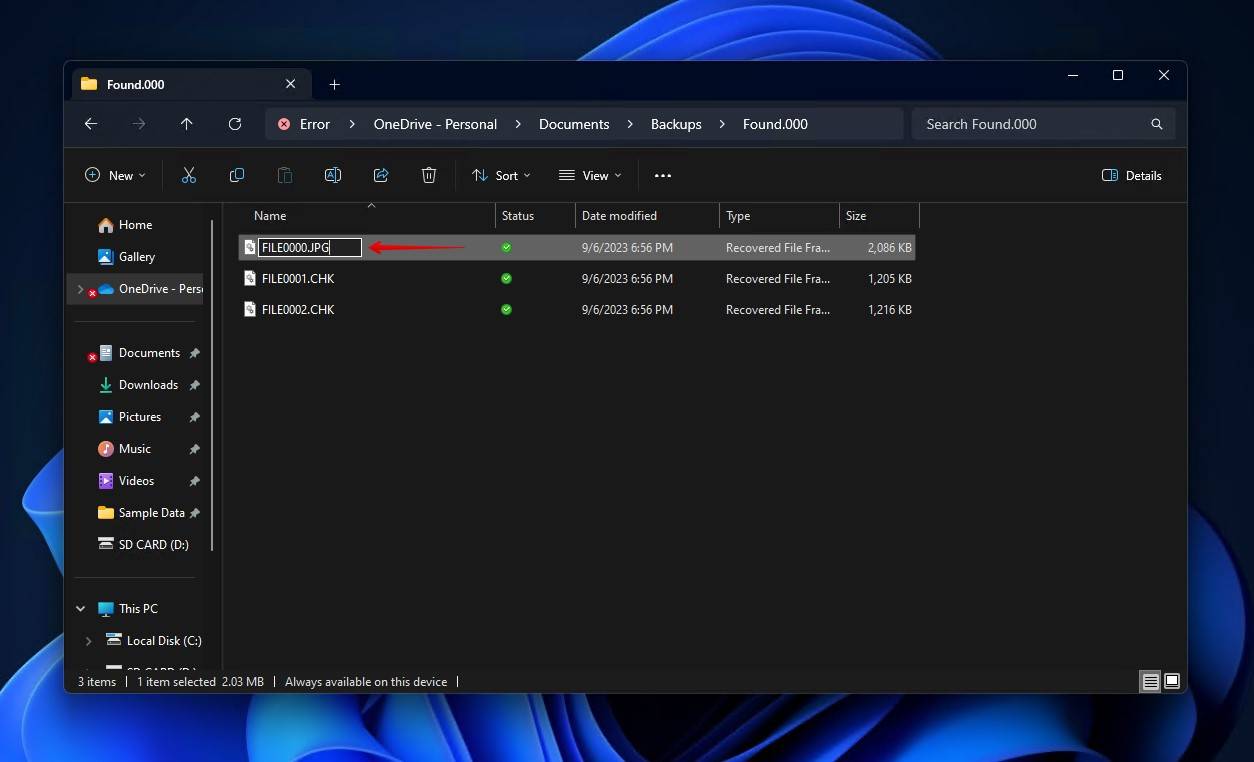
- Once it’s renamed, you can open the CHK file.
If you have a large number of CHK files, there are some faster ways to do it. However, they’re only really beneficial if all (or the vast majority) of the files were originally in the same format. This can be done with either (1) a batch renaming tool like Advanced Renamer, or (2) Command Prompt (CMD).
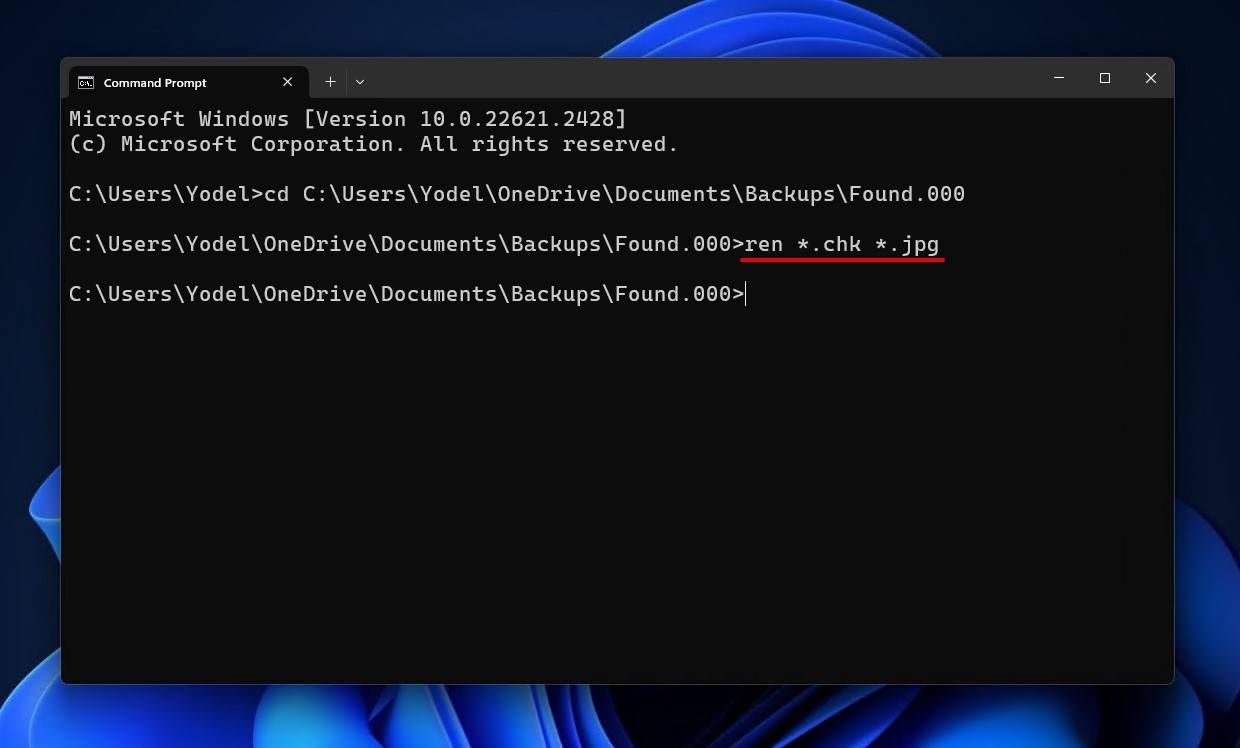
I’m going to show you how to rename multiple CHK files using Command Prompt:
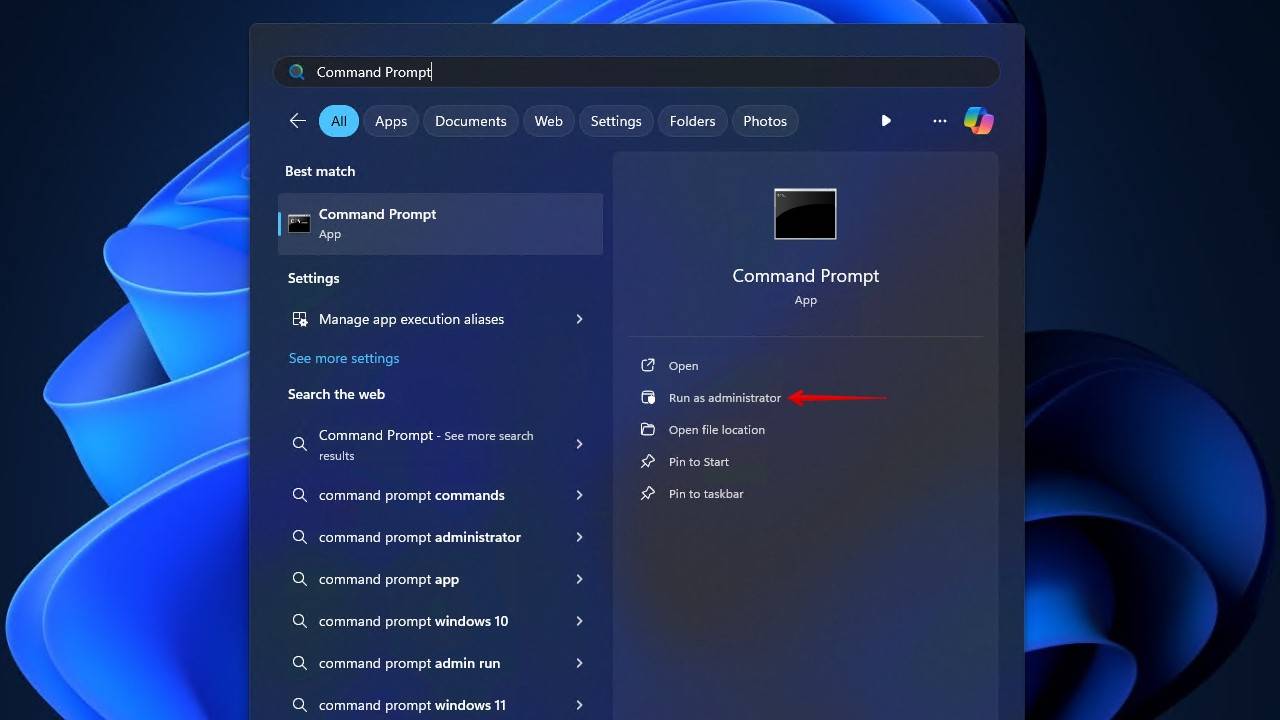
- Open Start and search Command Prompt. Run it as an administrator. (The commands in this method will not work in Windows PowerShell or Terminal.)
- Type cd *. Replace * with the copied Found.00X folder location. For example, mine is cd C:\Users\Yodel\OneDrive\Documents\Backups\Found.000.
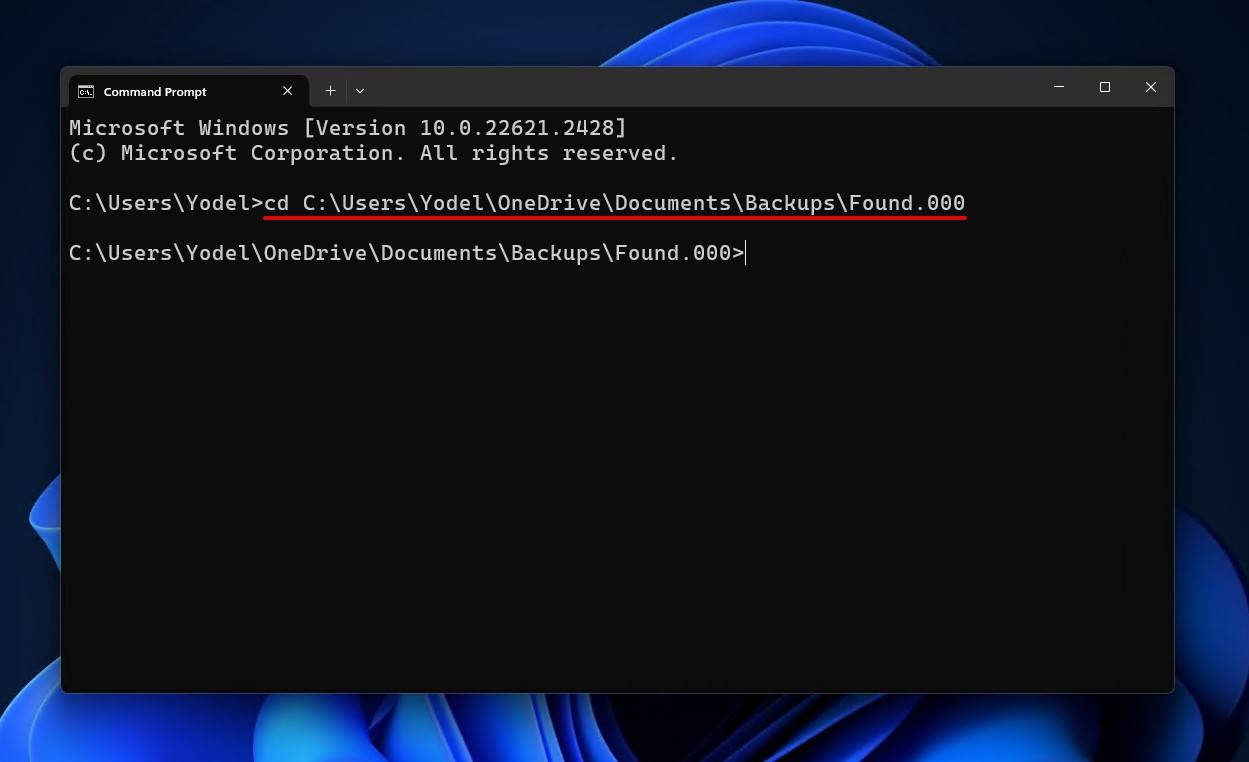
- Type ren .chk *. Replace * with the new file format. For example, mine is ren *.chk *.jpg. Press Enter.
Option B: Use a Third-party Repair Tool
I found that the most efficient and convenient way of restoring these files quickly and easily is through the use of a third-party repair tool. Even though no tool can guarantee a 100% success rate, it’s much faster than manually inspecting and renaming every single file.
There are quite a few tools that can get the job done, each with their own specific strengths. However, I’ll demonstrate how to do this with deCHK. deCHK was released in 2009, and despite its last update being released in 2012, it remains a reliable go-to for those who need to recover files lost by CHDSK. One user, Steve, managed to recover nearly 10,000 files.
- Download, extract, and open the latest version of deCHK.
- Specify your input and output directories. Select Copy, then click Go.
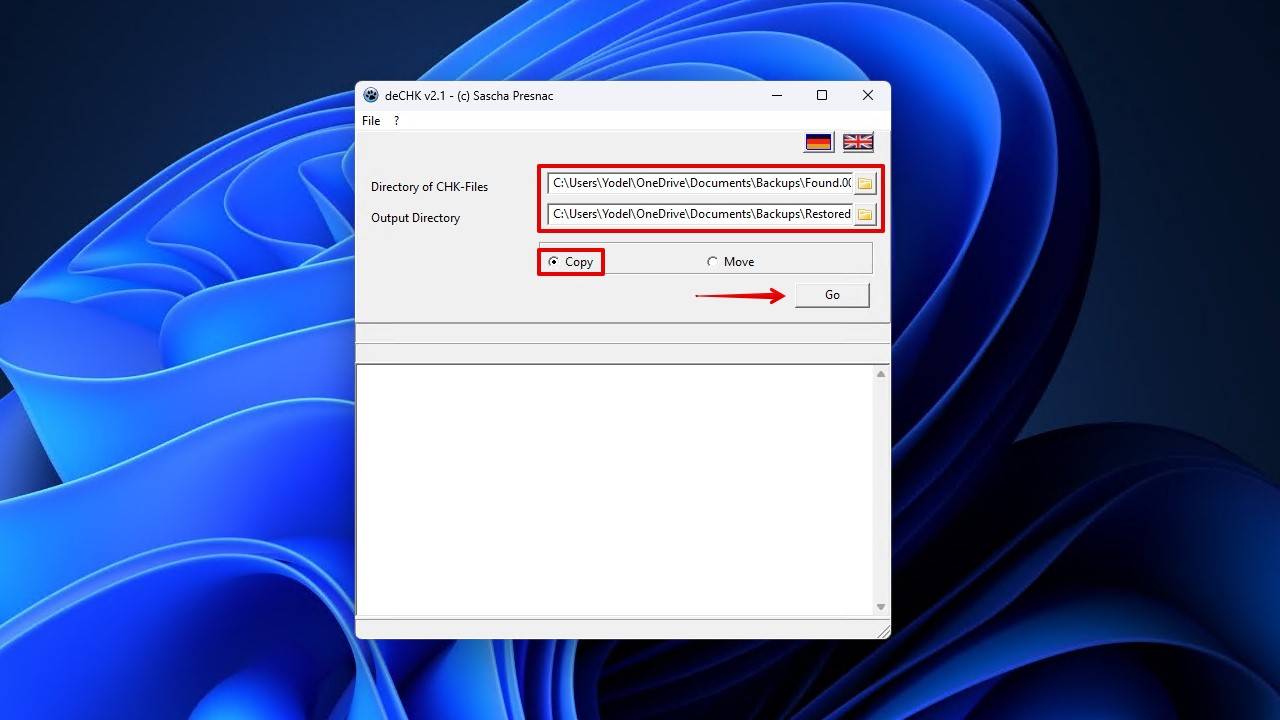
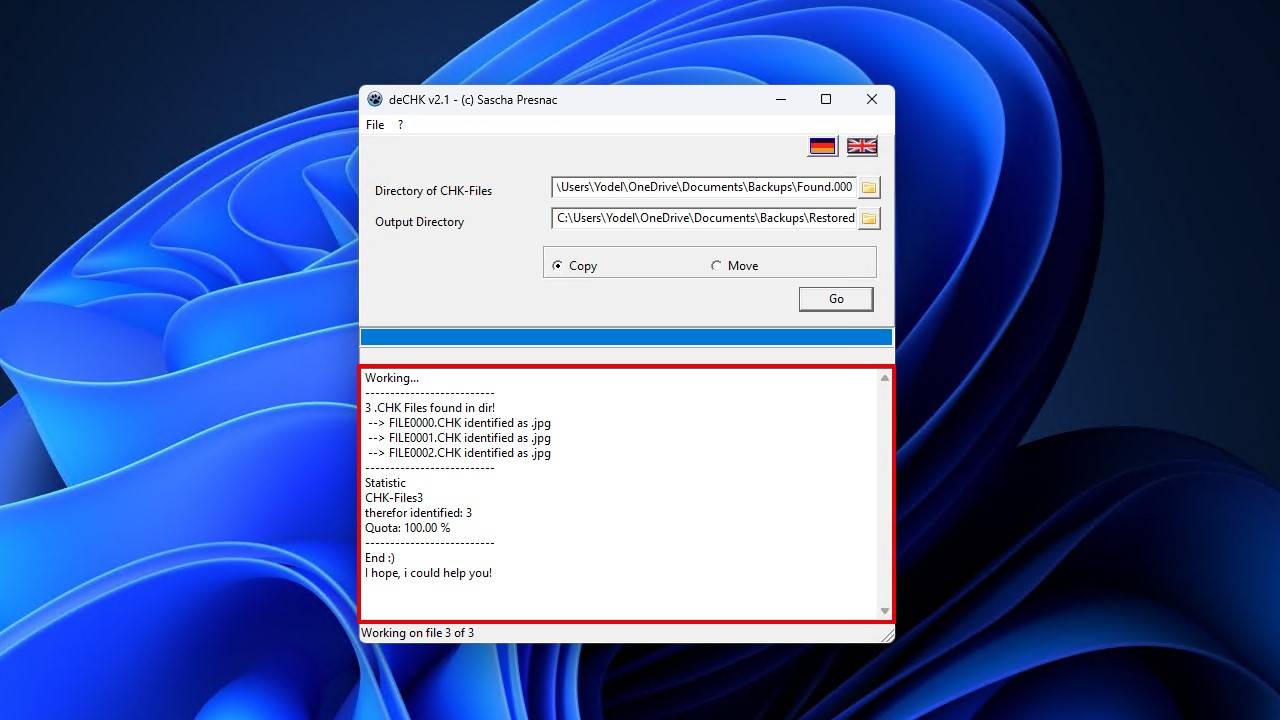
- The results will be output below.
If you want an alternative to deCHK, here are some more tools that may be helpful, along with some observations that I think are noteworthy.
- UnCHK – UnCHK is a favorite for some. I personally found its interface to be too outdated and clunky, but it does allow you to choose the scan depth so you have more control over what it finds.
- TrID – TrID is a command-line utility that can update your CHK files to the correct format. It has an extensive database of 17,989 file signatures that is always growing from community contributions. However, the command-line interface (CLI) may be confusing for some users.
- CHK-Mate – On the off-chance that you’re running Windows 7 or before, you may want to check out CHK-Mate. It has long been discontinued so it’s not a viable solution for later versions of Windows, but it’s useful for those running on legacy operating systems (OS).
Option C: Restore from a Backup
Backups are a surefire CHK file recovery method. Of course, this option is only available if you made a backup of the files prior to them becoming lost. Windows does come with some built-in backup utilities, which must be manually enabled before they kick into action. I’d say it’s worth checking out in case you set it up in the past and forgot, as it’s by far the most reliable method for restoring the files.
This option is particularly useful in situations where you’ve lost files from your system disk, as File History backs up all system libraries, favorites, and desktop files by default once it’s enabled.
I’ll show you how to restore the original files using File History, the preferred backup utility for Windows:
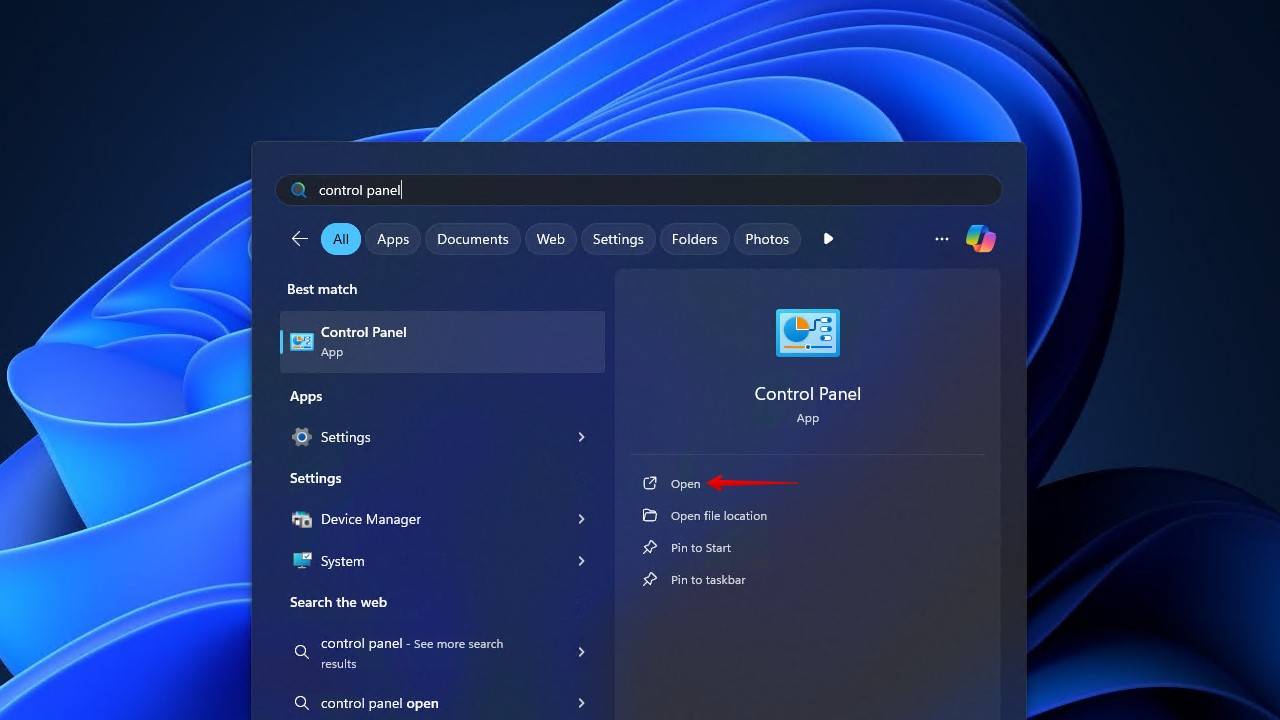
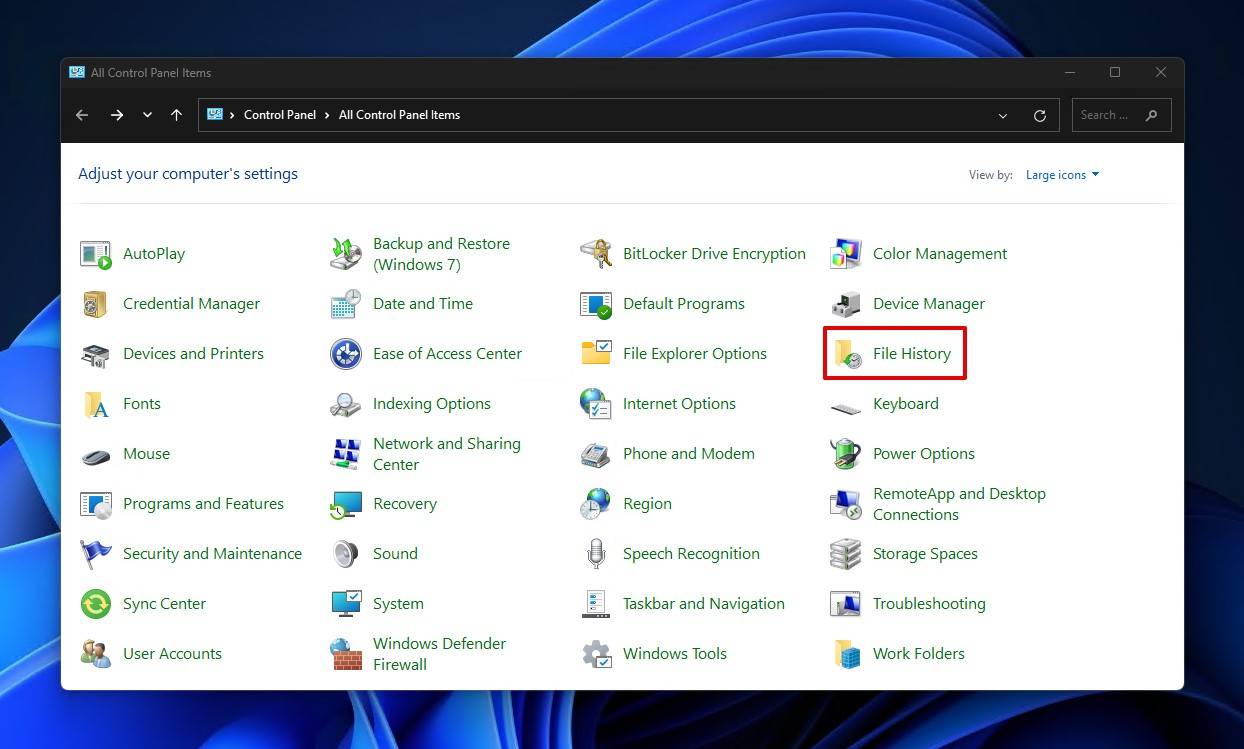
- Open Start and search “Control Panel”. Open it.
- Click File History. If you don’t see the option, make sure your view is set to small or large icons.
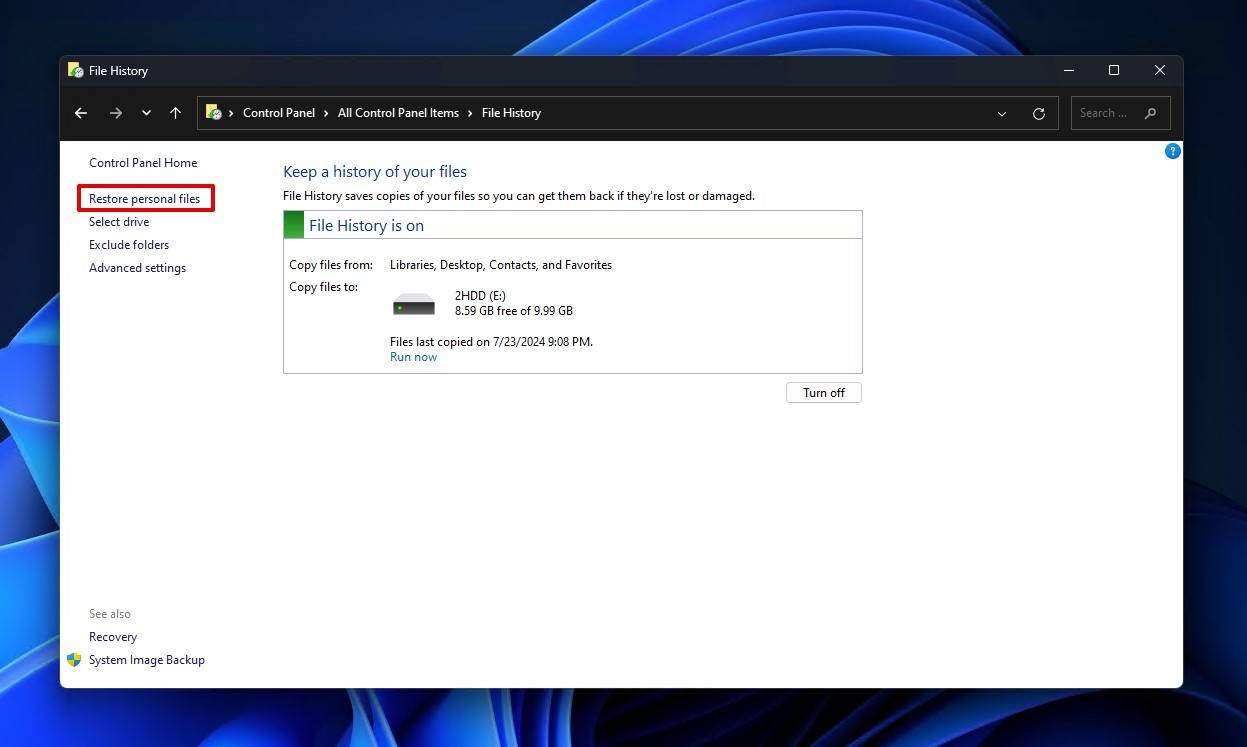
- Click Restore personal files.
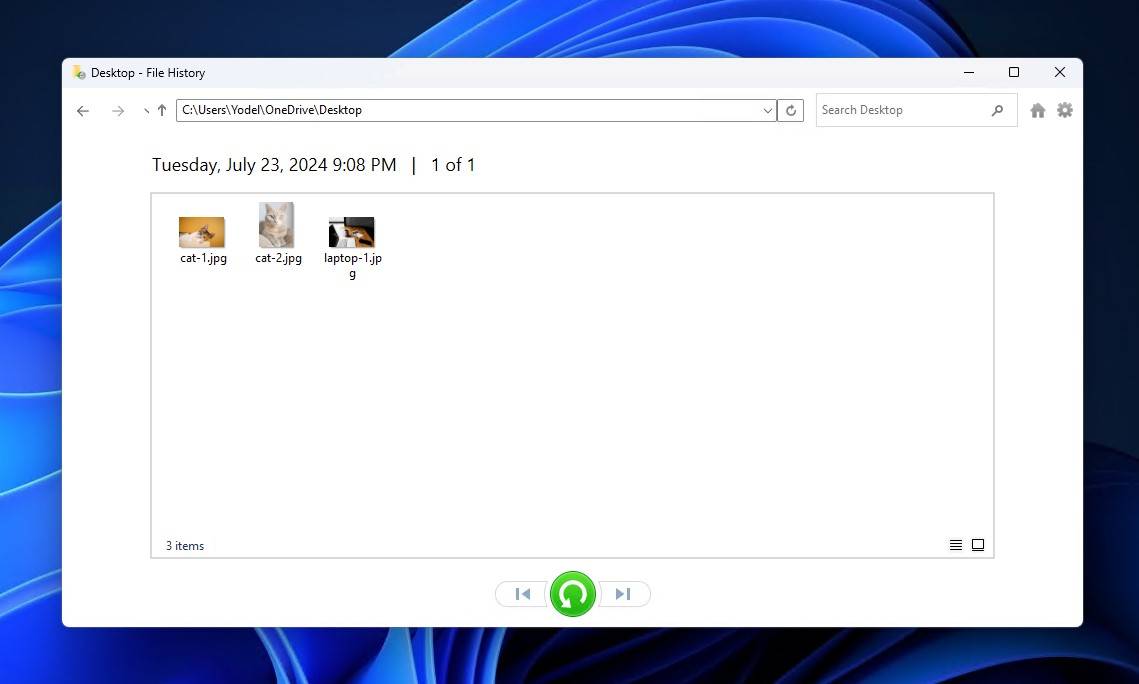
- Locate the original files.
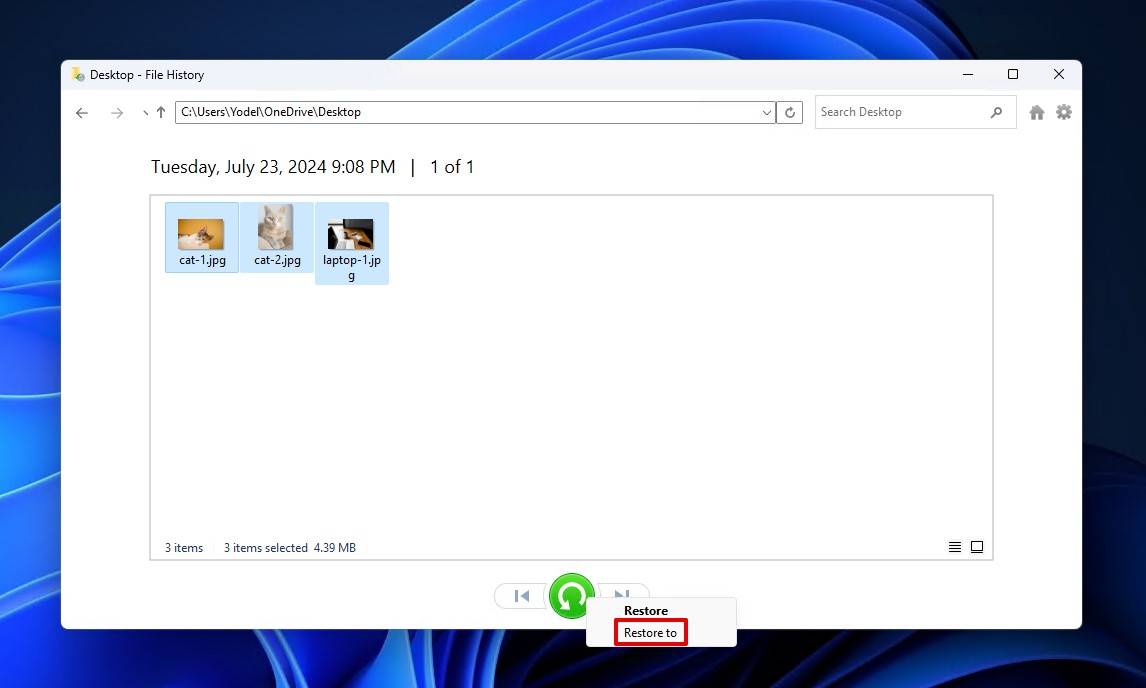
- Select the files you want to restore. Then, right-click the green restore button, click Restore to, and choose a recovery location.
How CHK Files Are Created and Where They’re Stored
CHK files come about as a result of some form of file system issue. When CHKDSK finds this issue, it will take the data located in that sector and put it into a CHK file. CHKDSK will then attempt to repair the sector.
Is there a list out there with all the file system problems that can cause this to happen? Probably not. Instead, I’ve compiled several very common issues that can result in the creation of CHK files:
- ⚡ Sudden power loss – If your computer loses power while you have files open, this can cause them to become corrupted. Consider investing in an uninterruptible power supply (UPS) if you’re handling important data or your area is prone to power outages.
- ⏏️ Improper device removal – Safely removing your storage device (USB, SD card, HDD, etc.) ensures all processes are stopped and all files are closed. Removing the device while files are open can lead to them becoming corrupted.
- 🦠 Virus or malware attack – Malware, particularly viruses, can be designed to wreak havoc on your device’s file system. This can lead to logical file system damage that results in files disappearing. Combat this by using an antimalware solution like Microsoft Defender Antivirus.
- 🔧 Faulty hardware – The cable you use to connect your external HDD or SSD may be faulty, causing the connection to be intermittent. If the connection is unstable and drops during a file transfer, the damage can become corrupted.
Regardless of what causes the damage, the CHK files that CHKDSK manages to recover will always be stored in a folder on the root of the drive. For instance, if you ran CHKDSK on your C: drive, it will be located at C:\Found.000. You may also discover more than one, following the naming convention Found.001, Found.002, Found.003, and so forth. The files inside will follow a similar pattern. E.g. FILE0000.CHK, FILE0001.CHK, etc.)
Conclusion
The discovery of CHK files could be considered good or bad depending on how you look at it. On one hand, CHKDSK has managed to fix whatever issue your drive was facing and recovered the data before it was too late. On the other hand, files located in those damaged sections are no longer usable.
You can recover CHK files by identifying their original file signature and then updating the file extension. Personally, my preferred method of doing this is by using a third-party tool. Alternatively, if you only have one or two files that need to be corrected, I think manually inspecting and renaming them is also fine. Despite the wide array of available fixes, there’s never a guarantee that your data will be recoverable, so your best plan of action going forward is to implement a data backup strategy that ensures you always have a working copy of your essential data.
FAQ
Is there a guaranteed way to recover CHK files?
No, not without a backup. Although your chances are very good in most circumstances, there’s never a way of guaranteeing that you’ll get the original files back once they’ve been converted to CHK. As such, it’s necessary to implement a rigid backup schedule to keep a copy of all essential files on hand.
How can I recover multiple CHK files at once?
The best way to recover multiple CHK files in bulk is through the use of a third-party repair tool like deCHK, which I mentioned earlier in the article.
How can I prevent CHK files from being created?
Realistically, these files can appear any time you run CHKDSK. However, to prevent the data from becoming lost, your best chance of combating this is by creating backups of the files you wish to keep safe.
This article was written by Jordan Jamieson-Mane, a Staff Writer at Handy Recovery Advisor. It was also verified for technical accuracy by Andrey Vasilyev, our editorial advisor.
Curious about our content creation process? Take a look at our Editor Guidelines.