
Most of our content reflects our specialization in data recovery and repeatedly warns about potential dangers that can lead to data loss. Yet, sometimes, you may want to do the exact opposite: eliminate critical data so that others can’t access it.
There are many ways to achieve this goal, from a full format to using specialized apps known as file shredders. But do such solutions work, or are your seemingly disappeared files still recoverable? Let’s find out!
When and Why Should You Use a File Shredder?
There are many reasons to use a file shredder to ensure that data on a storage device is permanently deleted and unrecoverable.
Such scenarios could be:
- 🧑🤝🧑 Sharing a device with others but not the data on it.
- 🔍 Ensuring all traces of how you used it and any personal information are eliminated before selling a laptop.
- 🎁 Handing down or discarding old devices while ensuring sensitive information like logins and personal files won’t be accessible by others.
- 🕵️ Removing a client’s confidential data after completing a project.
How Does File Shredding Work?
Typical deletion of files may mark them as gone when they actually aren’t or leave chunks or traces of them behind.
Specialized file shredder apps try to solve those issues by overwriting the space occupied by files with random data before deleting them.
It’s worth noting that there are various methods of doing this, with their primary difference being the type of random data used and the number of times the files are overwritten. Theoretically, the more garbled the random data and the higher the number of overwrites, the lower the chances of recovering the original files.
Hardware-Level File Shredding
Many storage devices have an option in their firmware to delete the data on them entirely and securely.
However, for this article, we won’t cover such cases because:
- ⛔Many storage devices don’t support the process.
- 🧩The results differ between devices, with some effectively eliminating all data on them, while on others, all files may remain intact but hidden.
- 🪛 The process requires specialized software.
The Case Of The Undeletable Cloud Files
You may have read horror stories about iDevice owners seeing sensitive files they’d deleted years ago inexplicably reappear on their devices. The most realistic scenario is that they had enabled “synchronizing their files with cloud storage”, and a bug on Apple’s side “forgot” to remove them long after their deletion.
The lesson from this is what many security-conscious users already know: never give third parties access to your sensitive files, and that includes “storing them on cloud-enabled storage/syncing them”.
Our Approach To Shredding (And Recovering) Data
For this article, we focused on file shredding and data recovery methods that are relevant for most users. We tested all software using real-world data and multiple devices to ensure the accuracy of our results.
Our Data Pile And Tested Devices
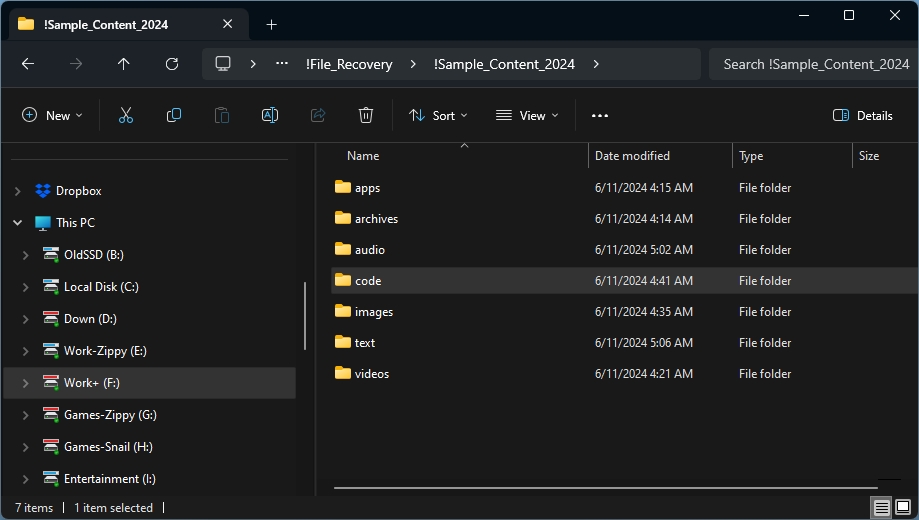
The “data pile” we used for our tests consists of around 4GBs of various types of files:
- 📃 Documents (Word, PDF, plain text, Markdown, etc.)
- ⌨️ Code samples (Python, JavaScript, AutoHotkey, JSON, CSV, and more)
- 🖼️ Images (RAW, PNG, JPG, and others)
- 📺 Audio & Video (WAV, MP3, MP4, MKV, WMV)
- 💻 Apps (EXE & MSI installers)
- 📁 Archives (7-Zip, RAR, ZIP)
As for the devices, we used an Intenso USB Flash Drive and an AData SD card. Since those devices use the same core technology as SSDs, flash memory chips, our results should also reflect this type of storage.
We decided to skip classic HDDs in this article since they’re now considered outdated technology, used when the priority is cheap storage space rather than performance and peace of mind.
How We Chose File Shredder Software
We chose three file-shredding solutions based on their popularity: Eraser, File Shredder, and WipeFile.
They all offer various methods of erasing data. Our initial plan was to start with the simplest methods and, if those failed, proceed to the most advanced ones. If that didn’t work, we would expand our scope and include more apps in our tests.
As it turned out, we didn’t have to.
Why We Selected The Data Recovery Apps In This Article
We selected three data recovery apps based on a combination of their popularity, price, and proven performance:
- Recuva: With a price of zero and an easy-to-use wizard-based interface, Recuva is the most popular data recovery solution by far.
- Disk Drill: Consistently positively reviewed and loved by its users, Disk Drill offers an unmatched combination of performance and features at an affordable price.
- R-Studio: Designed primarily for professionals and demanding users who prioritize results over user-friendliness (and are willing to pay its price), R-Studio overflows with advanced functionality.
As we’ll see next, despite those apps’ best efforts, “the shredders won”.
Real-World Recovery Testing After Permament Deletion, Format, And Shredding
For our tests, we followed the following process:
- We started by copying our “data pile” onto the USB Flash Drive and SD card and creating two backup images of them using imageUSB.
- We then used each data shredder on our storage devices, starting with its “lowest level” of security (when we had to make a choice) or the suggested defaults.
- Each data recovery solution was tasked with restoring the contents of our data pile using both fast scan and deep scan modes.
- After each recovery attempt with an app, we re-flashed the backup image on the device and re-shredded everything to ensure the results of one scan wouldn’t affect the next one.
- We tried all steps (flashing > shredding > recovery) two times for each device.
Regarding our “testbed” platform, we’ve performed all our tests on a “normal” (but custom-built) PC, with an ASUS motherboard and its default storage controllers, to reflect a typical user’s experience.
Test Scenario #1: Can You Recover Data Deleted With Eraser File Shredder Software?
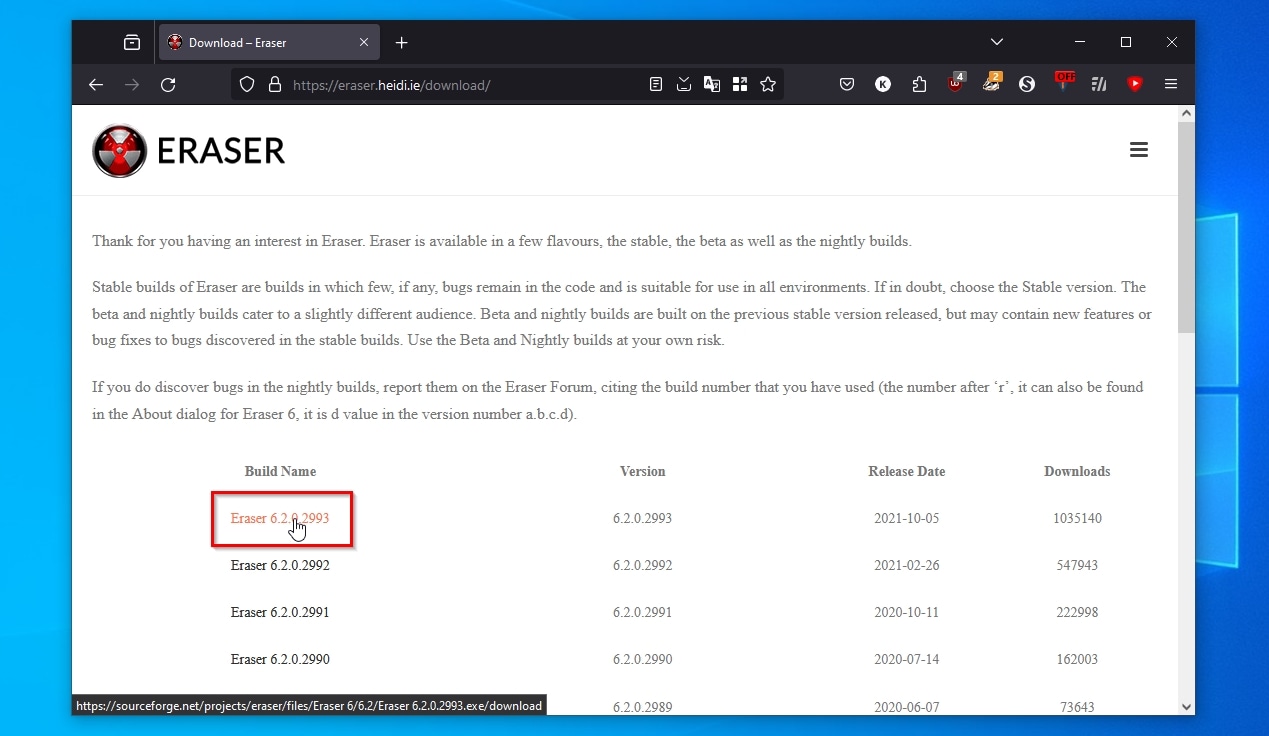
The first file-shredding app we tried was Eraser. It’s been years since the app’s last update. However, many users still endorse it, as indicated by over one million downloads of its last version.
- We downloaded the app from Eraser’s official site and installed it.
- Eraser refused to shred data directly from its interface. Instead, we had to right-click on a device and choose Eraser’s entry from the context menu. Then, instead of acknowledging that we wanted to “erase the selected items”, we picked Options to customize the process.
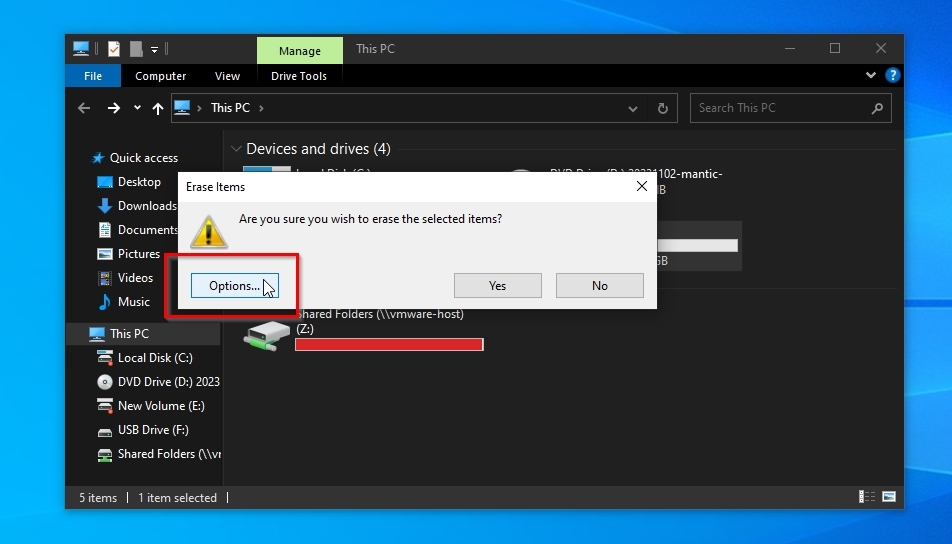
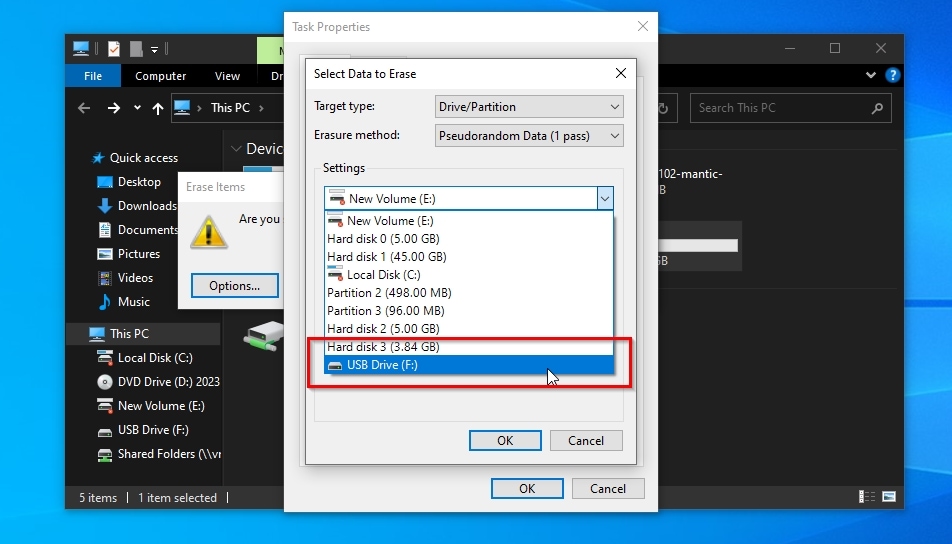
- We changed the (default) Erasure Method to Drive/Partition (to ensure the app would erase all data on the device) with Pseudorandom Data (1 pass) (which should be the quickest).
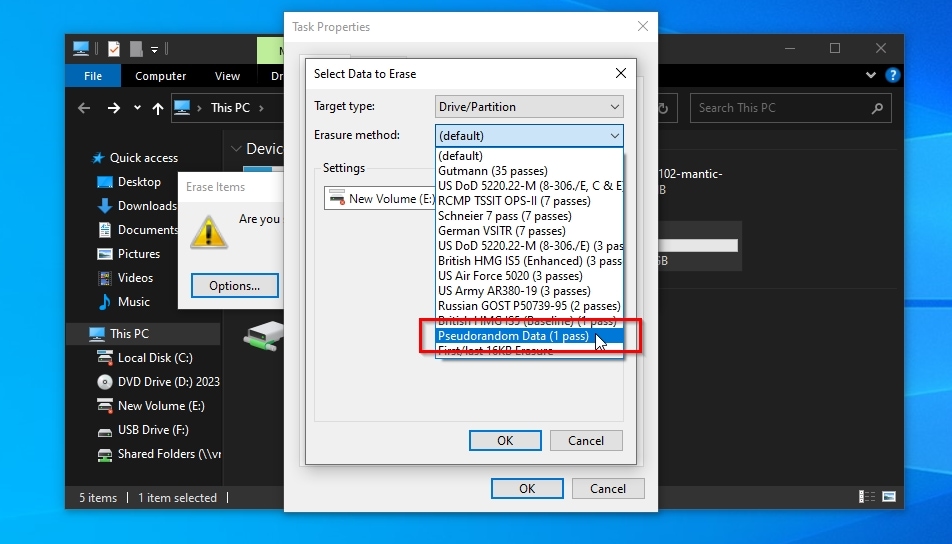
- We double-checked that we had selected the correct device for erasure to ensure no valuable data would be destroyed.
- After confirming the above changes, we finally clicked Yes, back on the initial dialog, to initiate the actual shredding process.

- Eraser was relatively quick, but its Status reported errors for each step of the process. Despite this, we didn’t see any data left on our devices.
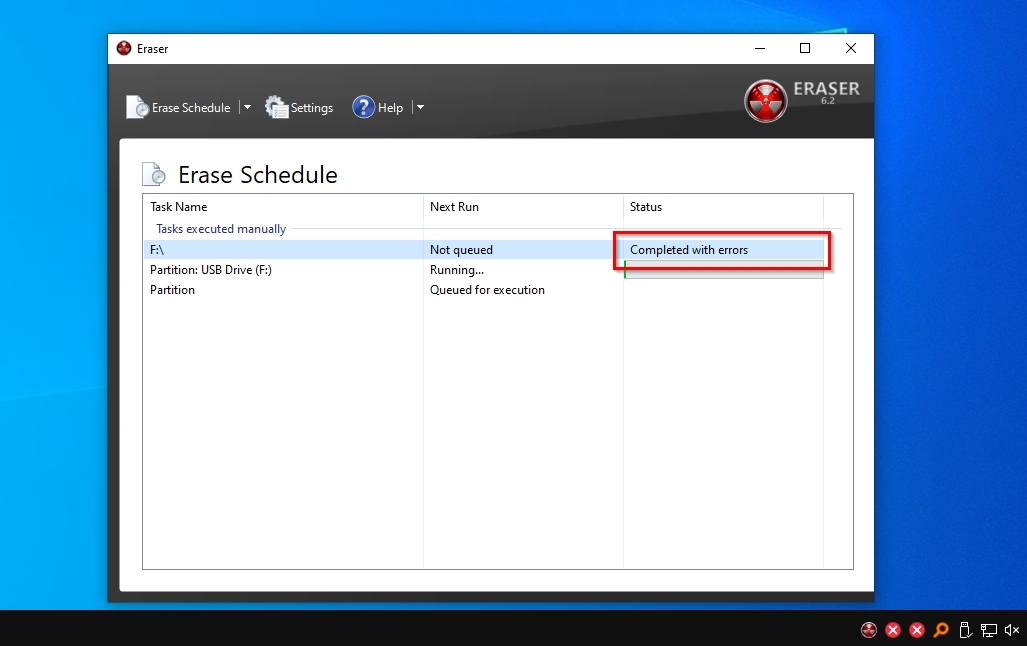
It was time to see if data recovery apps would agree with our assessment.
Recovering With Recuva
Recuva might be popular, but it’s generally not considered the most thorough or performant data recovery solution. Would it restore our files?
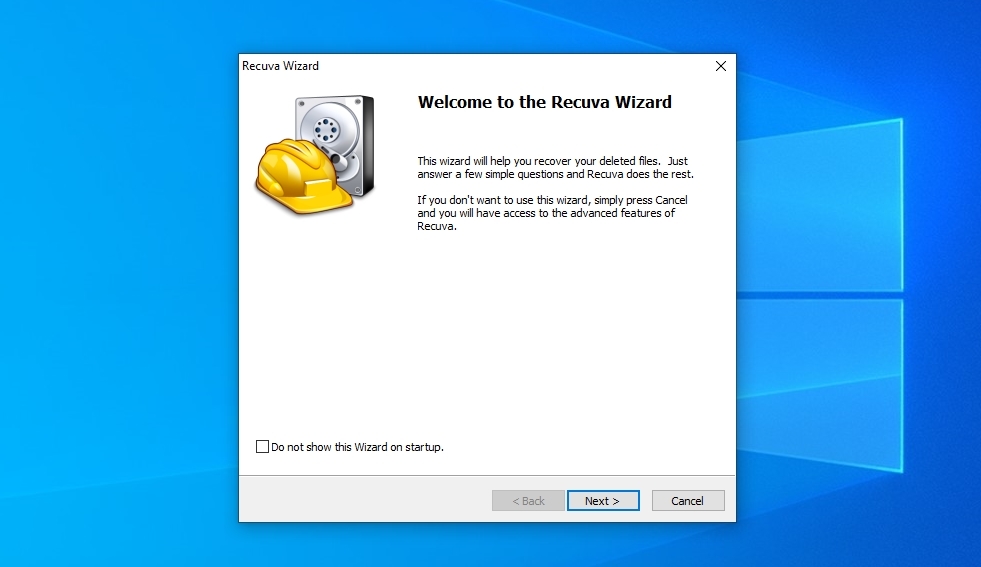
- We downloaded Recuva from its official site, installed it, and ran it.
- The app initially presents its wizard, so we tried that simple approach first.
- Since our data pile contained many types of files, we “told” the app to search for All Files.
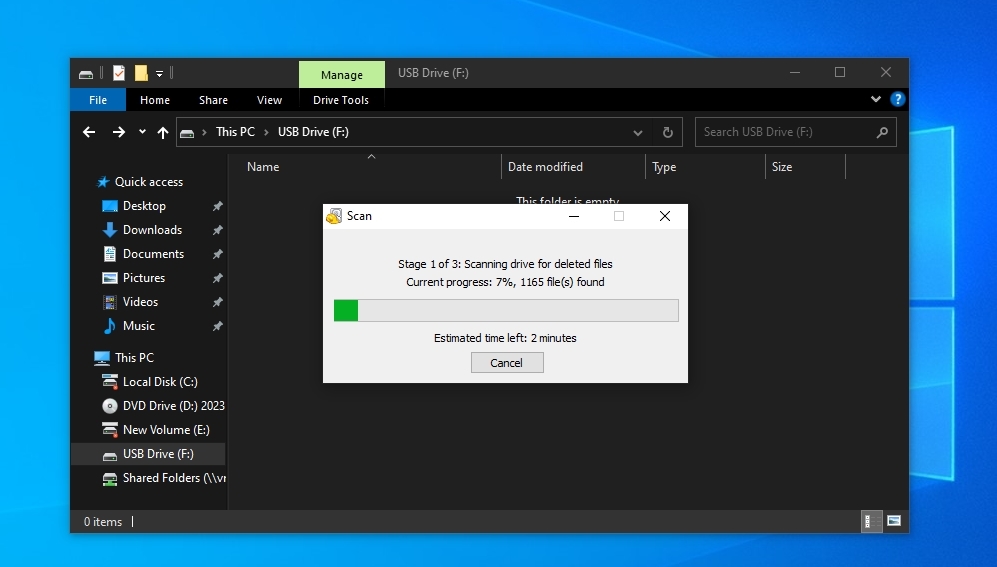
- Scanning our PC’s multi-terabyte storage devices would take a long time. So, we tried selecting In a specific location and choosing our shredded USB flash drive and SD card.
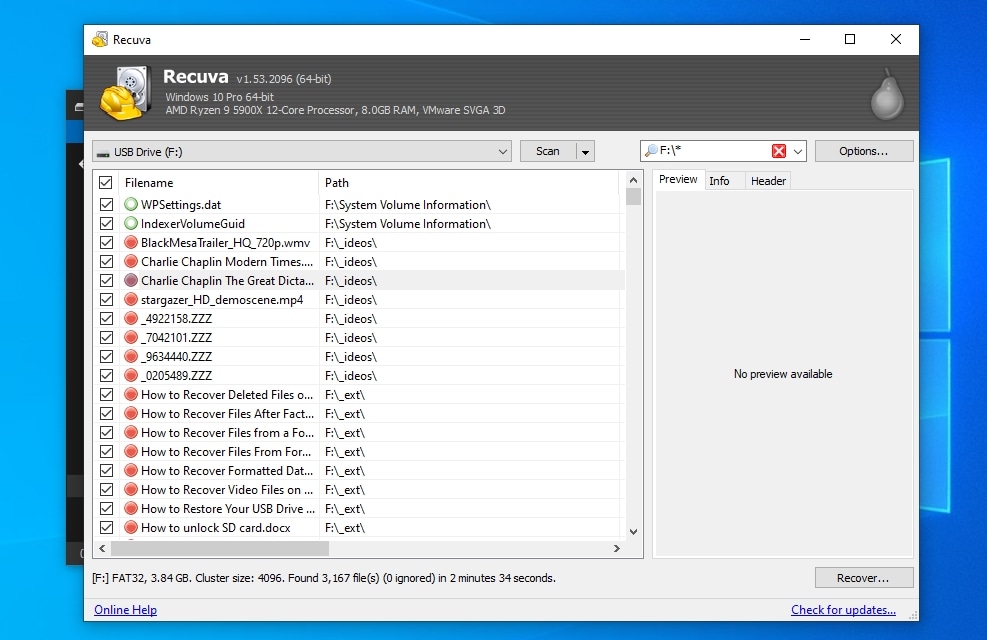
That’s where our adventure was cut short: Eraser had completely shredded all storage, leaving no file system behind. And Recuva does not work on unformatted devices.
Thus, we can mark this attempt as a total failure.
We should note that Recuva’s non-wizard mode works in the same way: no file system? No recovery possible.
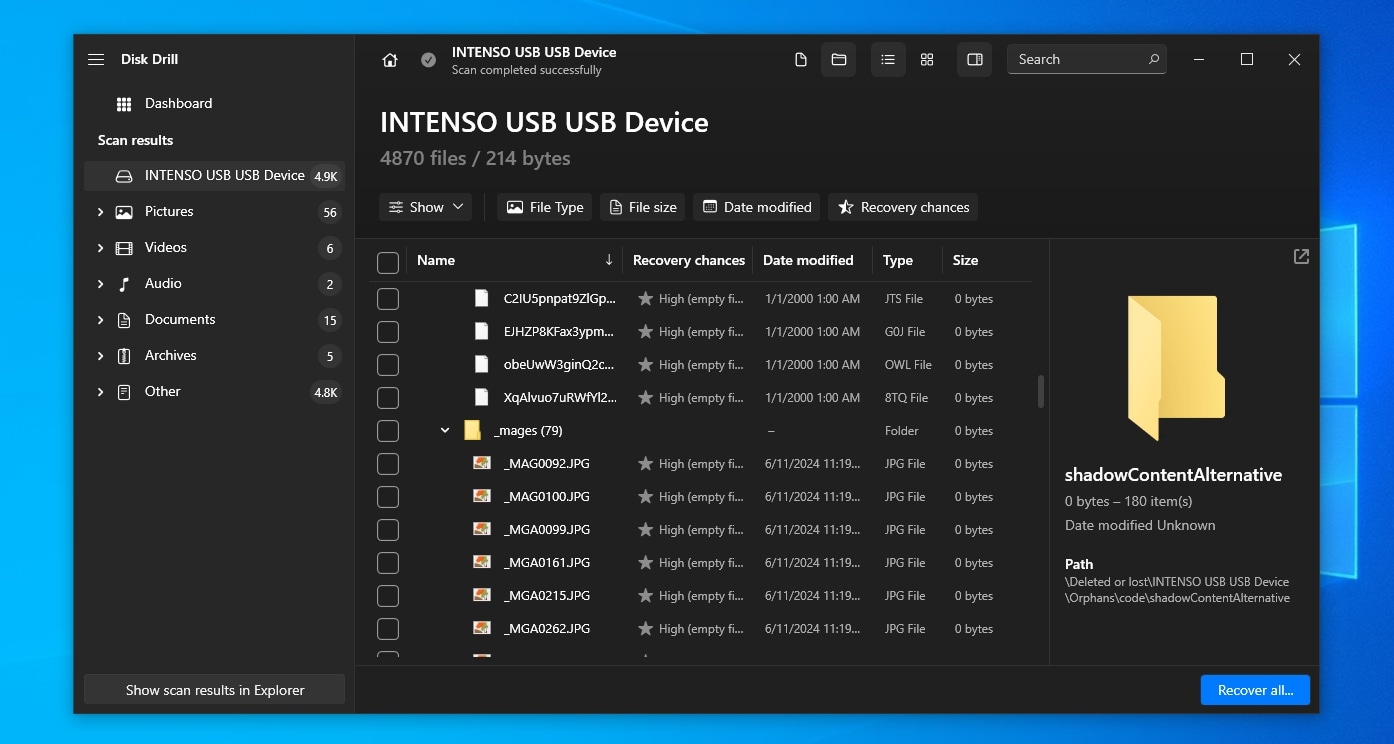
Recovering With Disk Drill
Unlike Recuva, Disk Drill is not a basic entry-level data recovery solution. But could it help recover files eradicated by a file shredder?
- We downloaded the app from Disk Drill’s official site, installed it, and ran it.
- Disk Drill can work with almost any type of device, the most popular file systems, and even devices that appear RAW, as long as the OS detects them. So, unlike Recuva, it allowed us to select and scan our shredded USB flash drive and SD card despite their lack of a file system.
- Disk Drill’s scan was quite zippy, but the results were unexpected.
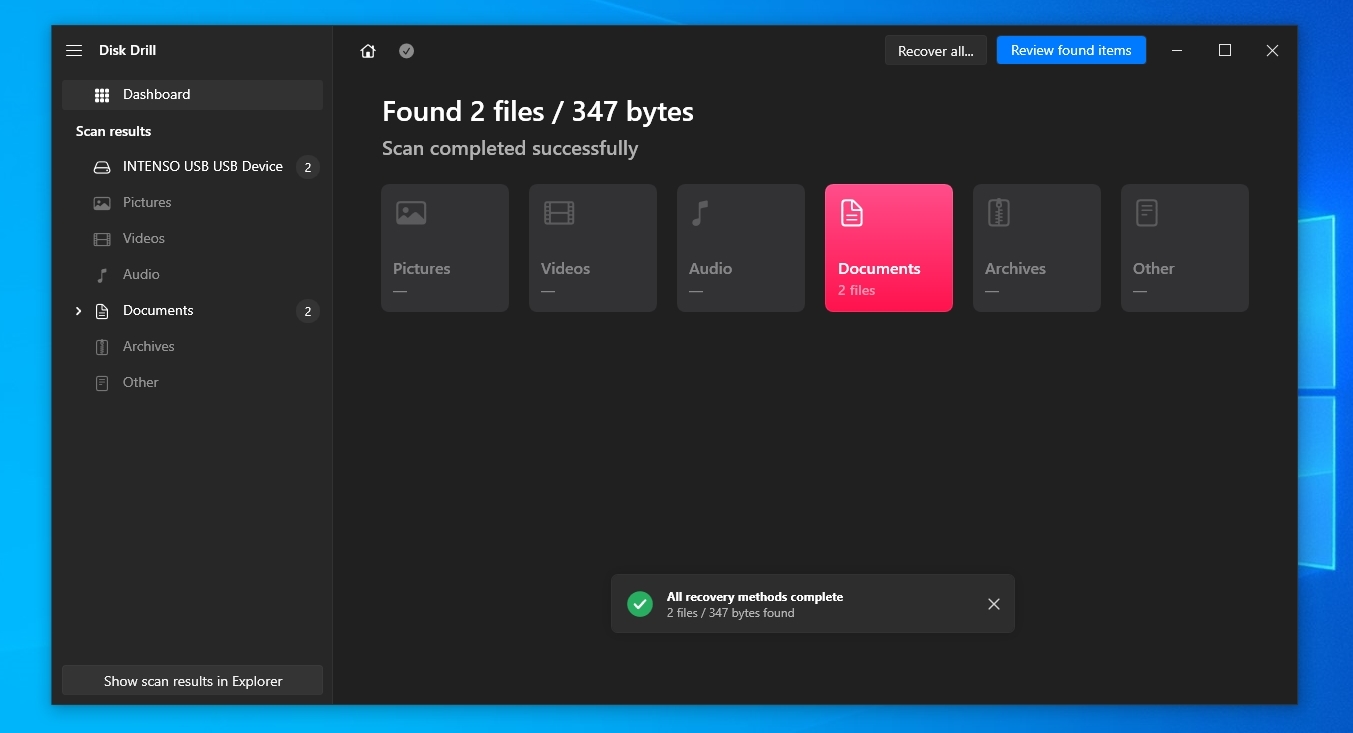
- Unlike Recuva, Disk Drill managed to find… something. The problem is that this “something” was only two files, only a few bytes long, that weren’t among the useful ones we’d included in our data pile.
Thus, the result was practically the same as Recuva: all files had been shredded beyond recovery.
Recovering With R-Studio
R-Studio is considered a pro-level solution, so we expected it to perform better than the other apps. But did it?
- We downloaded R-Studio from its official site, installed it, and ran it. The app informed us it was a demo version, which means it’s not very useful for demanding recovery tasks. Still, it should be sufficient for a test run to “evaluate its capabilities”, which is precisely what we want for this article.
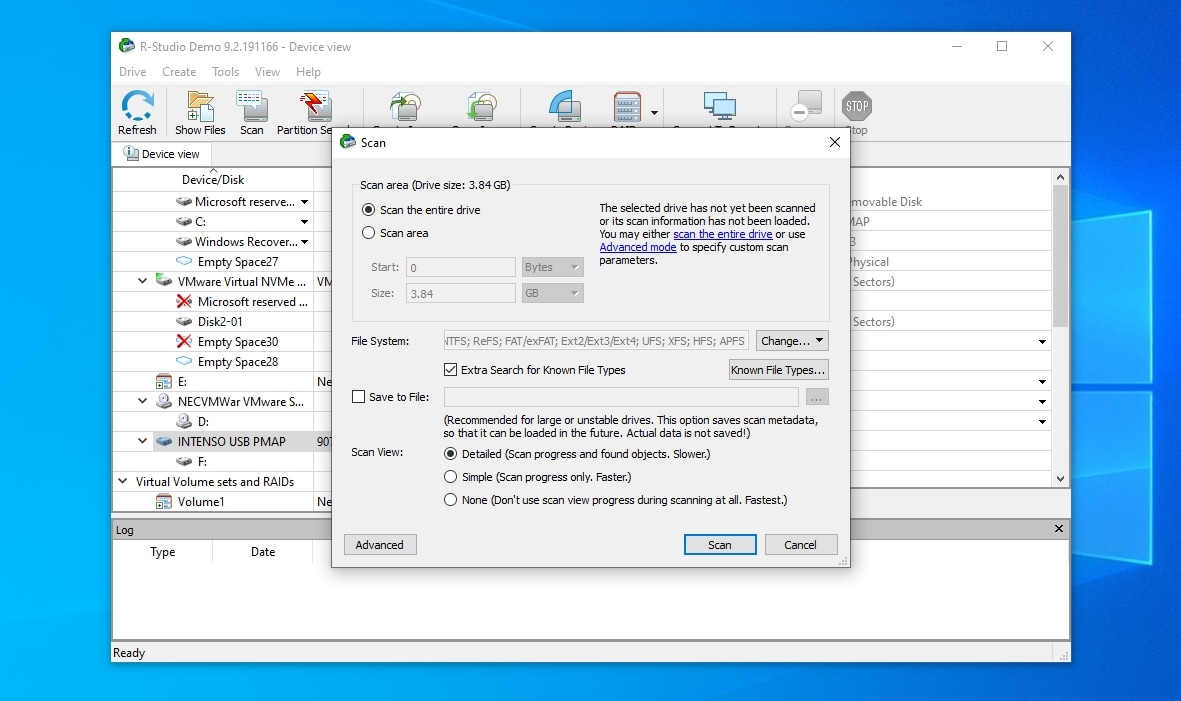
- Like Disk Drill, R-Studio can work even with devices that don’t have a file system, so it allowed us to select our completely shredded USB flash drive and SD card.
- We went directly for the more thorough Scan the entire drive option and left Extra Search for Known File Types enabled to maximize the chances R-Studio would locate as much data as possible.
Unfortunately, the results were the same as with the other apps: at least Disk Drill found… “something”, whereas R-Studio, like Recuva, came up completely empty-handed.
Test Scenario #2: Can You Get Back Data Destroyed With The Free File Shredder App?
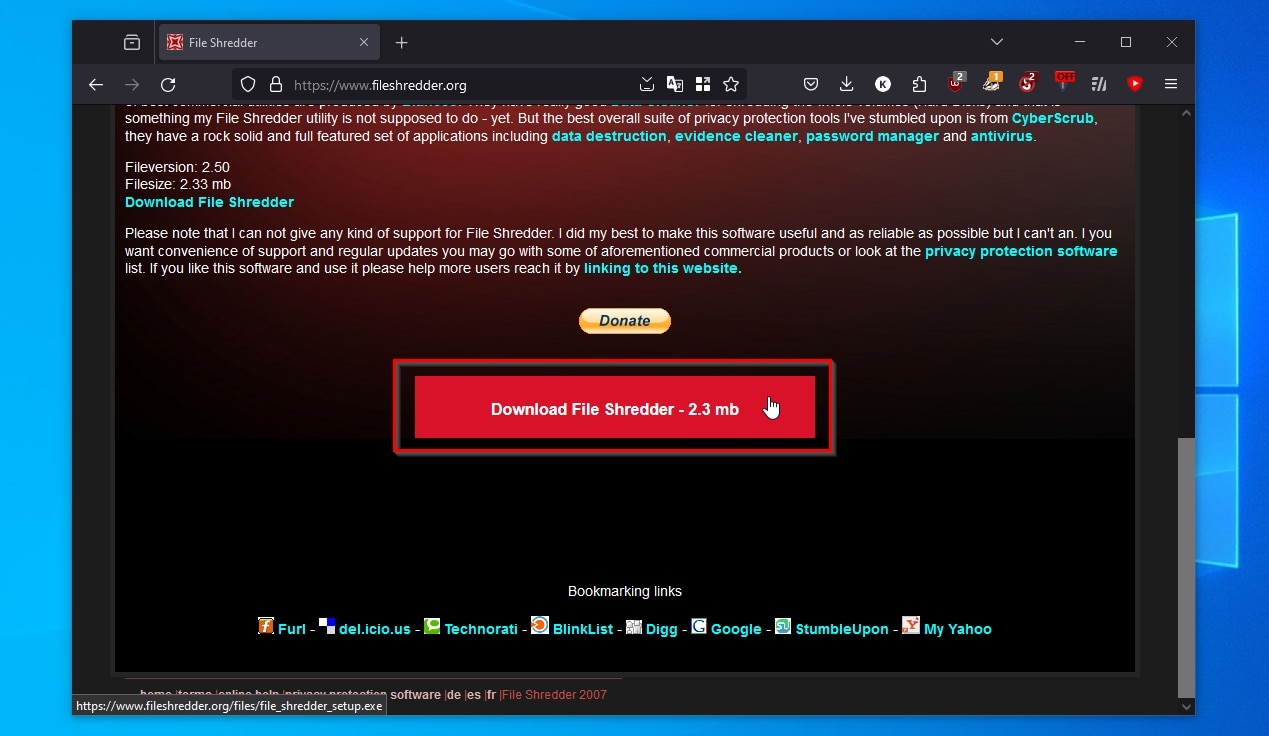
We don’t know if File Shredder is as popular as Eraser. Still, since it was one of the top suggestions from the most widely used search engine when searching for “file shredder”, we decided to try it.
- We downloaded the app from File Shredder’s official site, installed it, and ran it.
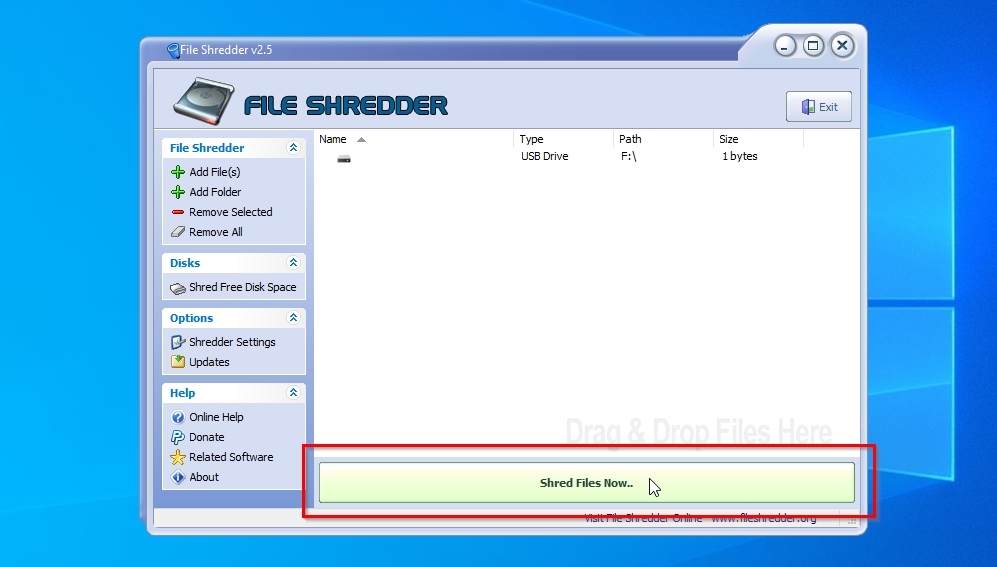
- Its interface felt friendly and familiar in a “we still love Windows XP” way. We clicked Add Folder and selected our storage device.
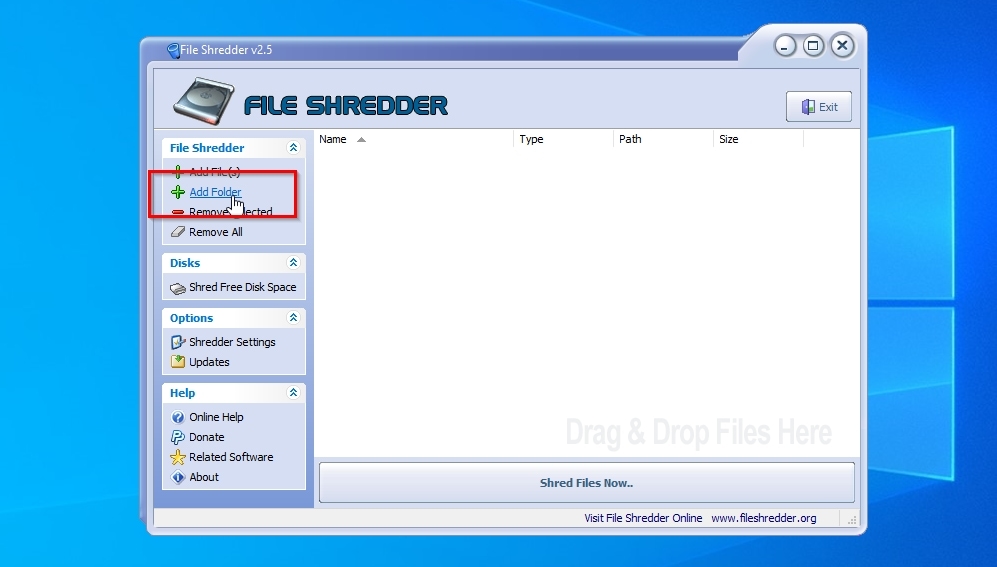
- We clicked Shred Files Now and confirmed that we wanted to shred them, but nothing happened. We tried again. Same result.
- Like Eraser, File Shredder is accessible from the right-click menu, so we tried that path. We selected all files and folders we wanted to shred from a Windows File Explorer window, right-clicked on them, and chose File Shredder > Secure delete files.
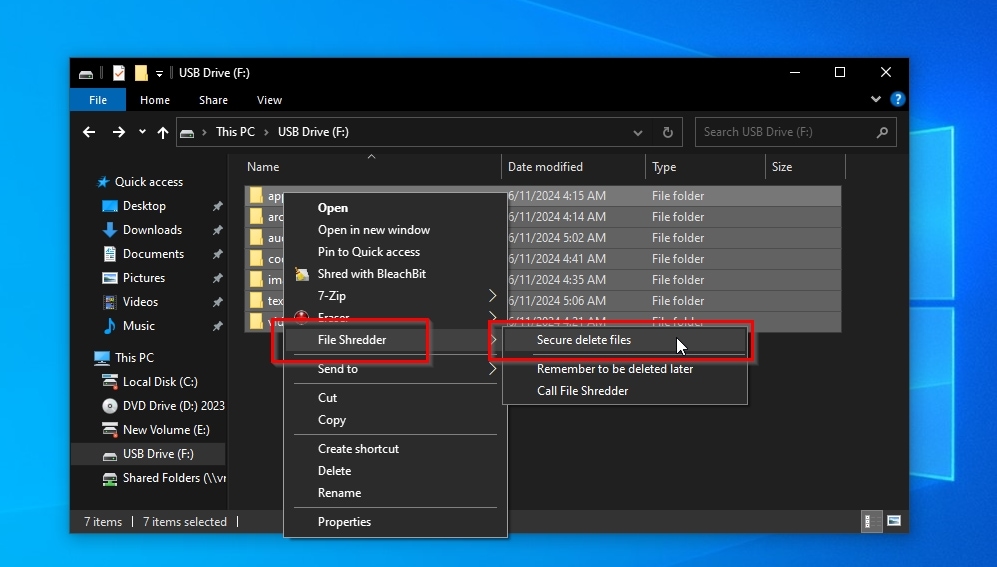
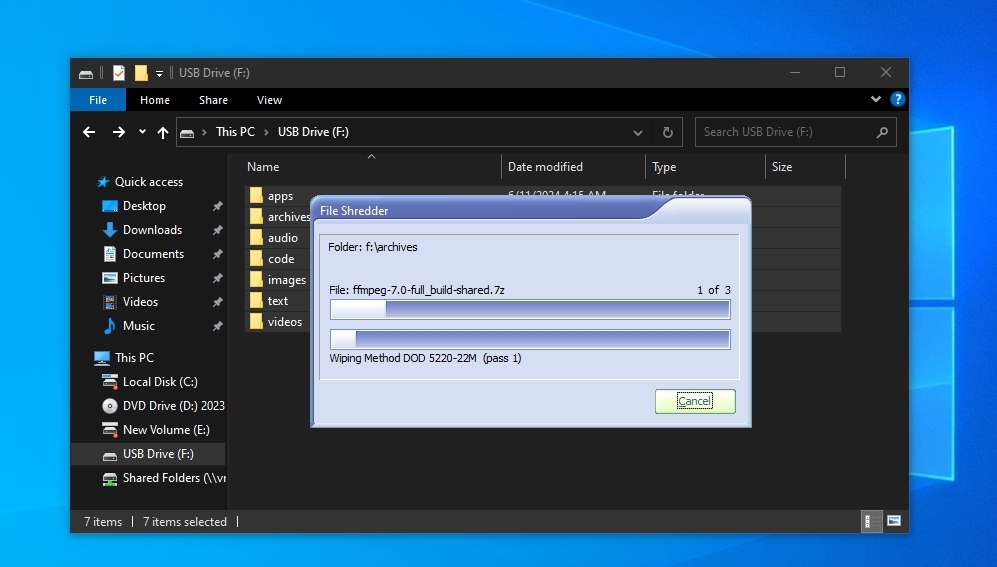
- We answered once more that, yes, we wanted to eliminate all selected data, and that was it. We weren’t given any choice to customize the process. File Shredder immediately started going through the list with what we guess is its default Wiping Method, DOD 5220-22M, as stated on its progress window.
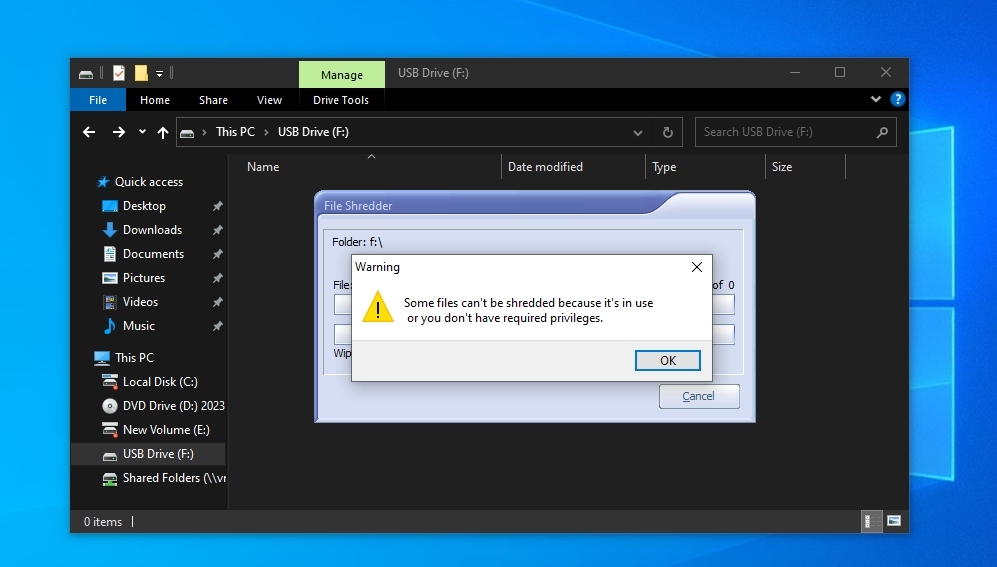
- Sometime later, the app informed us that “some files can’t be shredded because it’s in use or you don’t have required privileges” (sic). It likely teased us, for no files or folders were in sight. Mission accomplished.
Recovering With Recuva
Unlike Eraser, File Shredder left the file system on our devices intact, allowing us to unleash Recuva on them.
- We went through the same steps as before. After selecting our devices, we left Enable Deep Scan checked, hoping it would help locate as many files as possible.
- Indeed, Recuva located thousands of files. Theoretically.
- Practically, it returned no results.
- We moved from its wizard to Recuva’s full interface, accessed the app’s Options, and enabled all extra settings on the Actions tab.
- We scanned our devices again. This time, Recuva decided to display the “thousands of files” it had found the previous time.
- However, we guess the key setting that made the difference was Show zero byte files, for they were all zero-sized and, thus, unrecoverable and useless.
Still, it’s worth noting that if some files’ names are also considered “sensitive data”, File Shredder didn’t eliminate all of them, and Recuva managed to find them.
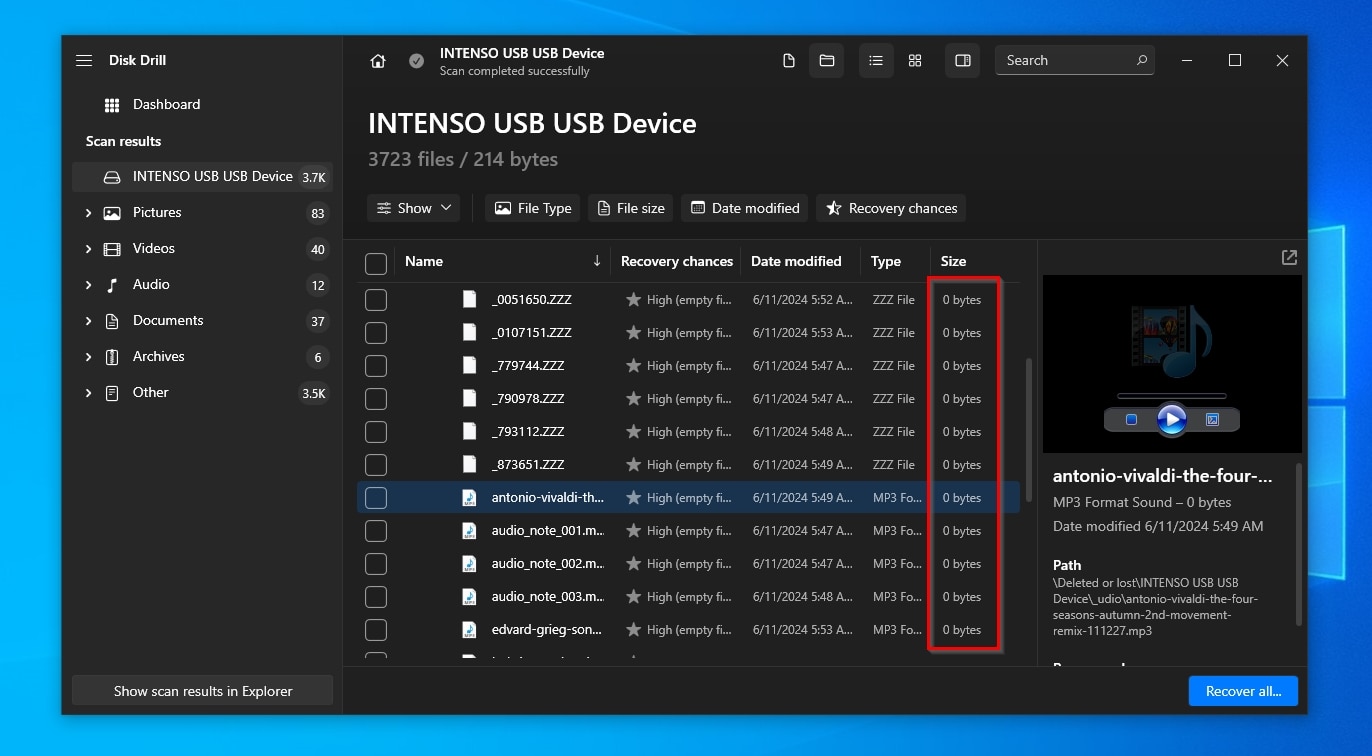
Recovering With Disk Drill
Since we already covered Disk Drill’s scanning process, we won’t go over it again. Long story short, Disk Drill managed to locate just as many files as Recuva.
Like Recuva, Disk Drill found thousands of files, but they were all zero-sized. The app could “recover them” if we wished, but it would be pointless since they’d be useless.
We should note that all files’ names were readable here, too. Even better, Disk Drill’s interface made it easier than Recuva to go through them or seek specific ones.
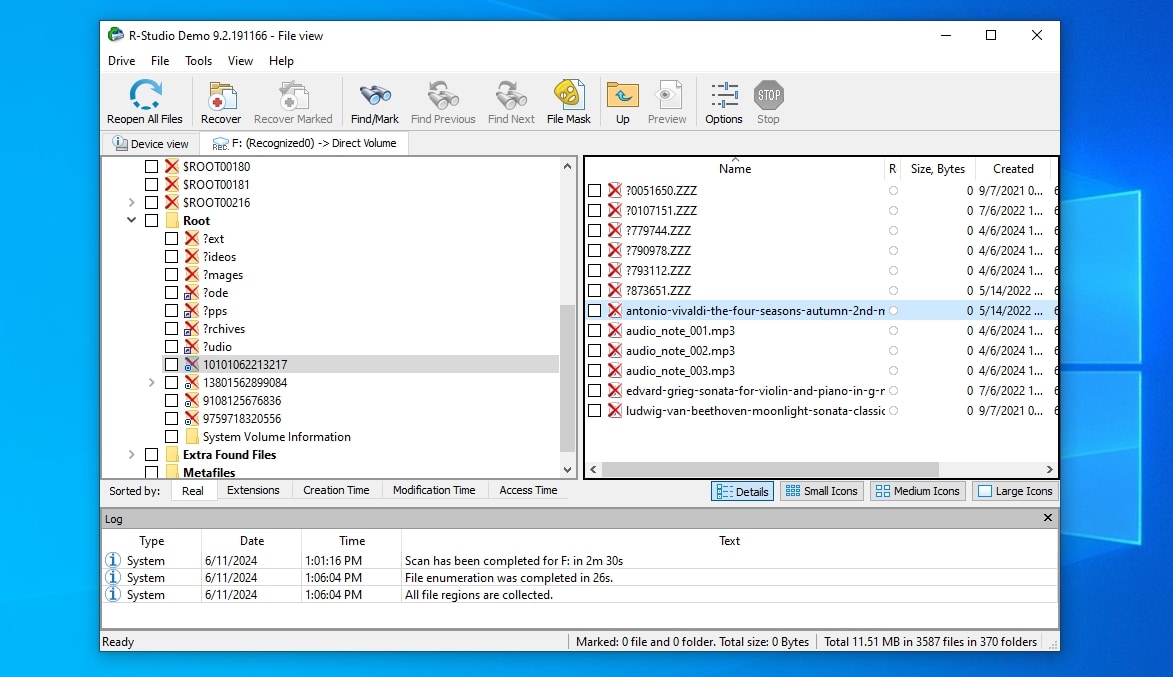
Recovering With R-Studio
As with Disk Drill, we’ll skip R-Studio’s scanning process steps since we covered them before.

The app performed as well as Recuva and Disk Drill in locating the files that File Shredder had blown to bits. But like its peers, R-Studio recognized them as zero-sized and thus couldn’t recover any useful data.
All file names were visible here, too, potentially revealing vital information or hinting at their contents. However, R-Studio’s more complicated interface made going through them a chore.
Test Scenario #3: Can You Get Back Files Sent To Oblivion With WipeFile?
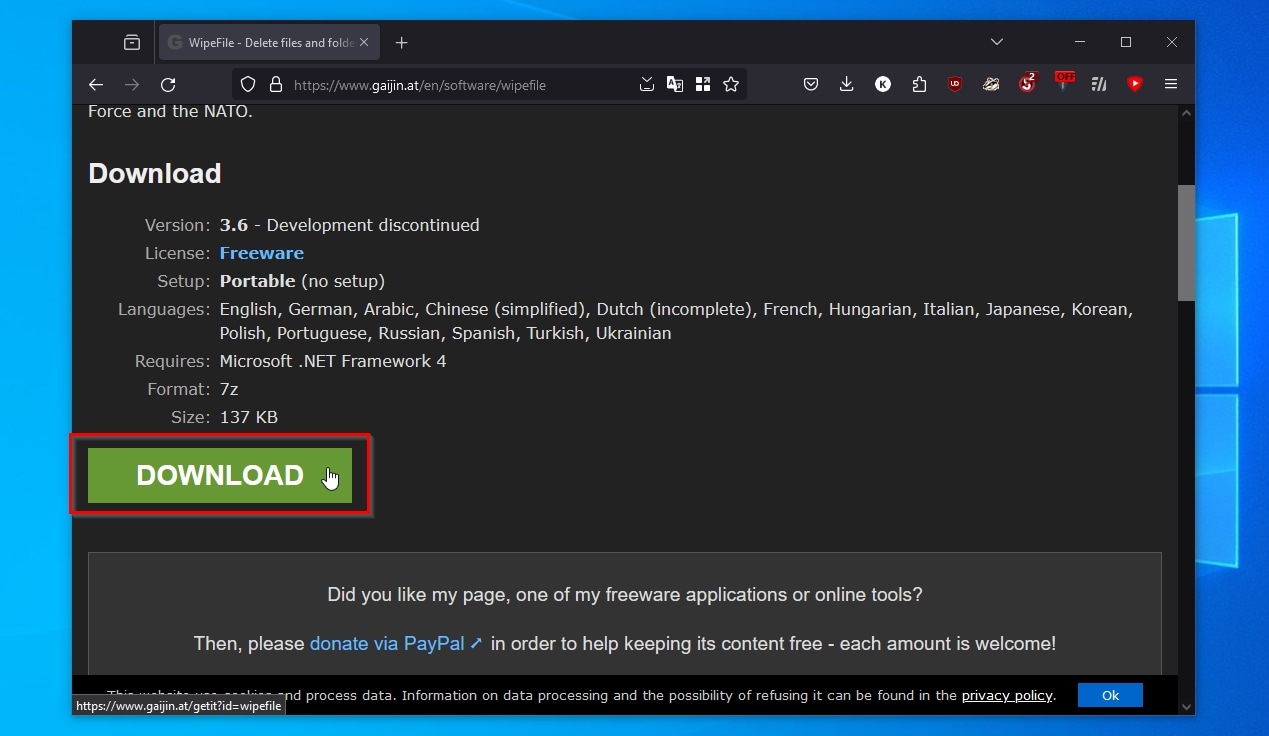
We chose WipeFile as the third (and final) file shredder for this article despite one major shortcoming: the app has been discontinued and is no longer actively updated.
Still, we went for it because we consider its pros outweigh that little issue:
- It’s small and portable, which means you don’t have to install it to use it.
- It supports 14 different wipe methods, including ultra-secure approaches and standards defined by the US Navy, US Air Force, and NATO.
- Plus, like many other similar solutions, it’s free.
Would it render the files in our data pile unrecoverable, too, and would their names still be visible, like with File Shredder?
- We downloaded the app’s archive from this website. We extracted its contents to a folder, ran the app, and chose to use it in portable mode.
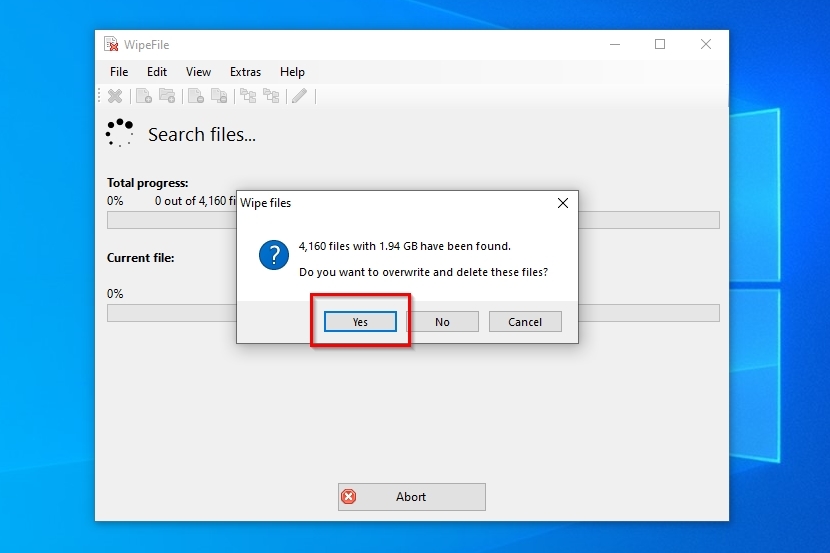
- We clicked on Add Folders and selected the device we wanted to shred. We left the Wipe method at the default WipeFile – Simple (1x) value.

- With a click on Wipe, WipeFile analyzed our device, found thousands of files, and asked us if we wanted to overwrite and delete them. We answered positively and waited.
When the process completed, no files could be seen on our device. Were they really gone and unrecoverable, though?
Recovering With Recuva
As before, we fired up Recuva, and since WipeFile hadn’t eliminated the devices’ file system, we could scan it without issues.
Like with the File Shredder scenario, WipeFile had ensured that Recuva couldn’t recover our files’ contents. Recuva’s wizard returned no results, and only after enabling all its scanning options and running a second manual scan did it locate zero-sized versions of all of them.
Unlike with File Shredder, though, we could see fewer non-garbled filenames.
Recovering With Disk Drill
Like Recuva, Disk Drill managed to unearth zero-sized versions of all the files WipeFile had wiped out, which practically means they were useless.
Still, although WipeFile garbled the names of most files, Disk Drill’s interface, thanks to its advanced categories and filters, made it easier to locate the ones that had slipped through the cracks.
If the files’ names also contained critical information, Disk Drill proved to be the app that could find them the most effortlessly.
Recovering With R-Studio
We’re unavoidably repeating ourselves: just like when we tested it with File Shredder, and as Disk Drill before it, R-Studio located all the files shredded by WipeFile, but with a size of zero and garbled names for most of them.
Since no app recovered the files’ contents, one could say “they all failed”.
Nevertheless, among them, Disk Drill takes the cake, as it at least presented the results clearly and assisted in locating and making sense of intact file names.
Does a Full Format Erase Files As Thoroughly As File Shredding?
Many people believe that file shredders are more or less useless since a full format can also completely erase all data on a storage device.
After testing the shredders in this article, we conducted a final test by re-flashing our data pile backup image on each storage device. Then, we performed a full format using Windows 11’s default solution:
- We right-clicked on the device in Windows File Manager and selected Format.
- We disabled Quick Format from the Format device window. We left all other options at their defaults.
- This meant a FAT32 file system and 4096-byte allocation size for our devices.

After the process completed, we tried to recover our full-formatted files using all three recovery solutions mentioned in our article: Recuva, Disk Drill, and R-Studio.
The results were all but identical to those of using a shredder. In fact, they were even better than those of two of the shredders we tested since no file names were found.
However, that only tells part of the story.
Recovery Black Ops
For this article, we used widely available hardware and software and couldn’t recover any data after shredding files or performing a full format.
Still, as proven by Michael Wei, Laura M. Grupp, Frederic E. Spada, and Steven Wilson, in their paper “Reliably Erasing Data From Flash-Based Solid State Drives“, it’s possible to recover data from flash chip storage using specialized (but affordable) custom hardware.
Additionally, in his old but classic Secure Deletion of Data from Magnetic and Solid-State Memory paper, Peter Gutmann suggested it was possible to get back erased data from HDDs, due to their “magnetic” nature, by using Magnetic Force Microscopy (MFM) to detect file remnants on the disk’s platters.
And yet, to our knowledge, this remains theoretical and has never been tested and proven true.
In his newer paper, Data Remanence in Semiconductor Devices, Peter Gutmann presents alternative ways to achieve similar results on newer flash-based storage solutions.
It’s important to note that even if what Mr. Guttman claims is possible, it still requires specialized equipment, extensive knowledge of how a particular piece of storage technology works, and an extended amount of time for analyzing it.
In other words, even if someone could recover your securely erased files, the required time, cost, and knowledge would be so prohibitive that they’d have to work for a government security agency to do so.
Thus, it’s probably safe to say that most people shouldn’t worry about it.
Better Safe Than Sorry
As this article showed, it’s practically impossible for the average user to recover securely shredded files using widely available data recovery apps.
Even a “simple” full format can safely remove all files from a modern flash-based storage device beyond any chance of (typical) recovery.
Still, for the paranoid among us, the best solution for “securely erasing every last bit of sensitive data” remains introducing a storage device to a blunt instrument, like a hammer.
And, ideally, then incinerating it, “just to be sure”.
This article was written by Odysseas Kourafalos, a Editor-in-Chief at Handy Recovery Advisor. It was also verified for technical accuracy by Andrey Vasilyev, our editorial advisor.
Curious about our content creation process? Take a look at our Editor Guidelines.