If your up‑to‑recently trustworthy NAS started acting up (or failed entirely along with your files), don’t be too quick to give up. In our simple guide, we’ll walk you through how to recover your lost data over the network (if your NAS still boots), and what to do if it doesn’t. Our team has handled NAS drive data recovery across all kinds of setups, and while it might seem like rocket science, most cases are quite straightforward once you know what to look for.
We’ll start with a bit of NAS recovery theory to help you understand what’s going on behind the scenes. It’s useful if you’re curious why things break or want to make smarter decisions during recovery. But if you just want to get your files back ASAP, feel free to jump straight to the recovery steps.
Can You Recover Data from NAS?
NAS recovery is usually possible, but its outcome depends on both the cause of data loss and your NAS device’s setup. Depending on the case, the reason your data disappeared might play a bigger role than your NAS drive’s setup when trying to recover your files. However, you should know how your NAS drive might differ from other solutions before you attempt to get your files back.
Although the term “NAS” applies to many seemingly similar storage devices, they can be vastly different.
- Affordable entry-level devices might use a single drive, which makes them great candidates for a successful NAS data recovery.
- Other entry-level/DIY NAS drives may be set up as JBOD – “Just a Bunch of Disks”, which presents many disks of various specifications within them as a single storage device. You can often recover the contents of those disks individually.
- RAID0 NAS setups “spread” data among an even number of (ideally) identical drives to boost read and write speeds. Unfortunately, precisely because only parts of each file are stored on each drive, recovery ranges from hard to impossible. Still, if dealing with data loss on a RAID0 NAS setup, our guide on how to recover data from RAID 0 might come in handy.
- RAID1 NAS devices use half of the even number of (ideally) identical drives within them as backups of the others. A successful NAS drive recovery from such setups is typically effortless and almost guaranteed as we’ve seen before – for it’s rare for all drives to fail together.
- RAID5 setups are an ingenious mix of RAID0 and RAID1. Similarly to RAID0, they offer higher speeds than each disk in their array but also increased resiliency, like RAID1. Recovery can be successful but relies on many factors (e.g., how many drives failed, whether the rest are in perfect working condition, etc.).
- RAID6, RAID10, and more. There are more RAID setups, but they’re actually somewhat more complicated versions of the above. For example, RAID6 is an “expanded” version of RAID5, using one additional disk for storing extra data (“parity”) that makes recovery of the array possible. RAID10 combines two identical RAID1 setups “striped” as RAID0 storage, to offer both top speeds and high resiliency. Similarly, RAID50 combines RAID5 with RAID0, etc.
While most NAS devices follow the same basic principles, some models have their own quirks. If you’re working with a Buffalo LinkStation or TeraStation, or any external drive from Buffalo, we recommend checking out our separate guide on how to recover data from Buffalo’s external storage – it’ll walk you through the exact steps for those devices.
First Response Before You Attempt NAS Recovery
In our long experience working in the data recovery space, we’ve seen all kinds of things go sideways (many of them totally avoidable). People often act fast, but those knee-jerk reactions are what often end up killing their chances. If we had to boil it down to a quick list of what to do (and what not to do) before starting any NAS recovery, here’s what we’d say:
Do this:
- Power off the NAS until you’re ready for recovery (keeps the system from overwriting deleted or lost data in the background).
- If you need to remove the drives – label every drive clearly. If you mix them up, it can make recovery harder.
- Take your time and document everything you do. If you need help later, you’ll have a record of what you’ve tried.
Don’t do this:
- Don’t rebuild the RAID unless you fully understand what you’re doing.
- Don’t run file system checks or format anything.
- Don’t write anything to the drives (any write, even tiny ones, can overwrite lost files and kill your chances).
- Don’t guess RAID settings in recovery tools.
How to Recover Data from NAS Drives
Alright, let’s finally get into the practical steps.
We’re going to walk through two main NAS data recovery cases, ones we see all the time:
- A working NAS where you accidentally deleted/lost files. Here, you can recover data over the network using NAS data recovery software. This is the simpler scenario; no need to disassemble anything.
- A failed NAS where the system is no longer accessible. This one’s trickier. You’ll need to take the drives out, connect them to your PC, and recover data from there. It takes a bit more effort, but still very doable with the right tools.
Let’s start with the first scenario: how to use data recovery software for NAS file recovery over the network.
Scenario 1: Recover Files from a NAS Device Over the Network
There are plenty of NAS data recovery software tools out there (and we’ll cover a bunch of them a little later), but for the actual step-by-step walkthrough, we decided to use Disk Drill because:
- It’s both powerful and easy to use.
- It supports a vast number of NAS and RAID setups, all related file systems (from EXT2 to EXT4, BTRFS, and even RAW disks), and over 390 file types.
- It can get back data from Linux-based RAID0, RAID1, RAID5, RAID6, RAID10/1E, and JBOD, Windows-based RAID0, RAID1, RAID5, and JBOD, and Mac-based RAID0, RAID1, and JBOD.
- The latest TrueNAS versions based on Linux are supported, which helps a lot for home servers and DIY NAS boxes.
- It can scan and recover files even from corrupted RAID arrays.
- With Bonjour/mDNS and SSH support, Disk Drill can detect network devices and automatically reconstruct arrays during remote recovery sessions.
- Includes byte-to-byte backups feature tuned for unstable drives.
- A single purchase grants access to both Mac and Windows versions.
To learn more about the app, check our full Disk Drill review.
For demonstration purposes, we’re using both the Windows and macOS versions of Disk Drill. But no matter which platform you’re on, the steps in this guide apply 1:1.
Disk Drill uses standard Secure Shell (SSH) protocol to recover files directly from a NAS, which is both secure and widely supported. Most NAS systems like Synology, QNAP, and TrueNAS offer SSH access, so compatibility isn’t usually an issue. But you’ll need to enable SSH on the NAS before starting.
The basic steps to enable SSH in your NAS are:
- Run your favorite web browser on your PC, and type your NAS drive’s IP address in the browser’s address bar.
- Use your administrator login and password to log in to your NAS drive’s web interface.
- This part will be different depending on your NAS: You’ll have to visit its Control Panel, Settings, (Network & File) Services, or any similar entry from where you can customize its networking capabilities. When there, look for the settings for SSH, Terminal, Telnet, or SNMP. On a Synology NAS you’ll find them on the Terminal & SNMP page of its Control Panel.
- Locate the option Enable SSH (service) and activate it.

With SSH enabled, you can run Disk Drill and start the NAS file recovery process remotely:
- Download and install Disk Drill from its official site.
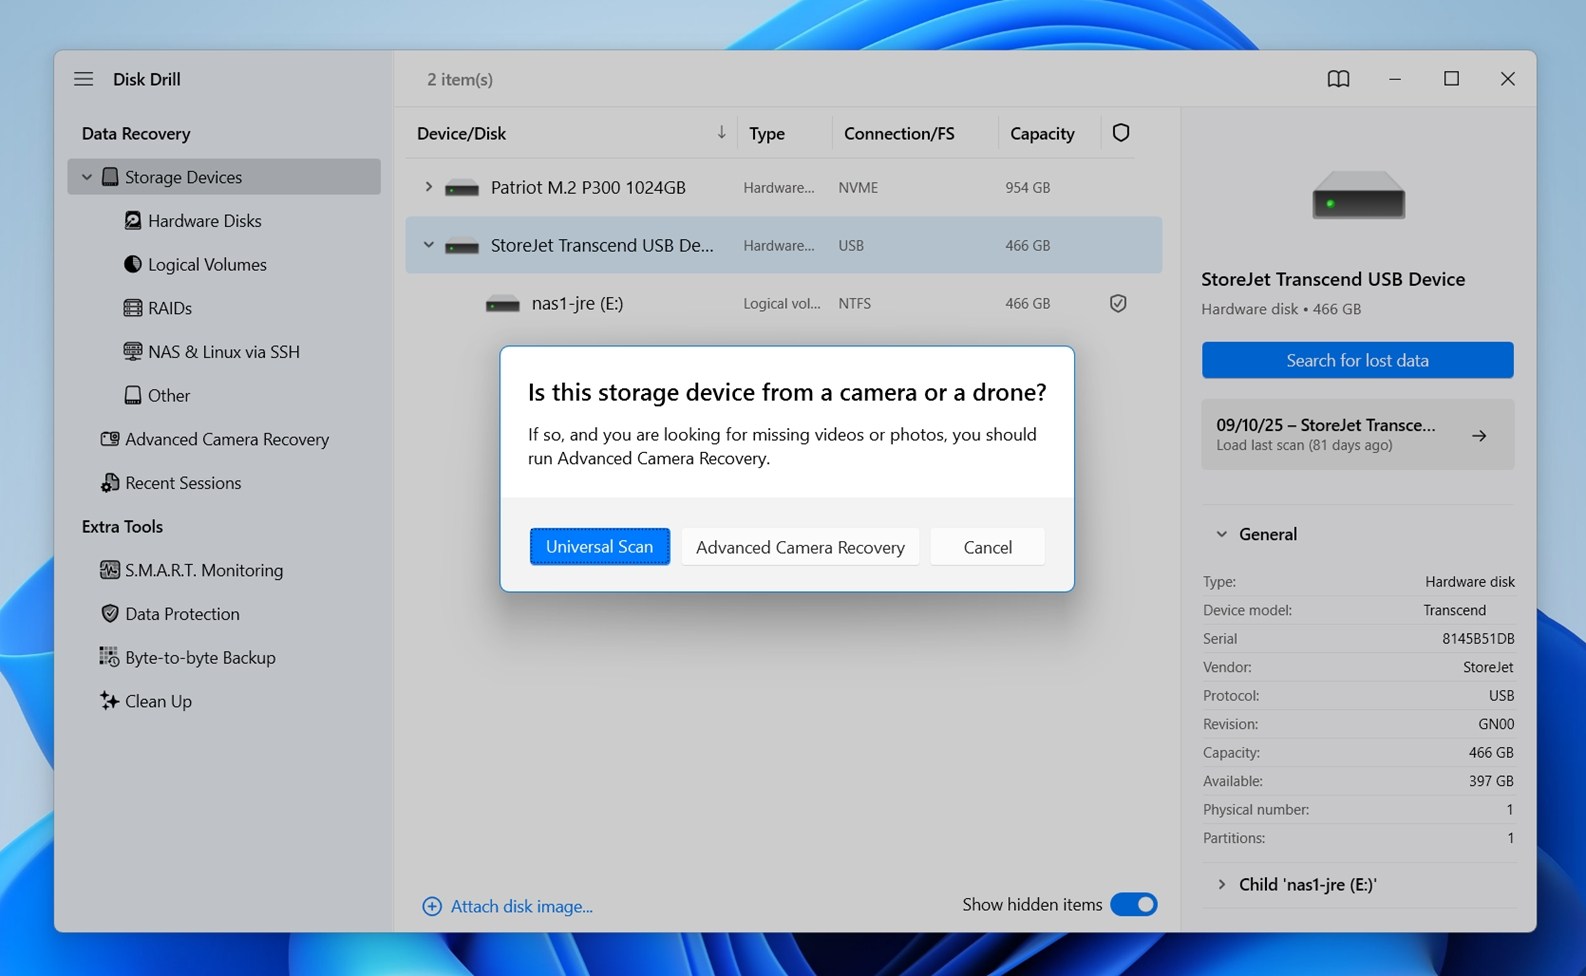
- Run the app and expand Storage Devices from the panel on the left.
- In most cases, Disk Drill will automatically detect your NAS on the network and show it in the main device list – if you see it there, simply select it and click Connect now.
- If Disk Drill doesn’t detect it automatically, choose NAS & Linux via SSH, and click Add network storage.

- Enter your NAS drive’s IP address, your login and password, and click Connect. Disk Drill should detect your NAS drive’s RAID setup and present it as a RAID volume. If not, it will show you individually your NAS drive’s disks.
- Select your NAS’s RAID volume and click Search for lost data.

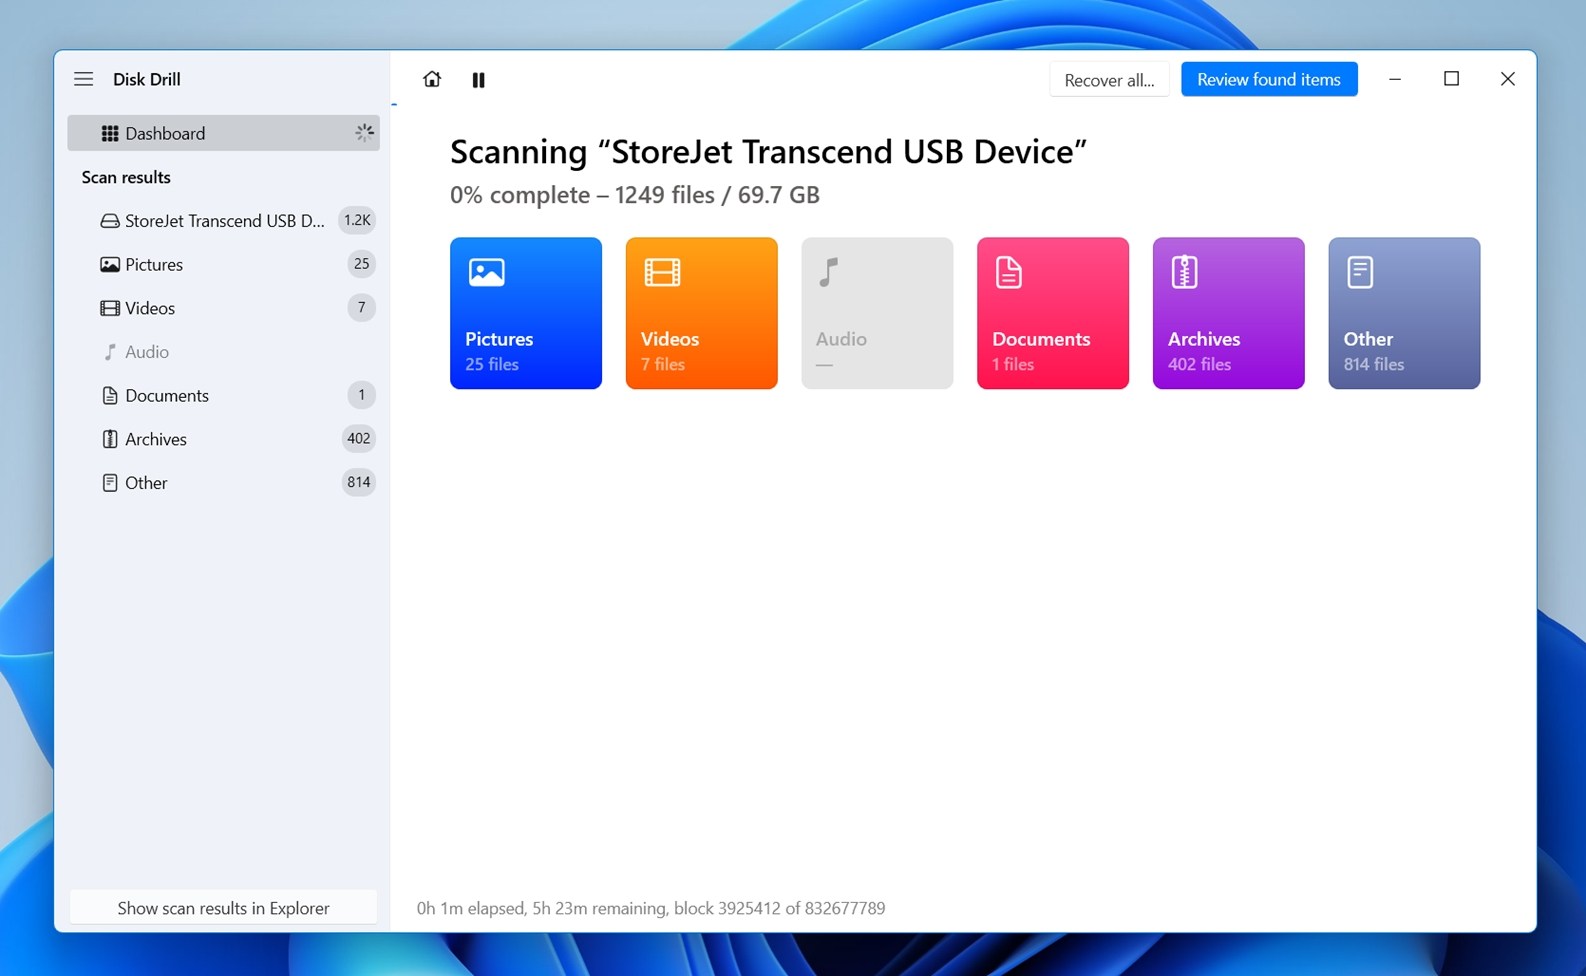
- Let Disk Drill’s scan run its course to locate as many files as possible. When it’s done, click Review found items.

- Go through the files Disk Drill found, and when you locate the ones you want to get back, mark them for recovery with a checkmark.
 👀
👀Looking for files you accidentally deleted? Check the Deleted or Lost and Reconstructed categories in Disk Drill’s scan results. These are the two most useful sections when dealing with deleted files or folders that went missing without explanation. “Deleted or Lost” shows files Disk Drill identified as removed from the file system, while “Reconstructed” lists content found via deep scan. It identifies them based on unique binary patterns (called signatures).
- If Disk Drill presents you with so many results that finding the files you require feels like searching for a needle in a haystack, use the app’s Categories (on the left) and Filters (above the results) to narrow them down based on values like their type, size, latest modification date, etc. 👀
Always check the preview. It’s usually the quickest way to tell what a file actually is, especially when the names are of no help. More importantly, if you can preview a file, that means it’s 100% recoverable. If it opens in the preview window, you’re good to go.
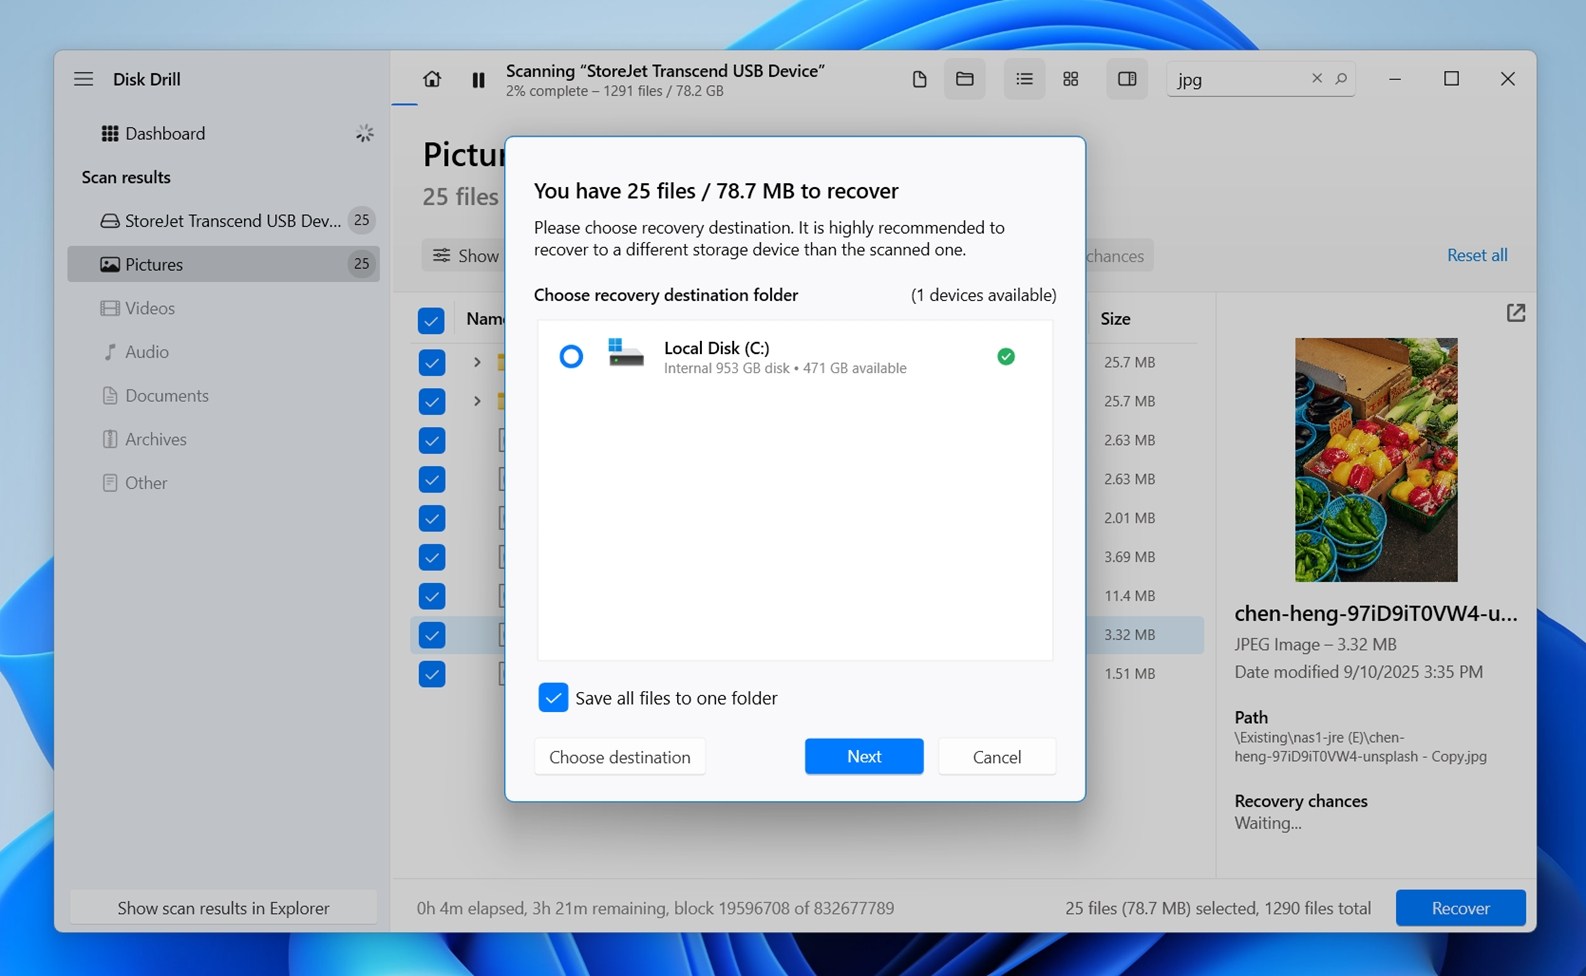
- When done, click Recover.
- Choose the destination where you want to store the files Disk Drill recovers and click Next.

- After a short wait, you’ll find the files Disk Drill recovered in the destination folder you selected in the previous step.
If you’re working with RAID drives outside of a NAS setup on Mac, we’ve also got a dedicated guide on RAID data recovery that walks you through the process step by step.
Scenario 2: Recover Data from a Failed NAS
Now this case is a bit trickier. You can’t just connect over the network via SSH. If the NAS isn’t booting or the interface is dead, you’ll need to physically remove the drives from the NAS and hook them up directly to your PC. That means using SATA ports if you’re working inside a desktop, or a USB-to-SATA adapter if you’re on a laptop. This method bypasses the NAS hardware completely, which is what you want if the RAID controller failed, the firmware’s corrupted, or the unit won’t even power on.
Once you’ve got the drives connected, you’ve got two ways forward, depending on the condition of the disks.
Option A: Your NAS Drives Are Intact (No Data Loss)
Sometimes your NAS fails, but the drives themselves are fine.
In this case, you might be able to read the file system directly. Most NAS units use EXT4, BTRFS, or XFS (Linux file systems that Windows and macOS can’t read natively). But you can still mount them with the help of third-party tools. For this demo, we’ll use DiskInternals Linux Reader. It’s free, easy, and works well.
Here’s how to do it:
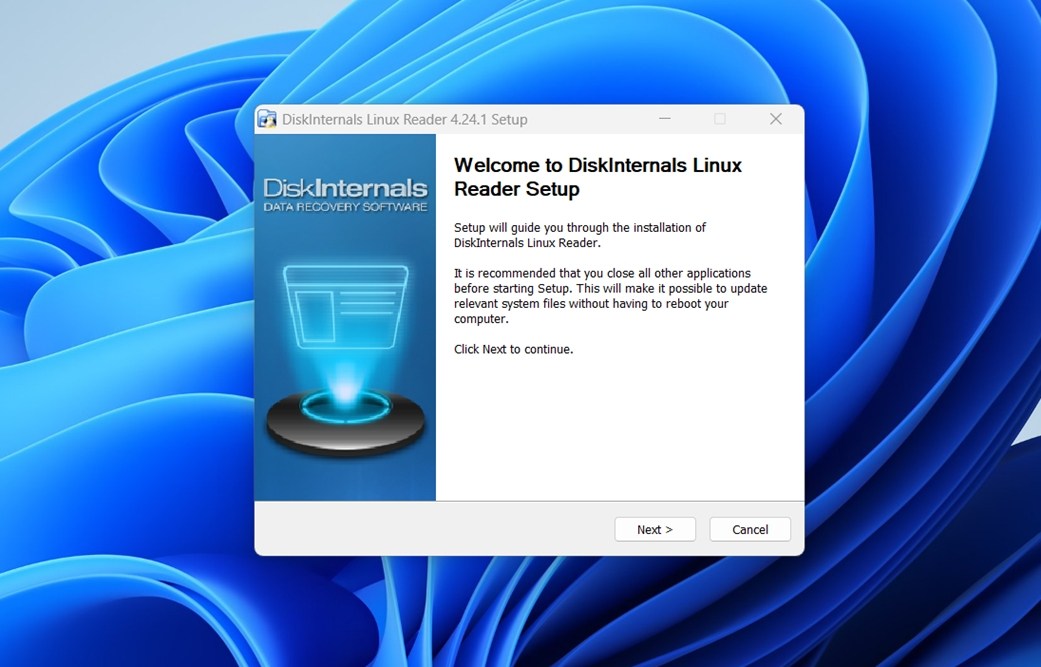
- Download and install DiskInternals Linux Reader from their official site.
- Connect the NAS drive to your PC using a SATA port or a USB-to-SATA adapter.
- Launch Linux Reader and wait a few seconds (it should auto-detect the Linux partitions on the drive).

- Browse the partition to find your files. It works like a file explorer.
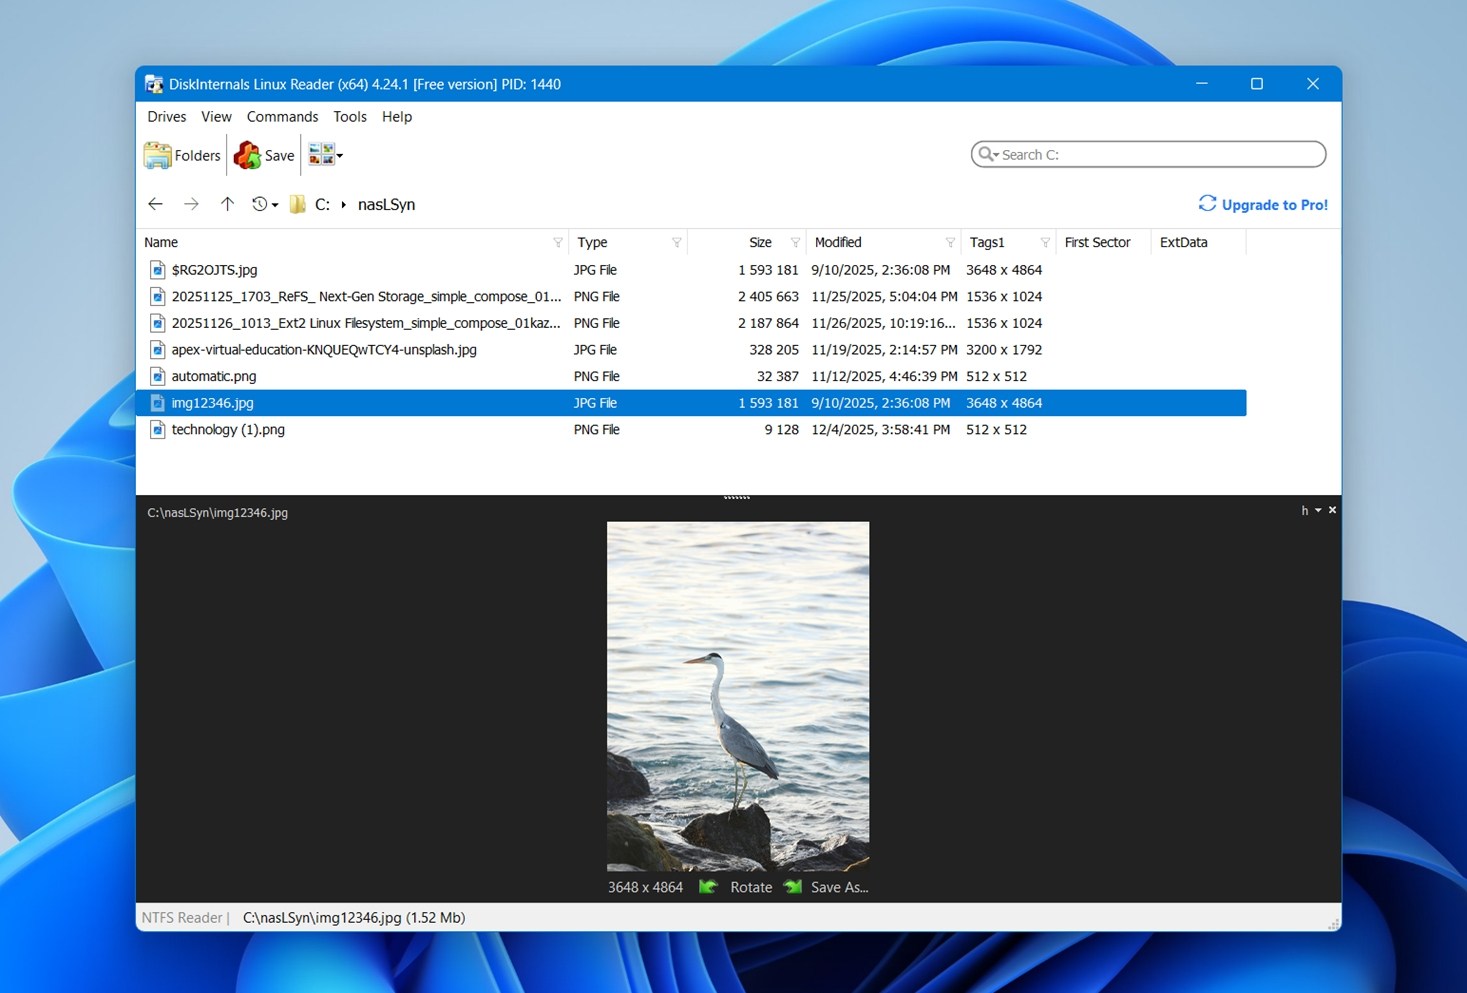
- Select what you want and click “Save” to export the files to a local folder on your PC.

That’s it. You won’t be able to modify anything on the original NAS drive (Linux Reader is read-only), but for safe recovery, that’s a good thing.
If you can’t find the files you’re looking for, the NAS volume doesn’t mount properly, or you see error messages instead of folders, in that case, you’ll need actual NAS data recovery software.
Option B: Your NAS Drive Has Lost Data (or Is Inaccessible)
You can perform data recovery on them using one of the best RAID data recovery software as if they were a local storage setup from the get-go. For this example, we’ll use Disk Drill again – it works seamlessly for both remote NAS recovery and direct recovery from detached drives.
Were you using Windows’ software RAID on your NAS drive or an older Windows PC as a NAS server? Then, you were probably using Windows Storage Spaces. In that case, check our guide on Storage Spaces recovery.
Here’s how to perform data recovery on NAS disks when accessing them directly on your PC:
- With your NAS drive turned off, unmount its disks and connect them to your PC. If your PC doesn’t have enough storage slots available, you can use an external disk enclosure for that.
- Download the app from its official site. Then, install and run it. ⚠️
Be careful where you install your recovery software. If you connected a NAS drive (or one of its disks) to your PC for recovery, don’t install the recovery app onto that same drive. It writes new data, which could overwrite the very files you’re trying to get back.
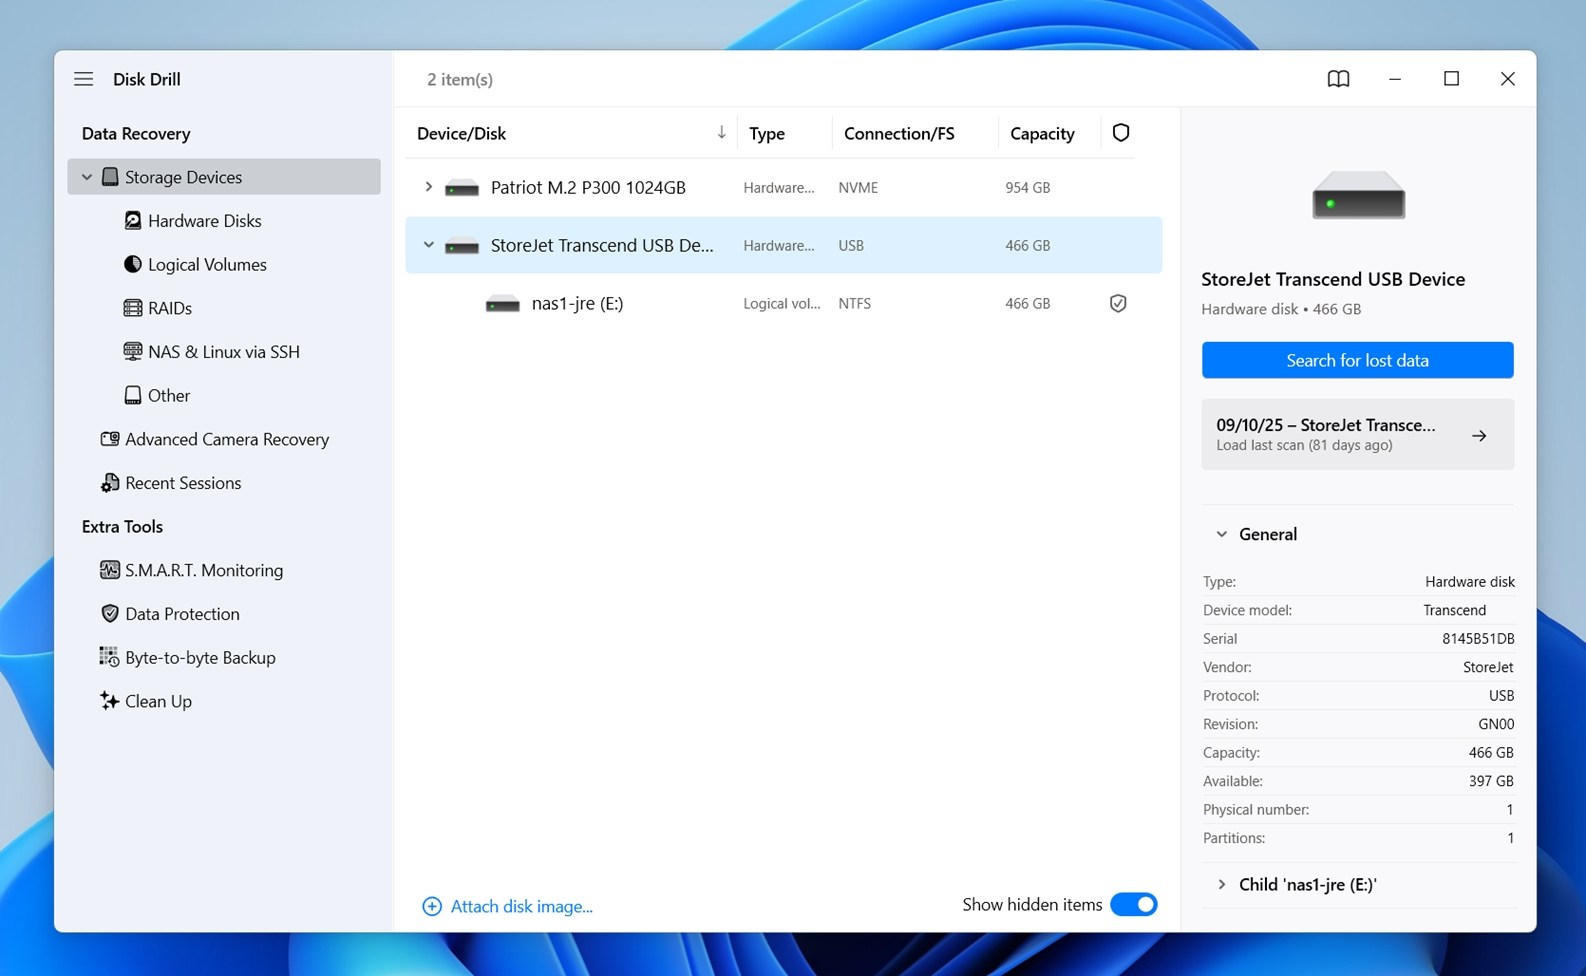
- With all your NAS drive’s disks connected to your PC, Disk Drill will automatically build a RAID array from them. Select this array and then click Search for lost data.
- Disk Drill will then ask you to choose a scan mode. Select – Universal Scan.
- It’s best to allow Disk Drill’s scan to complete to maximize the chances the app locates as many files as possible. When the scan completes, click Review found items.
- Go through Disk Drill’s scan results and check the previews and file names to spot what you’re looking for. If a file looks good, place a checkmark next to it, that’s how you mark it for recovery.
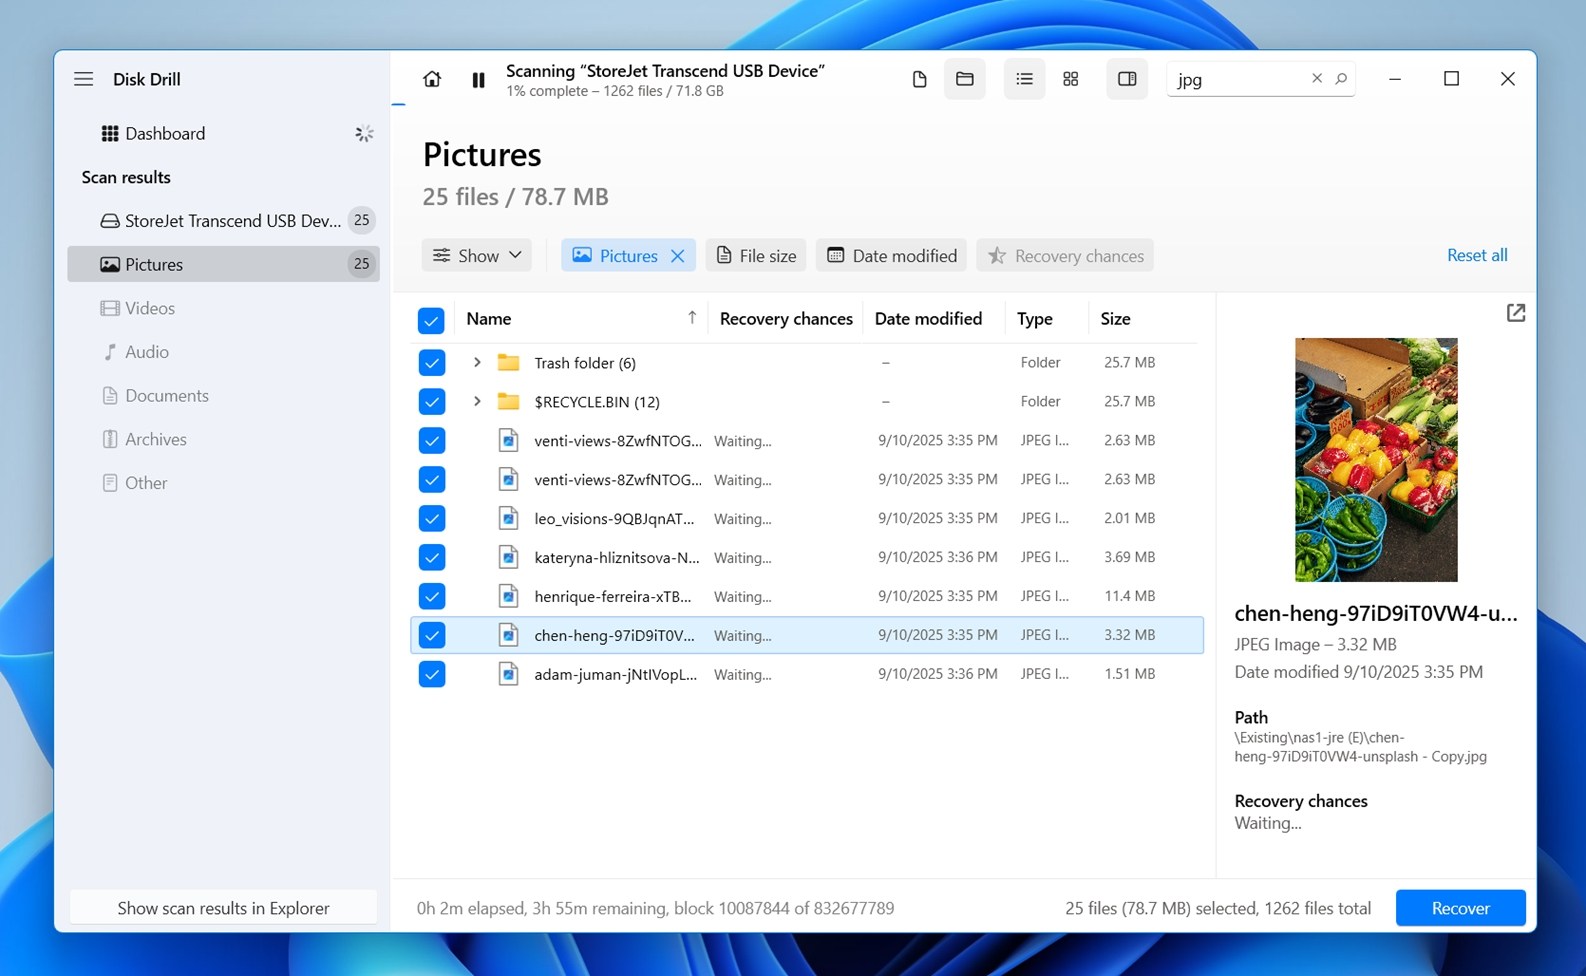
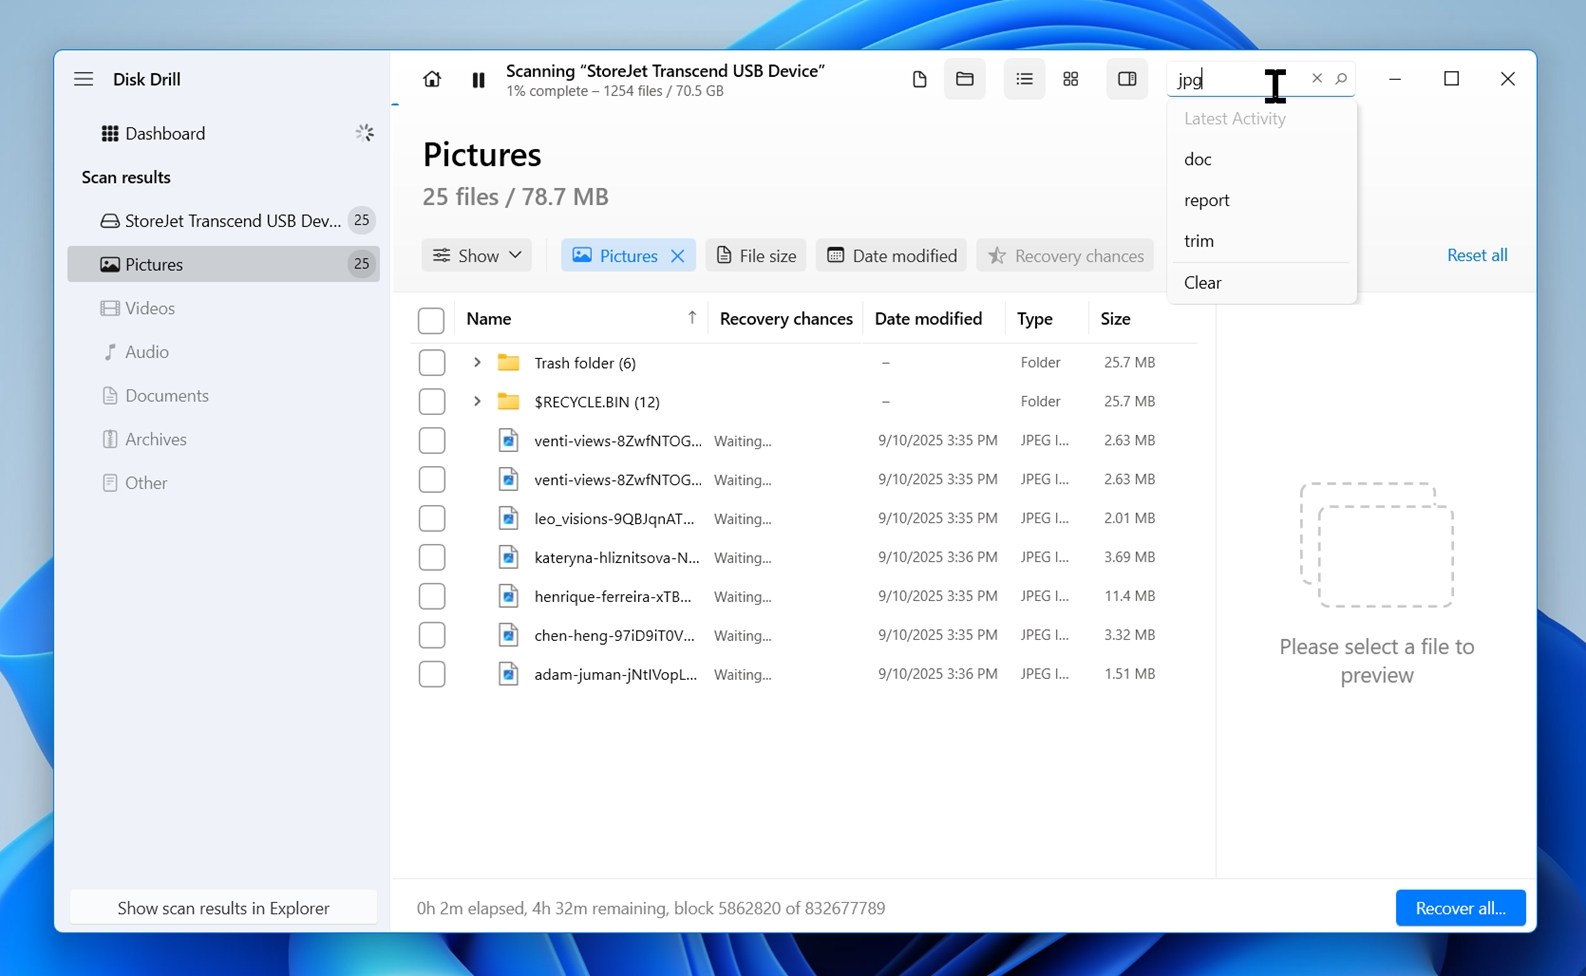
- You can also use the search bar at the top to save time. Type in the full file name, part of the name, or even just an extension like .jpg, .docx, .zip, etc., and it’ll pull up all matching results.
- If Disk Drill shows you thousands of files, you can narrow down its list based on characteristics like their type, recovery chances, size range, etc. For that, use Disk Drill’s Categories on the left or Filters above the files list.
- Choose where you want to store the recovered files. If your desired destination isn’t among the ones suggested by Disk Drill, click Choose destination and pick another folder. Click Next to proceed.
- Soon after, Disk Drill will show you a summary of the results. Click Show recovered data in Explorer to see your recovered files using the OS’s default file manager.

If the drive is acting weird (slow, freezing, or unresponsive) that’s a red flag. It might be physically degraded or have bad sectors. In that case, you can still try NAS drive recovery, but it’s safer to add one extra step first.
Open Disk Drill and go to the Byte-to-byte backup feature. Select the problematic drive, click Create backup, and choose a location with enough free space to hold the entire drive (same size or more).
Once the image is saved, go back to the main Storage Devices section and click Attach disk image at the bottom. Load the backup file you just created.
From there, select the image and follow the same recovery steps as before. You’ll be scanning the backup, not the damaged drive – which means zero risk of making things worse during recovery.
After your data’s safe, it’s technically possible to fix the original corrupted hard drive if the issue was software-level (like file system damage). But if it’s something physical, don’t trust it for anything important going forward.
You can check the drive’s health under Disk Drill’s S.M.A.R.T. monitoring tab. If you see any warnings (reallocated sectors, CRC errors, pending blocks), we wouldn’t be comfortable using that drive for more than one last job. Even if it still works, it’s not reliable. Better to retire it.

More DIY NAS Recovery Software
Now, as promised, here’s a quick overview of several apps that can help you recover deleted or lost files from NAS drives, besides the main method we just walked through.
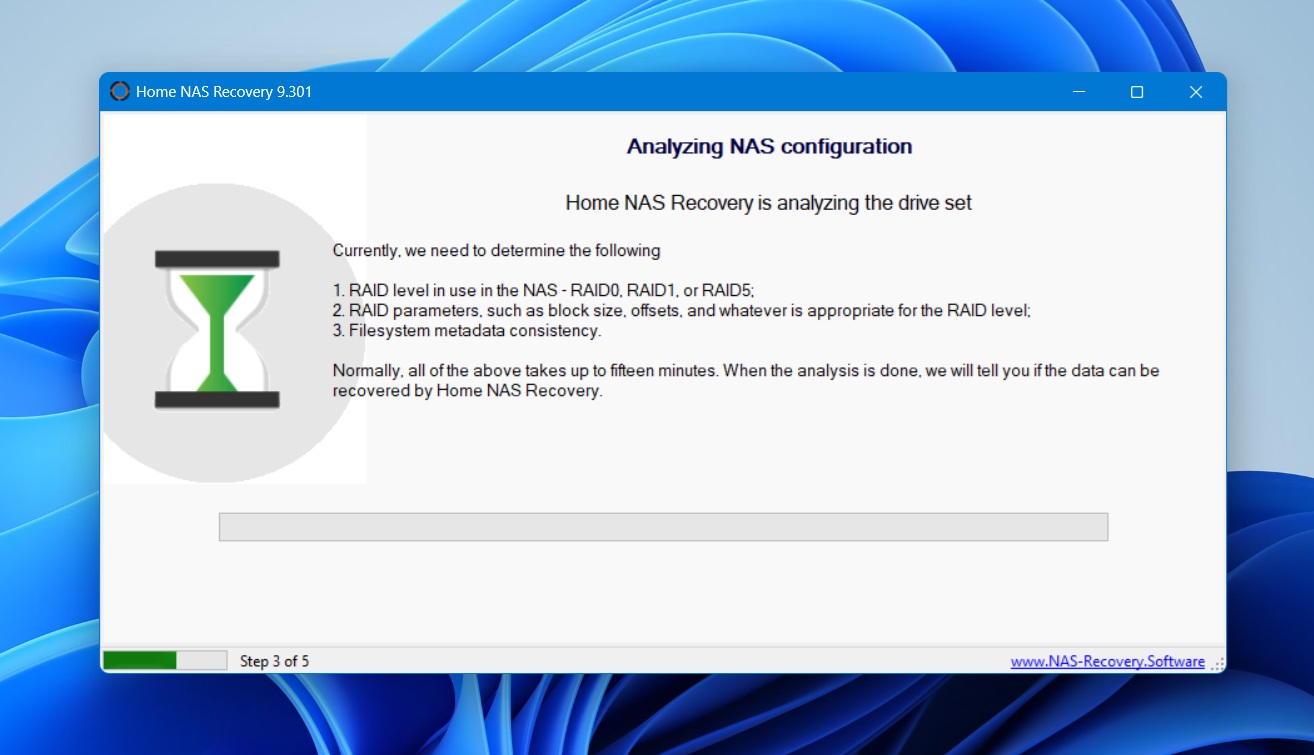
Solution 1: Home NAS Recovery
Home NAS Recovery has some significant pros going for it, which might make it the optimal choice for many people who want to recover data from a NAS drive without overthinking it. The app offers one of the most straightforward interfaces among its peers, is relatively quick, and supports the most popular RAID layouts and NAS manufacturers.
However, even after testing it, we can’t talk about specifics since neither the app, its official documentation, nor its site offer enough information about its capabilities.
Another major negative is that its per-drive pricing can render it more expensive than, for example, R-Studio, depending on your data loss scenario.
Still, downloading and trying it on your NAS drive’s disks is free.
🧰 Main features
- Per drive pricing
- 5-click NAS data recovery
- Asks for a license (payment) only if it locates potentially recoverable data.
🗂️ Supported file systems
- Unlisted
🗃️ Supported RAID types
- RAID 0
- RAID 1
- RAID 5
- X-RAID2
💲 Price
- Fluid pricing depends on the number of disks from which the app is recovering data.
- Prices begin at $69 for a single disk and up to $299 for eight disks.
- It’s unclear if they refer to a specific number of recovery attempts or if there’s an expiration date since there’s no option for a perpetually available unrestricted license or mention of subscription plans and fees.
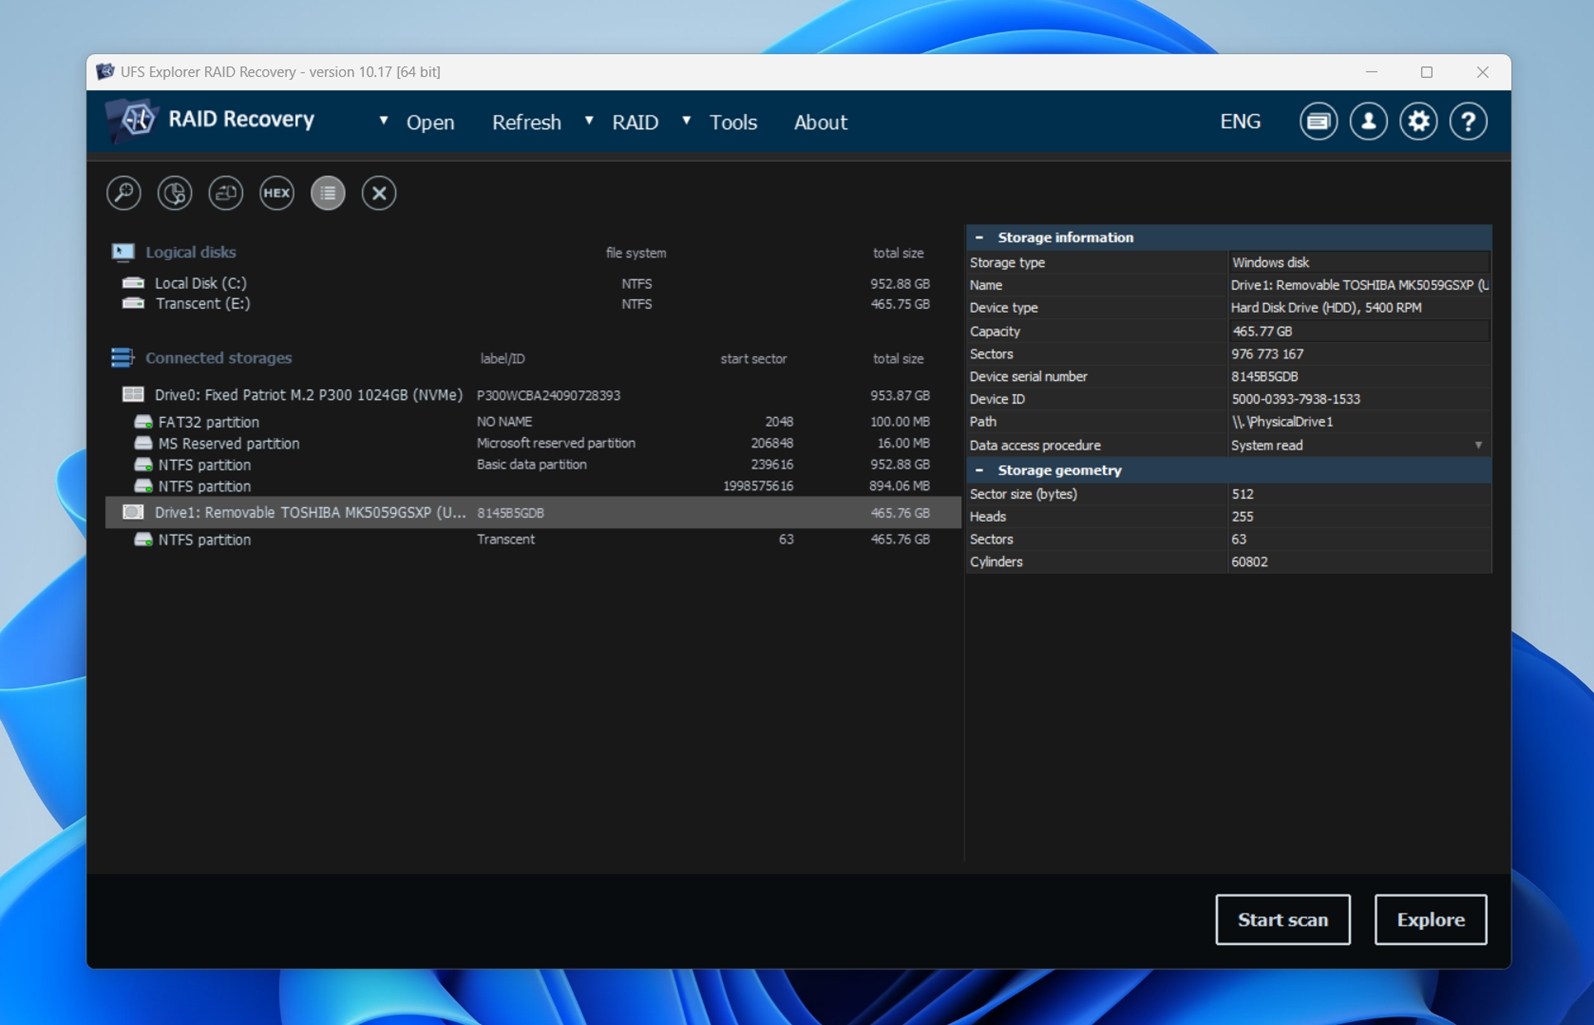
Solution 2: UFS Explorer
UFS Explorer may become your tool of choice for NAS drive recovery since it’s relatively affordable, easy to use, and probably offers the features you require.
“Probably” because you’ll first have to make sense of all its versions to pick the best one for your needs and requirements. Many features overlap, and there’s no clear explanation of what each version supports. Should you go for a more expensive one that supports RAID “natively”, or is a “standard” (and more affordable) option that requires an extra “RAID module” adequate?
Theoretically, you could dig through their extensive online documentation or try all of the app’s versions to find out. Practically, most users will probably skip that and check the alternatives for NAS data recovery.
🧰 Main features
- Automatic spanned/RAID volume detection
- Can work with devices undetected by the OS
- Supports virtual drives/machines
- Can decrypt encrypted storages
🗂️ Supported file systems
- FAT16/FAT32
- exFAT
- NTFS
- ReFS/ReFS3
- HFS+/APFS
- EXT2/3/4
- XFS
- JFS
- UFS/UFS2
- ReiserFS
- Sun ZFS & BSD/Solaris simple/stripe ZFS
- Btrfs
- F2FS
🗃️ Supported RAID types
- Entry-level Standard Access version offers minimal support for RAID recovery.
- Standard Recovery version supports “spanned” volumes created with Windows Logical Disk Manager, Apple Disk Utility, Linux LVM, etc.
- All higher-tier versions (RAID Recovery, Network RAID, and Professional Recovery) support (almost) all types of RAID layouts (including custom ones).
💲 Price
- The Standard Recovery version supports spanned volumes at $64.95 but not complicated RAID layouts.
- The versions with complete support of most types of RAID are UFS Explorer RAID Recovery, starting from $139.95, UFS Explorer Network Raid, which starts at $209.95, and UFS Professional Recovery, starting from $629.95.
We reviewed UFS Explorer recently, though that was for more basic data loss scenarios.
Solution 3: R-Studio NAS Recovery
Many professionals vouch for R-Studio as one of the best data recovery solutions, not only for NAS drives and RAID setups but for any data loss scenario. And they’re not wrong.
R-Studio is, indeed, one of the most versatile and powerful data recovery apps, and can usually successfully recover data from a NAS drive, no matter its RAID layout or file system used.
However, it’s also a relatively (actually, “very”) complicated tool, targeting primarily said professionals who are familiar with terms like “MDADM”, “LVM”, and “UUID”, and who will probably jump directly to its full-priced unrestricted version.

🧰 Main features
- Supports all types of RAID layouts (including custom ones).
- Supports almost all file systems (depending on the app’s version)
- Previews
- Cloning (depending on the app’s version)
- S.M.A.R.T. monitoring (depending on the app’s version)
🗂️ Supported file systems
- FAT12/FAT16/FAT32
- exFAT
- NTFS/NTFS5
- ReFS/ReFS2+/ReFS3.4/ReFS3.7/ReFS3.10
- HFS/HFS+/APFS
- UFS1/UFS2
- EXT2/EXT3/EXT4
🗃️ Supported RAID types
- RAID 0
- RAID 1
- RAID 4
- RAID 5
- RAID 6
- RAID 10
- RAID 1E
- RAID 5E
- RAID 5EE
- RAID 6E
- Custom RAID Layouts
💲 Price
- Entry-level R-Studio FAT and R-Studio NTFS cost $49.99 and $59.99, respectively. Each specializes in a single Windows file system. Still, both also support Linux’s native EXT2/3/4 and can recover data from most RAID setups (including Windows, Apple, and Linux software RAID).
- The more full-featured “plain” R-Studio supports both file systems and more (like Apple’s HFS/HFS+/APFS/UFS). This extended support is reflected by its $79.99 price.
- The unrestricted R-Studio Technician can be deemed “the best”, supports even more file systems, reverse RAIDs, a Forensic Mode and Hex Editor, and can perform recovery over a local network or the Internet. All this comes at more than ten times the cost of its most affordable version, at $899.
We also have a review of R-Studio Data Recovery. If you’re interested in this software beyond NAS data recovery, it’s definitely worth checking out.
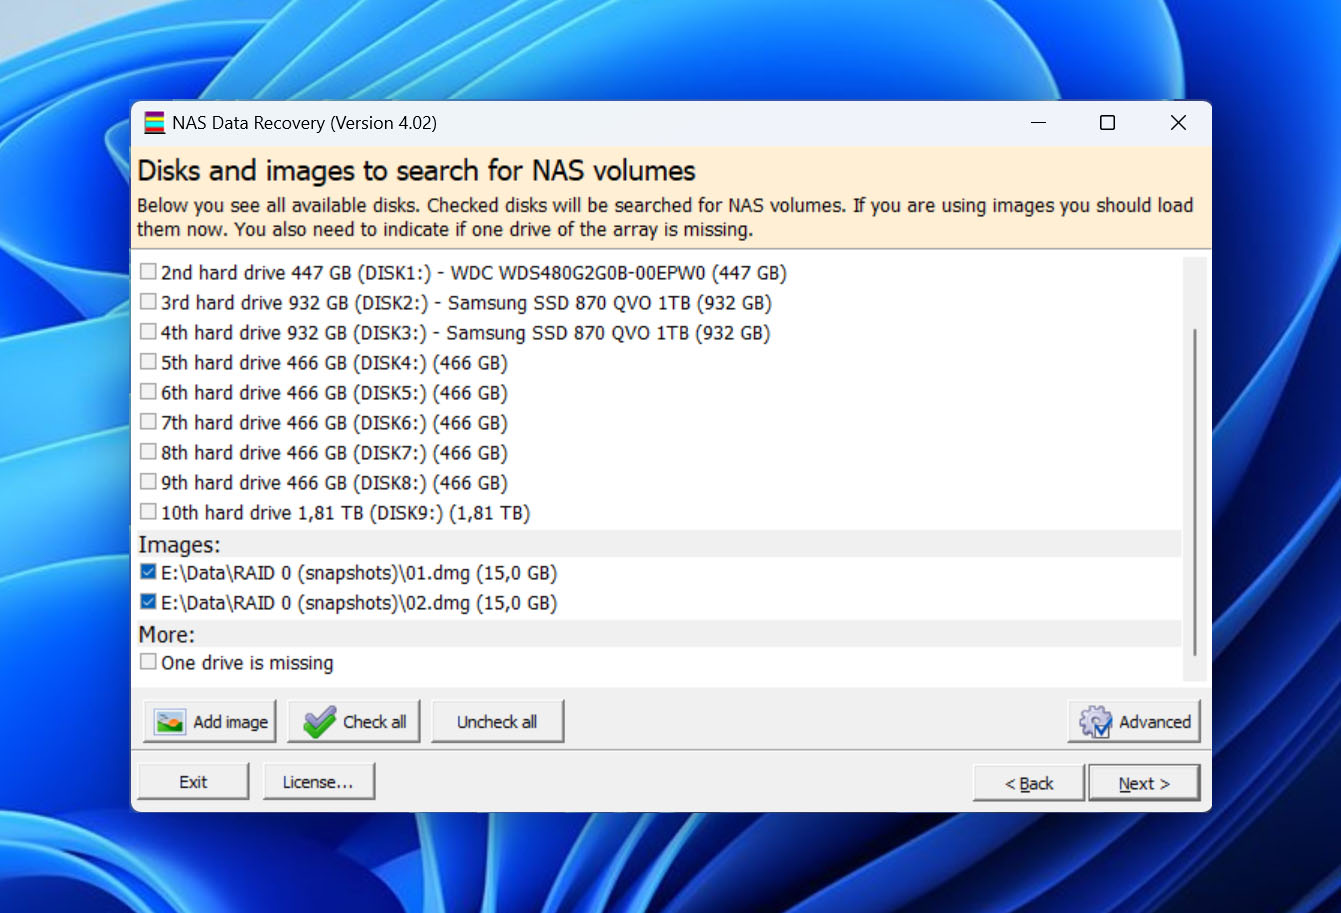
Solution 4: Runtime Software NAS Data Recovery
With one of the most approachable interfaces out of all NAS data recovery solutions, the aptly named NAS Data Recovery by Runtime Software should be extremely friendly and usable even by absolute beginners. You only have to select the disks of your NAS drive’s RAID setup, scan them, and recover their content to another storage device.
Practically, though, those “absolute beginners” will still have to:
- Unplug the disks from their NAS drive
- Connect them directly to their PC
- Recognize them among the rest of their PC’s storage devices
- Select the correct drives from the app’s interface
Thus, despite Runtime Software NAS Data Recovery’s easy-to-use interface, it’s not a user-friendly solution. Those who don’t know (or don’t care to learn) how to handle delicate HDDs would be better off sticking with Disk Drill, which we walked through in the main section of this guide. It’s far more approachable for typical NAS recovery jobs.
🧰 Main features
- Beginner-friendly interface
- Can be run from bootable media
- Automatic RAID parameter detection
🗂️ Supported file systems
- XFS
- EXT
🗃️ Supported RAID types
- RAID 0
- RAID 1
- RAID 5
💲 Price
- One-time $99 fee, comes with free lifetime updates.
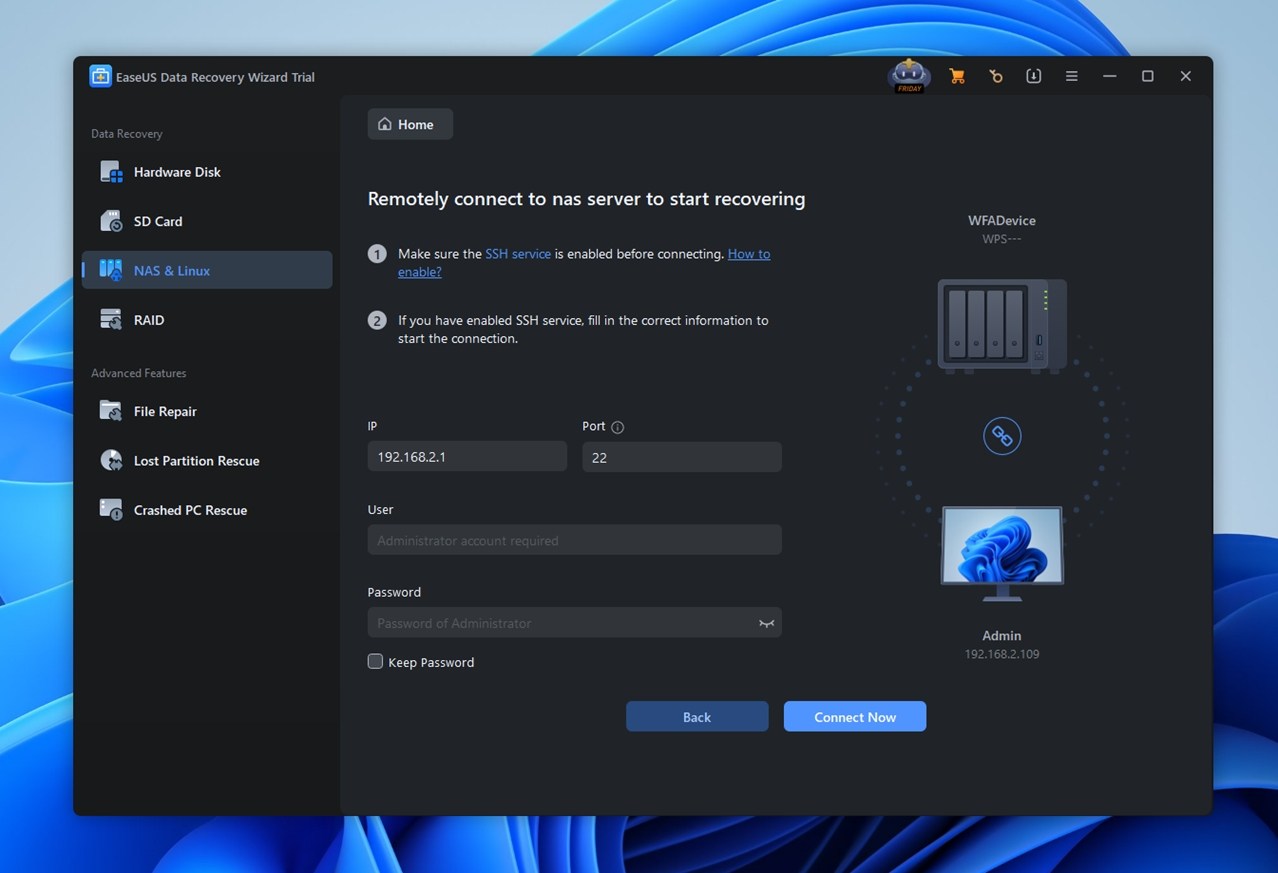
Solution 5: EaseUS NAS Recovery
EaseUS Data Recovery Wizard is regarded as one of the best solutions for recovering files under various data loss scenarios. Although it doesn’t specialize in networked storage, EaseUS Data Recovery Wizard also presents itself as a NAS recovery solution and can help you get your data back from networked RAID setups.
The app has some advanced features, like its ability to attempt repairing/reconstructing image and video files. Still, its support for File Systems is lackluster, and its pricing plans are far from enticing.
🧰 Main features
- File Previews
- File Filters
- Recovery while scanning
- Enhanced Video Recovery
- File Repair (JPG/MP4/MOV)
🗂️ Supported file systems
- FAT12/FAT16/FAT32
- EXT2/EXT3
- HFS+
- ReFS
🗃️ Supported RAID types
- RAID 0
- RAID 1
- RAID 5
💲 Price
- Subscription-based plans
- Monthly: $69.96
- Annual: $99.95
- Lifetime: $149.95
And of course, we have a review of EaseUS Data Recovery Wizard as well.
Tips for the Tough Cases
The tools and methods we covered here should work for most people trying to recover data from a NAS setup. Whether you decide to run a data recovery tool over SSH or take the more hands-on route of disconnecting drives and plugging them directly into your computer, both paths have a solid track record.
From what we’ve seen across our team and community tests, one of these approaches typically leads to success unless you’re dealing with a physical failure or some obscure issue like a bricked device from a bad firmware update.
In our recent survey, about 79% of users who tried a DIY software route managed to recover their files successfully.
That said, not all cases are this straightforward. If your drives freeze, vanish mid-scan, or behave erratically, there could be an underlying hardware issue that makes DIY recovery risky (or sometimes impossible). In those scenarios:
- You might still be able to recover files using a byte-to-byte backup (we walked through that).
- Or you might need professional help.
Data recovery labs have tools and expertise that most of us simply don’t have (cleanroom setups, chip readers, and experience handling damaged drives). The problem is, they’re not cheap. To put it mildly.
But not every service charges a fortune. If you want to know which data recovery companies offer solid results without wrecking your wallet, our team has put together a full guide on the best data recovery services out there.
Also, don’t forget – you can always start a thread in our community or even reach out to us directly. If your issue is fixable, chances are we (or someone in the community) can point you in the right direction. Just make sure to share what you’ve already tried – nothing’s worse than guessing in the dark. That’s actually why we said to document everything from the start of this guide. It helps us help you.
FAQ
Can I just pull out the drive and copy-paste the files?
It depends on the situation. If your NAS uses a basic setup (like a single-disk volume or a simple JBOD configuration), and the drive is healthy, you might be able to connect it directly to a PC with the right file system drivers and access the files like you would from any external disk.
But (and this is important) most NAS systems use RAID, proprietary partition layouts, or file systems like Btrfs or ext4, which Windows or macOS won’t read out of the box. Even if the OS detects the disk, the volume structure could be unreadable or fragmented. In those cases, copying files manually risks corrupting them or skipping over critical data structures. You’re better off cloning the drive or using proper NAS data recovery tools.
Is there NAS data recovery software that’s free of charge?
Many solutions allow you to recover data from NAS for free. For example, Photorec or Recuva can help if you detach the disk from a single drive NAS, attach it to your PC, and perform data recovery on it as if it was a typical local drive.
That said, in our experience, the best NAS data recovery software isn’t truly free. Most fall into the “freemium” category. Take Disk Drill – it gives you unlimited scanning, disk imaging, and nice extra tools, but recovery is capped at 100MB (on Windows). Then you’ve got tools like R-Studio, which is more advanced and RAID-aware, but only lets you restore files under 256KB in the demo version. So yes, free options exist. Just don’t expect miracles if your NAS setup is complex or the damage runs deep.
How do I read a NAS drive in Windows?
Although various tools can try to read a NAS drive in Windows, even when it’s “misbehaving”, it’s best to detach its disks, plug them into your PC. Then, try accessing them directly using specialized software (Windows on its own cannot read data from NAS drives detached from their original controller). This eliminates any chances a problematic network interface or malfunctioning RAID controller on your NAS will prevent you from getting to your data.
How much does professional NAS RAID data recovery usually cost?
It’s hard to tell upfront. It depends on a few key things: the RAID type, how many drives are involved, what exactly went wrong, and how urgent the recovery is. For a typical RAID 0 or RAID 5 with 2–4 drives and no physical damage, you’re usually looking at:
- $300–$700 for software-based recovery (if the service can use tools remotely)
- $800–$1,500+ for in-lab logical recovery (when the RAID won’t mount or needs rebuilding)
- $1,500–$3,000+ if there’s physical damage to one or more drives
The more complex the array (like RAID 6, RAID 10, or proprietary NAS formats), the higher the cost. Emergency or expedited services can also add another 20–50% on top. That said, many labs offer free diagnostics, so you’ll at least get a quote before committing. We always recommend asking about no data, no fee policies to avoid paying if nothing is recovered.
This article was written by Odysseas Kourafalos, a Editor-in-Chief at Handy Recovery Advisor. It was recently updated by Roman Demian. It was also verified for technical accuracy by Andrey Vasilyev, our editorial advisor.
Curious about our content creation process? Take a look at our Editor Guidelines.