An unplayable or corrupted F4V video is very annoying to deal with, as no media player can do anything with it. The only solution is to somehow repair the file, but how? We have compiled a list of tried and tested methods that can fix corrupted F4V files in most common scenarios and make them playable again.
Is it Even Possible to Fix Corrupted F4V Files?
There are many ways of recovering deleted files, but what about corrupted ones? If your F4V video does not play or even open, this means that parts of the file itself are missing – a trickier problem to fix.
In short – yes, it can sometimes be possible to repair a corrupted f4v video. But only sometimes, as it depends on what part of the file is missing. Any f4v repair solution can only fix the inconsistencies in the format; if the footage itself has chunks missing, no software can recreate them out of thin air.
How a F4V File is Structured
Any video file consists of two main components – the video itself, encoded using a codec, and a container around it that gives the information about how to decode and play it. Without this second part, a video player cannot understand the video, making it unplayable.
F4V files work in the same way. The core video itself is encoded using the same codec utilized by the MP4 format, but within the same MPEG-4 container, which includes some differences such as DRM protection or variations in audio codecs. For a functioning F4V video, these distinctions are outlined in the container, allowing a compatible player to parse it.
However, when an F4V file is incomplete or corrupted, this decoding cannot occur, and the video remains inaccessible despite the footage still remaining intact. This usually happens when the recording device (a camera or even a drone) is suddenly interrupted before it can finish properly saving the file; say due to losing power or getting dropped.
More Reasons Why an F4V File Might Not Play
An incorrectly saved file isn’t the only way you end up with an F4V video that does not run at all. There are other problems that can cause this same issue.
- ❌ Missing codecs. This is not a problem you usually see with F4V files, since it uses the standard H.264 codec that is installed by default on most video players. Even so, it might not be a bad idea to try playing the video on a different player (VLC, for example) to see if it runs.
- 📛 Data corruption. We have discussed videos that are unplayable due to incomplete decoding information, but sometimes the data itself is corrupted. This could be due to malware, a failing hard drive, etc. Such a video is usually not fixable, since often the footage itself has been corrupted. Often such videos might even play partially, with the corrupted segments tripping up the player.
- ⚠️ Faulty encoding. It is also possible that the video isn’t corrupted at all, just not encoded properly, preventing it from being played. Or it plays, but not properly, either with just the audio or stuttering video.In these situations, the best method is to convert it into another format, which re-encodes the video and often smooths over minor issues. We will show in detail how to re-encode videos later in the article.
Method 1: Repair Corrupted F4V Files With Online Repair Service
We have mentioned that some corrupted F4V files can be repaired, but how exactly? One method is to use an online video repair utility.
Most of these apps offer a certain number of repairs for free, so you can try out their service without paying to see if they can even fix the file. Keep in mind that some of these apps will count any uploaded files against their limited quota, so make sure to pick the correct files.
Clever Online Video Repair is our recommended service because it provides generous file limits. It also offers a free account, which users must create before they can start repairing files. This account allows users to fix more files and access them through direct links.
It only requires you to upload your broken F4V file along with another working FV4 video recorded on the same device – this is what allows the utility to reconstruct the container and decoding instructions, making the file playable.
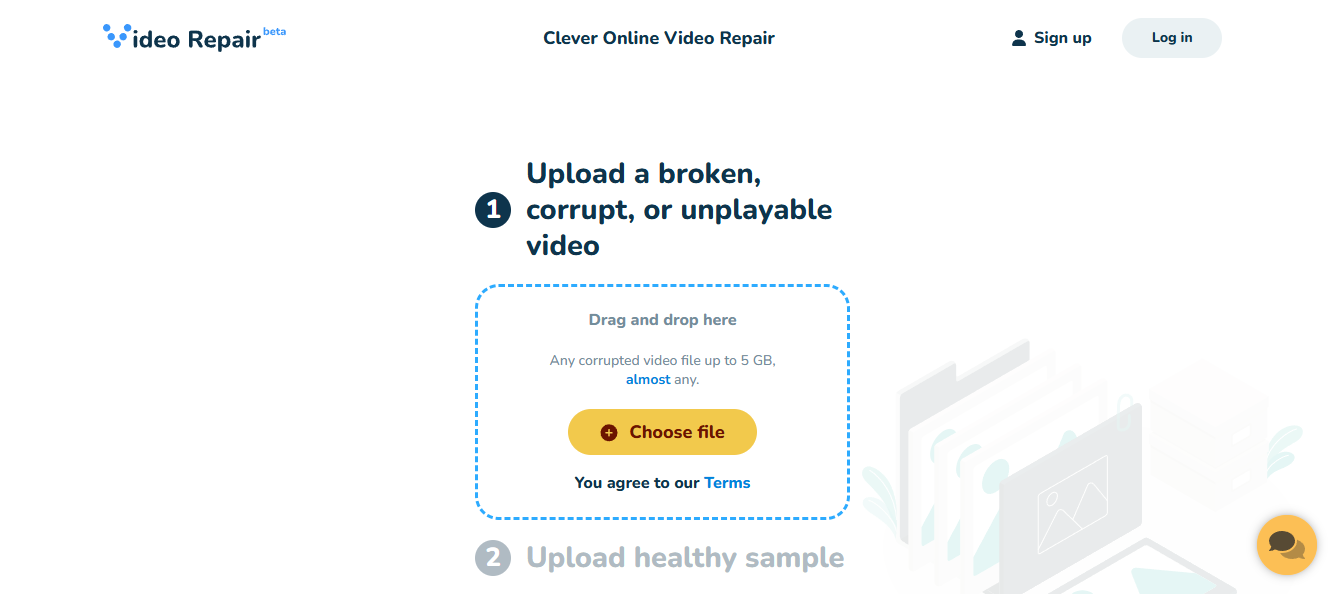
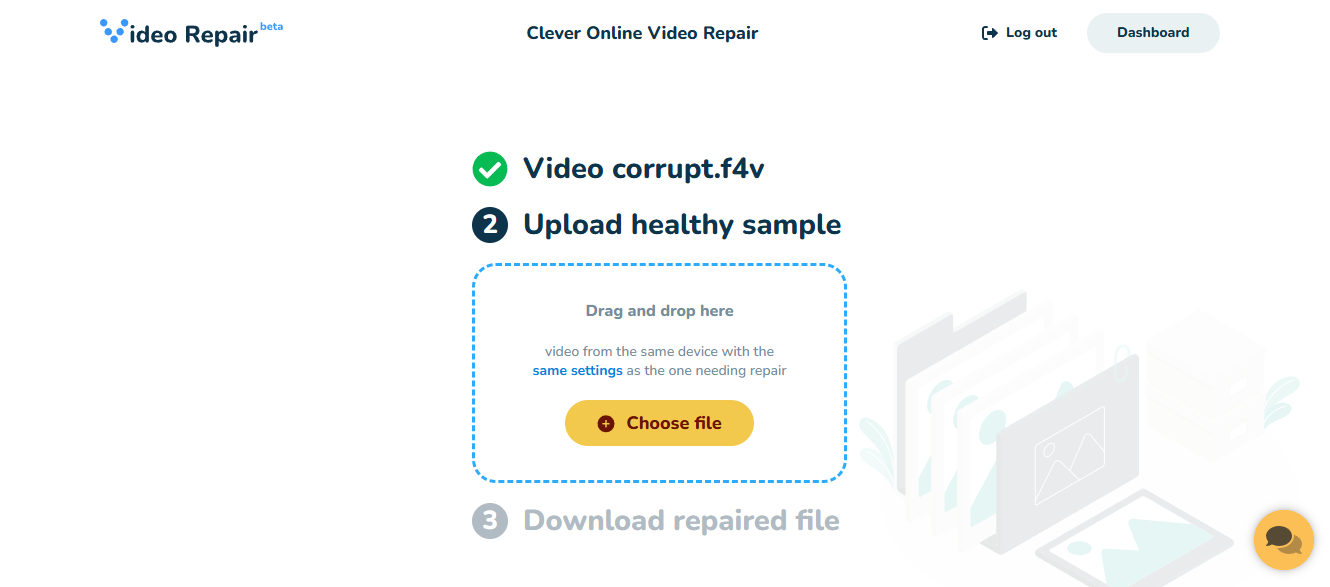
- To repair your F4V video, head to the Clever Repair website and upload the corrupted file. Keep in mind that there are limits to how many files can be repaired for free, so choose the file carefully.
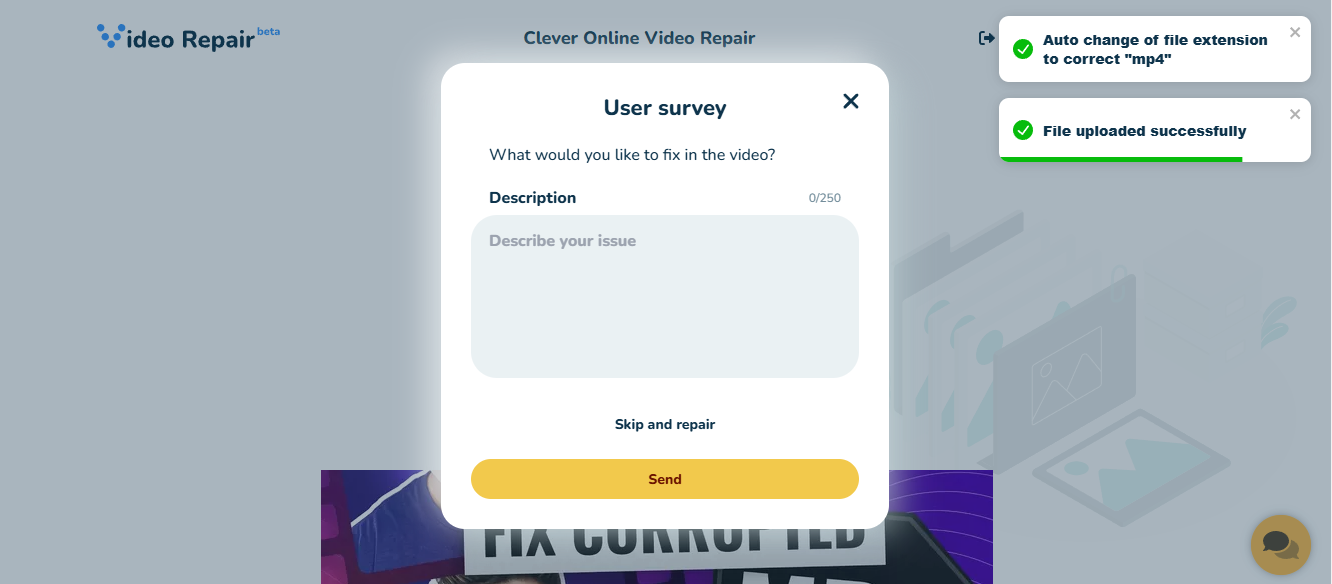
- This brings up a message box with an optional user survey; you can fill it in or select Skip and repair to go to the next step.
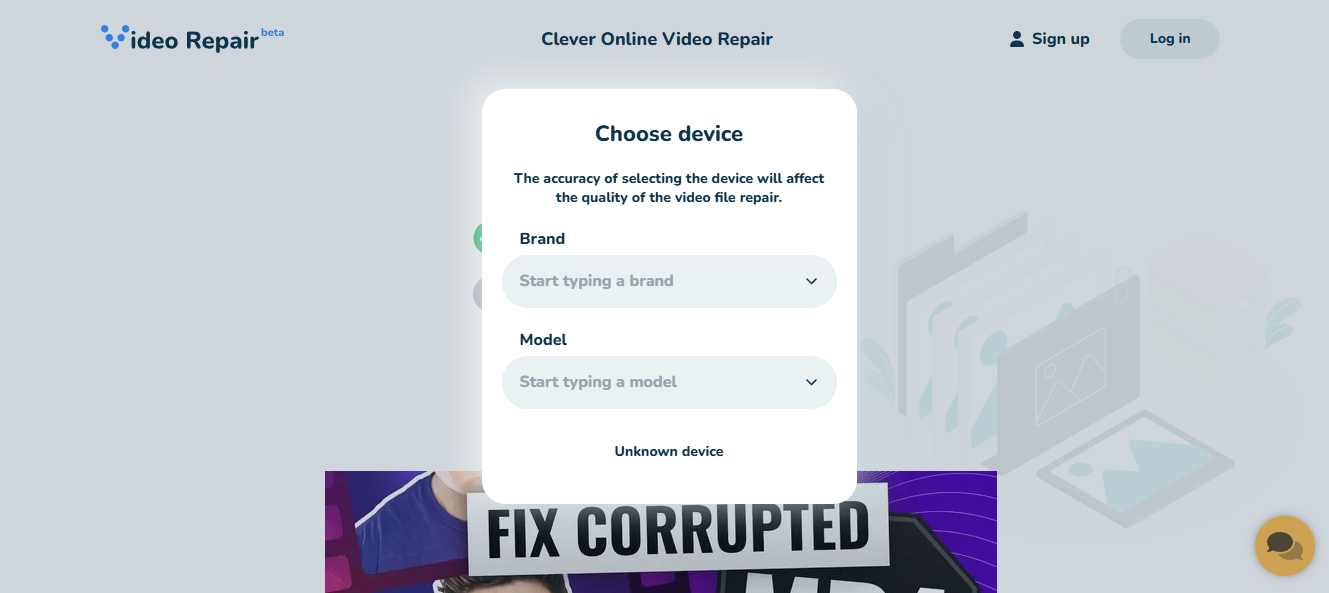
- Now you will be prompted to select the brand and model of your recording device; while this improves the chances of successful file repair, you can proceed by selecting Unknown device from the bottom as well.
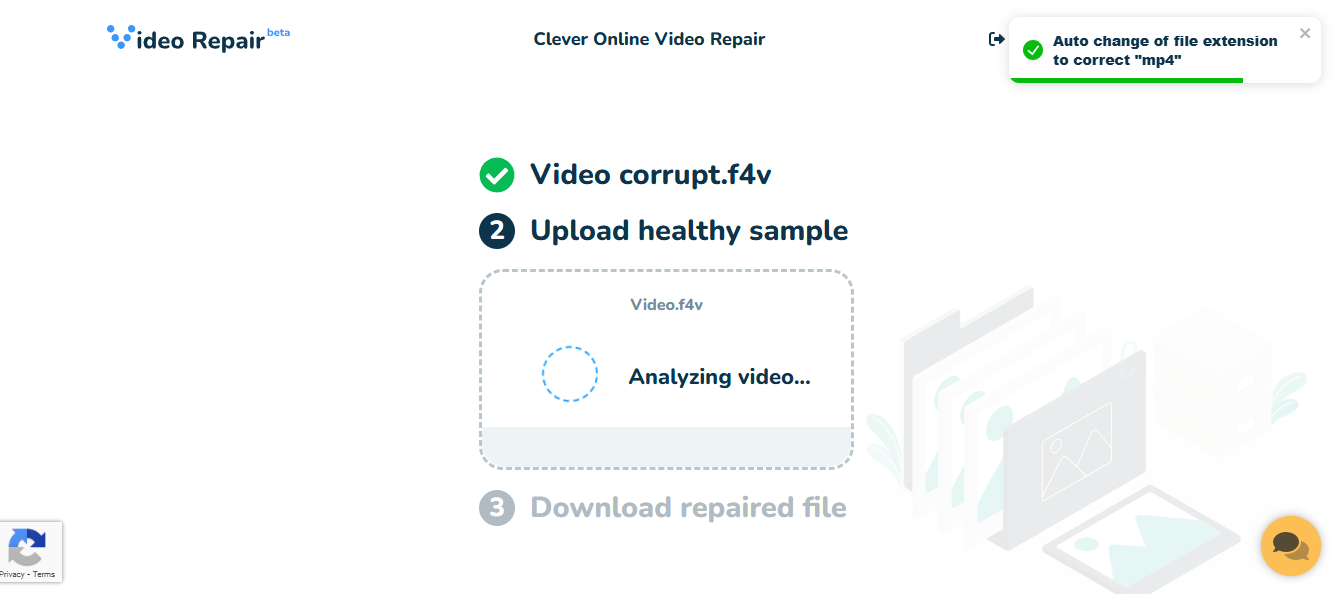
- Your uploaded video will be scanned (mainly to check if it is the correct file type), and then you will be able to select a healthy video to act as a reference. All you need is a working f4v video recorded using the same camera.
- This video will be analyzed as well, taking anything between a few seconds to a few minutes, depending on the size.
- Now you will need to register for a user account on the Clever Repair site. This ensures that your repair progress isn’t lost if you backtrack or even switch devices, letting you access the repaired file easily for a few days.

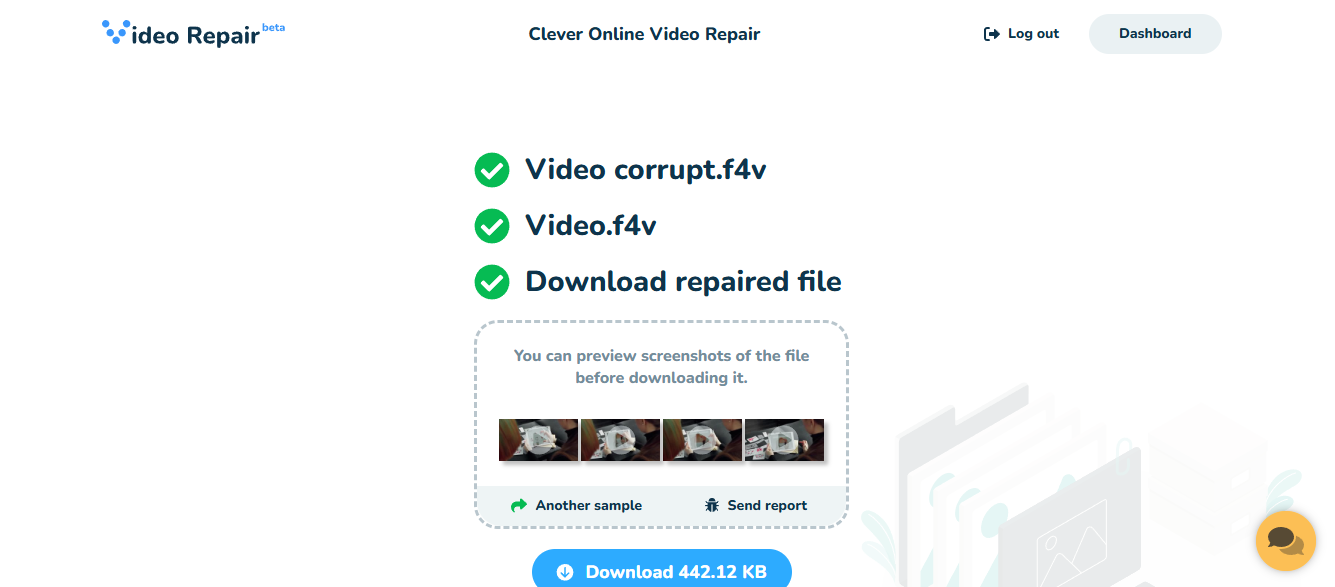
- And that’s it! After you have made an account the video repair will commence, and will be ready to be downloaded once the process is complete.
Let us clarify one thing again: only F4V files that were not saved properly can be fixed with this method, as most repair utilities can only fix the video container, not the footage itself.
Note: Clever Online Video Repair is just one of many video repair tools available. We’ve tested a wide range of them and put together a shortlist of the best video repair tools in our rating.
Method 2: Convert Your Problematic F4V File to Another Format
The F4V format makes repairing the video even more difficult, as very few applications support this file extension. So why not try converting it first?
Often the process of conversion itself will fix the file, usually when the error lies in the format’s “container”. And even if it doesn’t, getting it into a more common format like AVI makes it easier to find a repair tool that can work on it.
There are many online tools for converting videos, but the simplest method is to just use VLC media player’s video conversion feature. This can convert most video file formats (including F4V) to AVI or MP4.
Here are the steps to convert your F4V file:
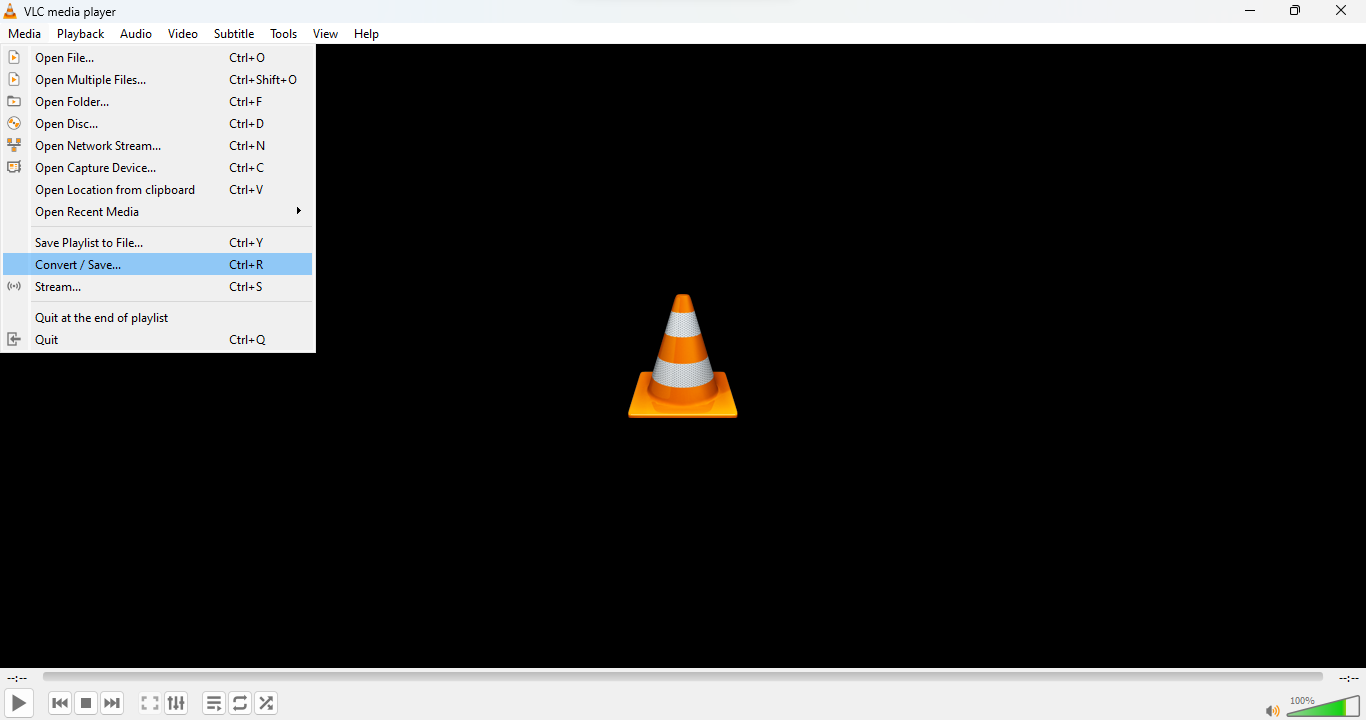
- Open VLC Media player and select Convert/Save in the Media menu or hit Ctrl + R.
- Add the video you want to convert, and click on the Convert/Save button.
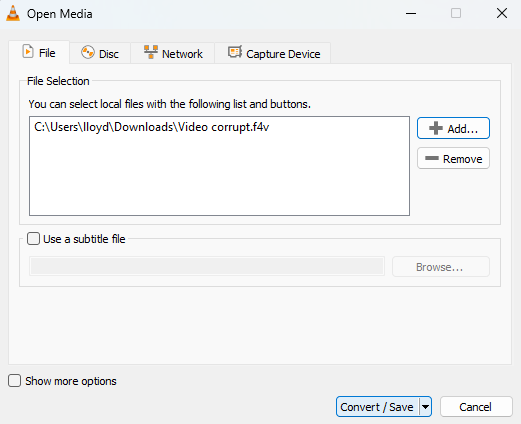
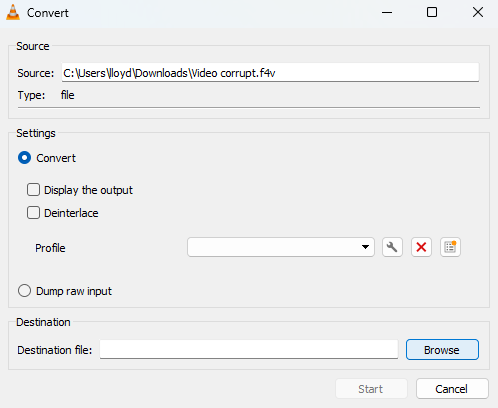
- Ignore the extra options in the window that appears and just use the Browse button to choose a destination for the converted file. This is also where you will be able to specify the file extension you want.
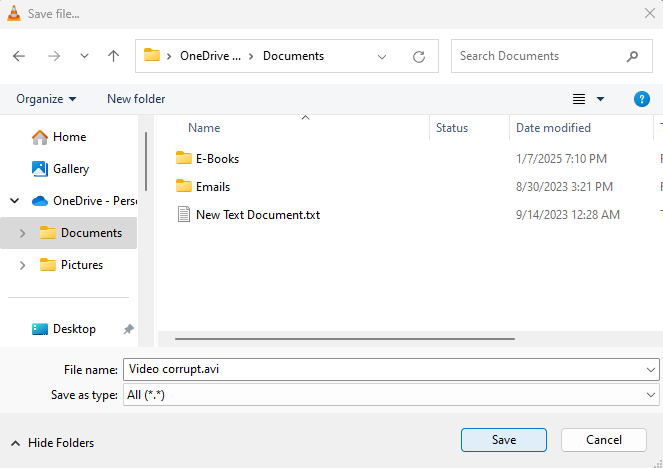
- By default, the video is converted to an MP4 file, which is ideal for most use cases. AVI is another good option as it is also a simple format that can be more easily repaired with other utilities and features. Once you decide on where to save it, you can change the file extension by select the file type as All and editing the name from .mp4 to .avi (or any other file type). Then just hit Save and the video will be converted.
Method 3: Use VLC’s Built-in FLV Repair Function
Once you have your F4V video converted to AVI (refer to our previous method) you can take advantage of VLC’s video repair feature to try and fix it. It is surprisingly good at repairing small problems in a corrupted video, saving you the effort of trying out a dozen online tools.
This method applies only to AVI videos, specifically those obtained through conversion in the previous step. If the corrupted video has a different format, you must convert it to AVI first. In some cases, renaming the file extension may work, but in our case, it will not because F4V and AVI use different containers. The AVI fix algorithm, which you can enable in the settings, works only for AVI files.
The VLC video repair feature is meant to be automatic – if you open an AVI video and it is corrupted, the application should automatically attempt to fix it, or at least prompt you.
In case the option is disabled on your app, you can enable it manually to force VLC to repair the video.
Here are the steps for activating VLC video repair:
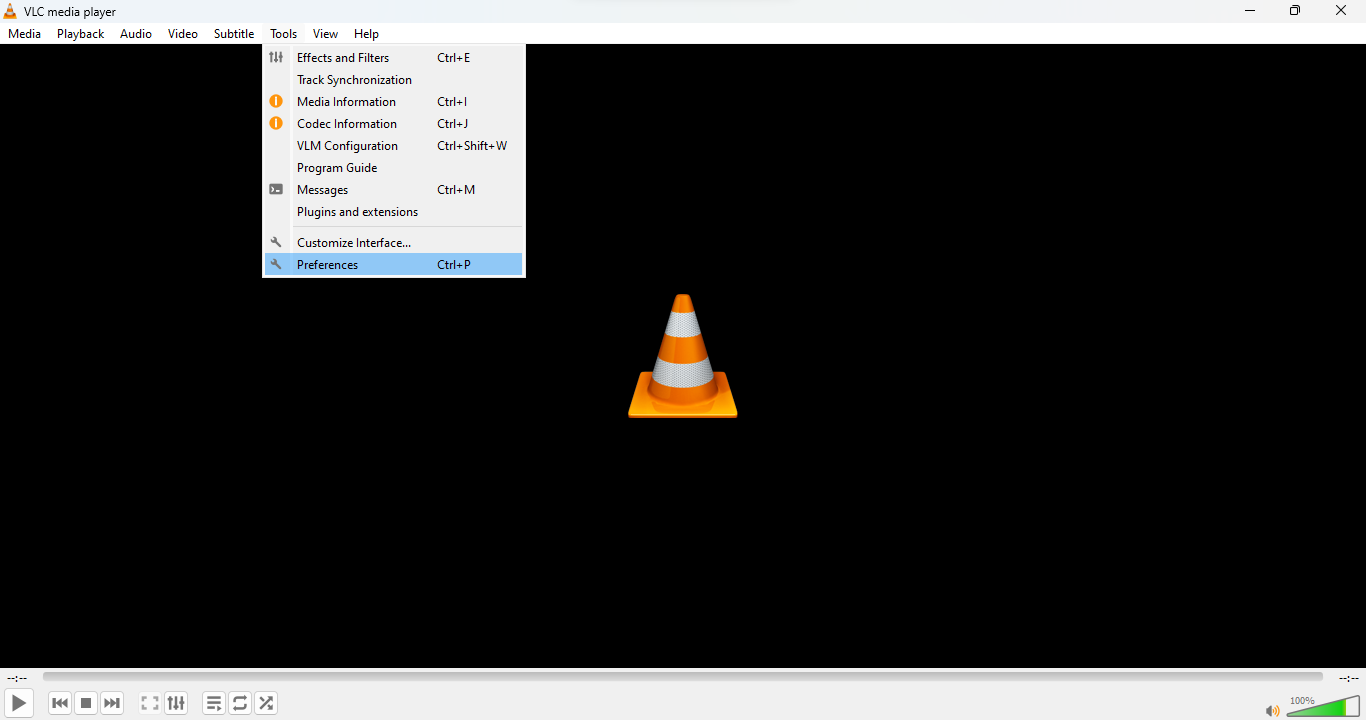
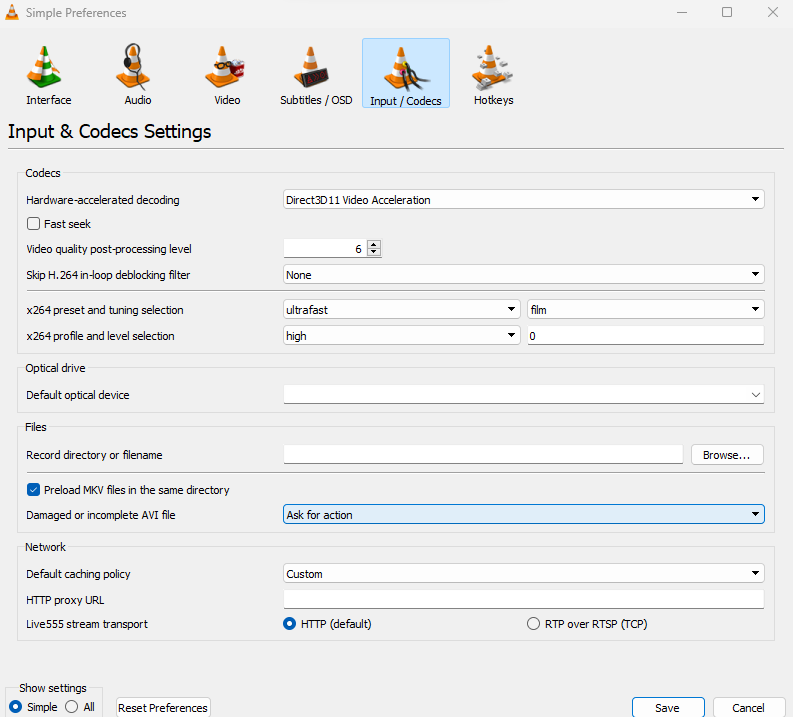
- To enable VLC’s video repair, head to the Tools menu and select Preferences, or hit Ctrl + P
- Switch to the Input/Codecs tab and look for the Damaged or incomplete AVI file option.
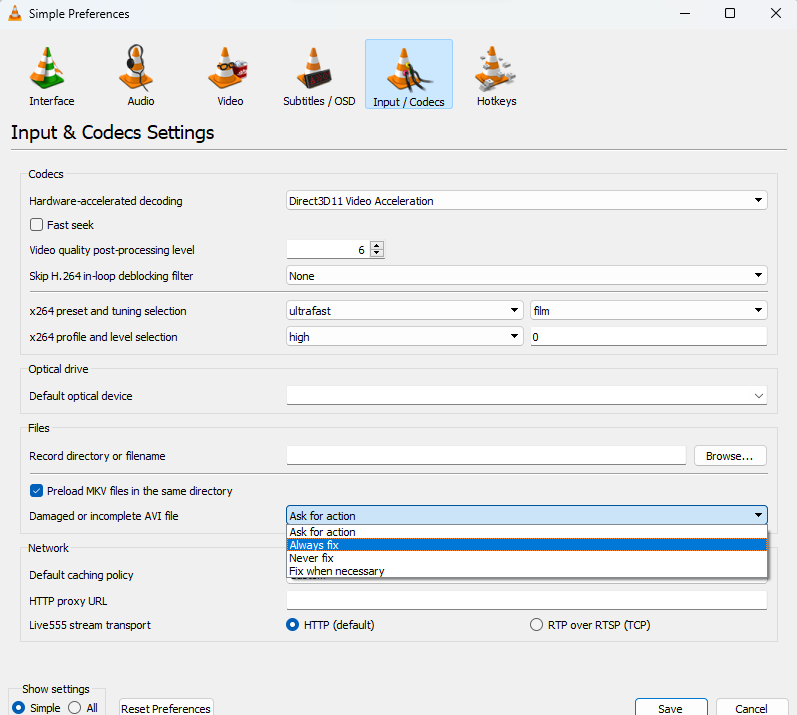
- Click on the drop-down menu to reveal all options and select Always fix, then hit Save.
Now you can try playing the corrupted video again, and VLC will attempt to repair it automatically. If it succeeds, the video will play as expected.
Can’t Find F4V Video File on Your Device? Try Data Recovery Software
Sometimes when a recording gets interrupted, a video file does not show up at disk at all, even though the camera has probably written a file into memory but hasn’t been able to properly save it. This is another case where a data recovery tool can help by restoring this incomplete video file, which you can then attempt to repair with an online tool.
To find a deleted or missing f4v video file using data recovery software, follow these steps:
- Download and install Disk Drill from the official website. You can use another data recovery tool as well, the process is mostly the same.
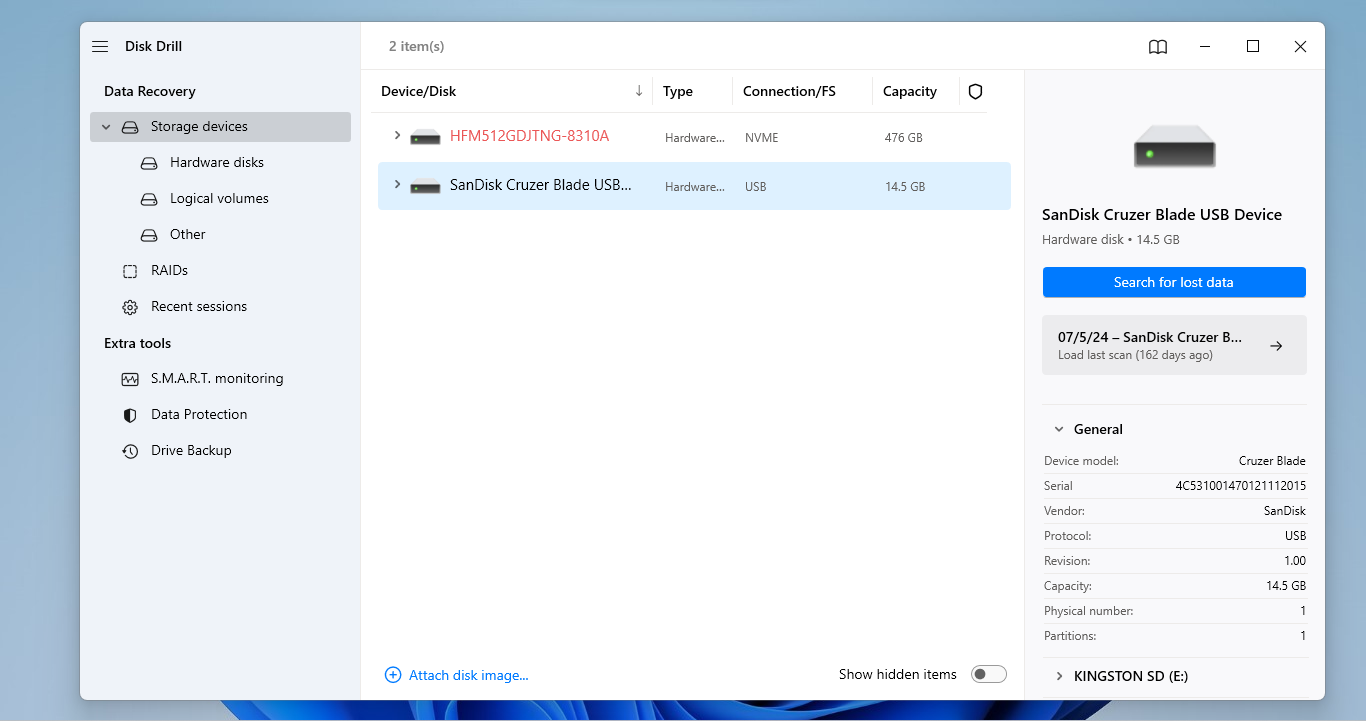
- Connect the storage device containing the deleted F4V video to your PC (this can be an SD card or a USB drive), and run Disk Drill.
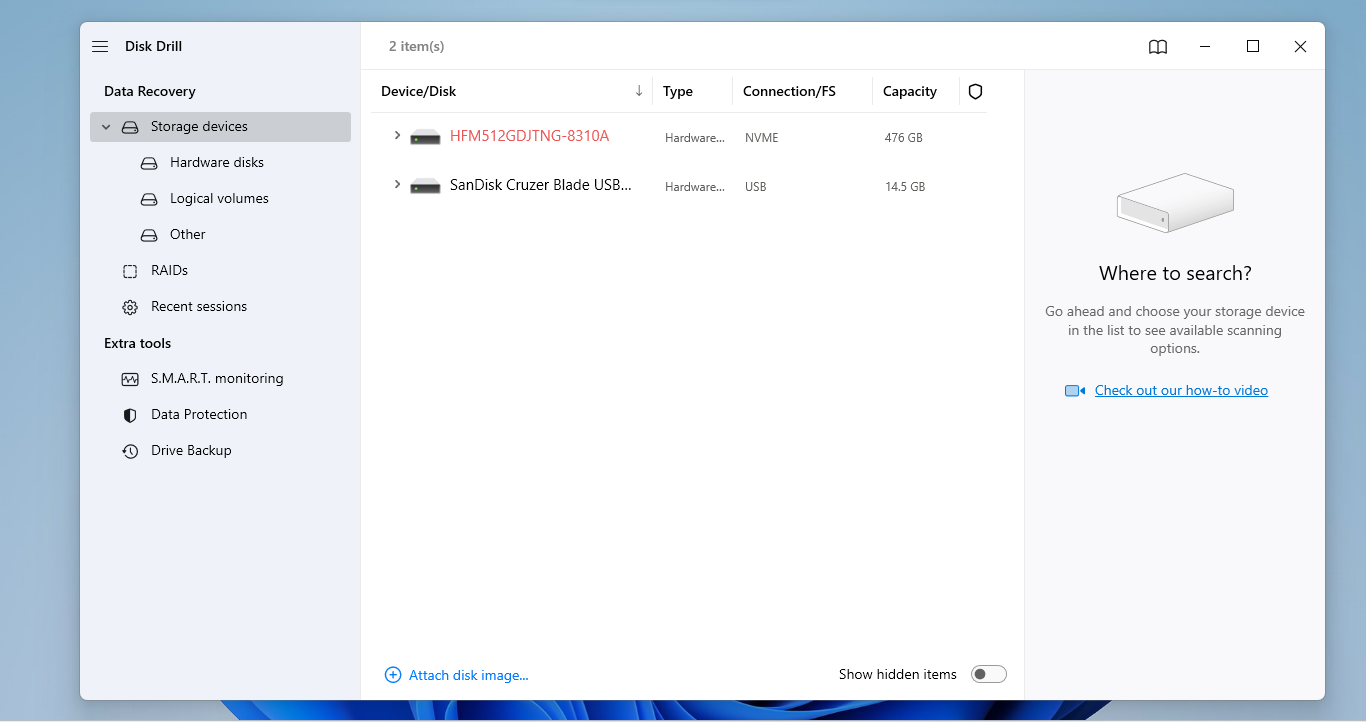
- Select the drive and use the Search for lost data button.
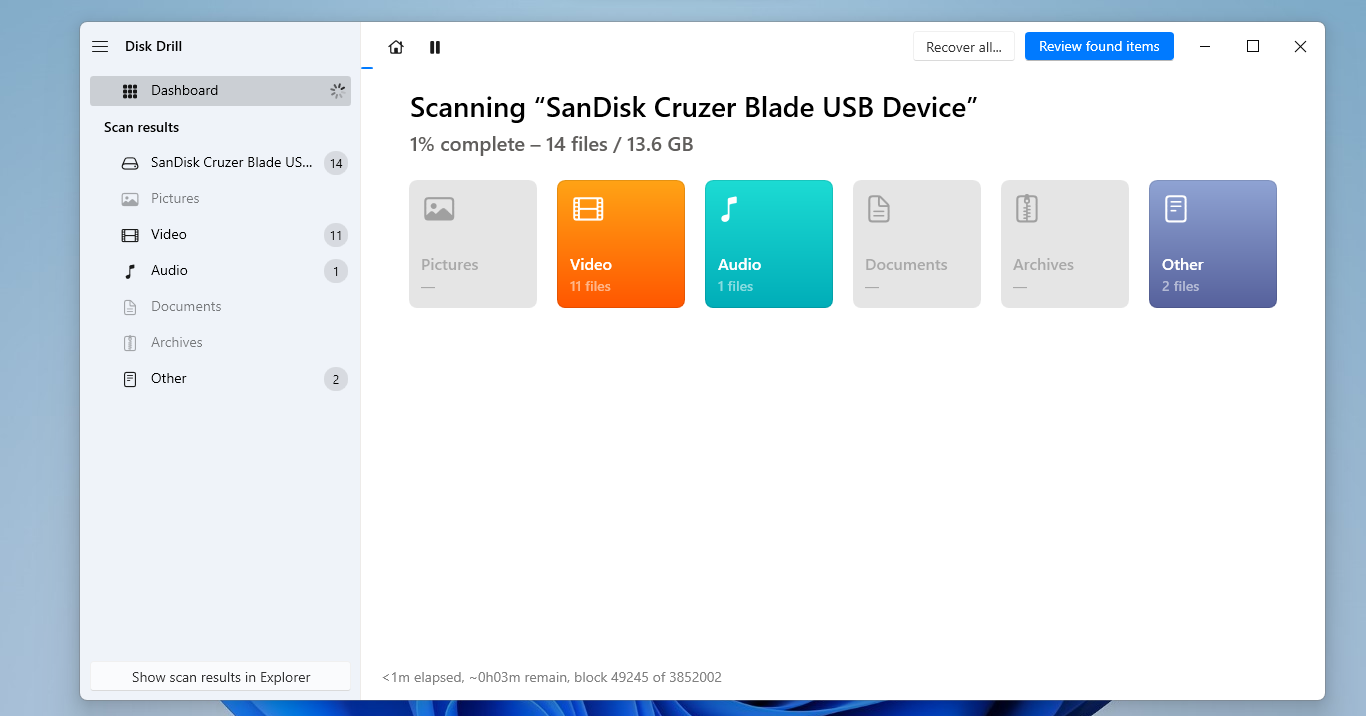
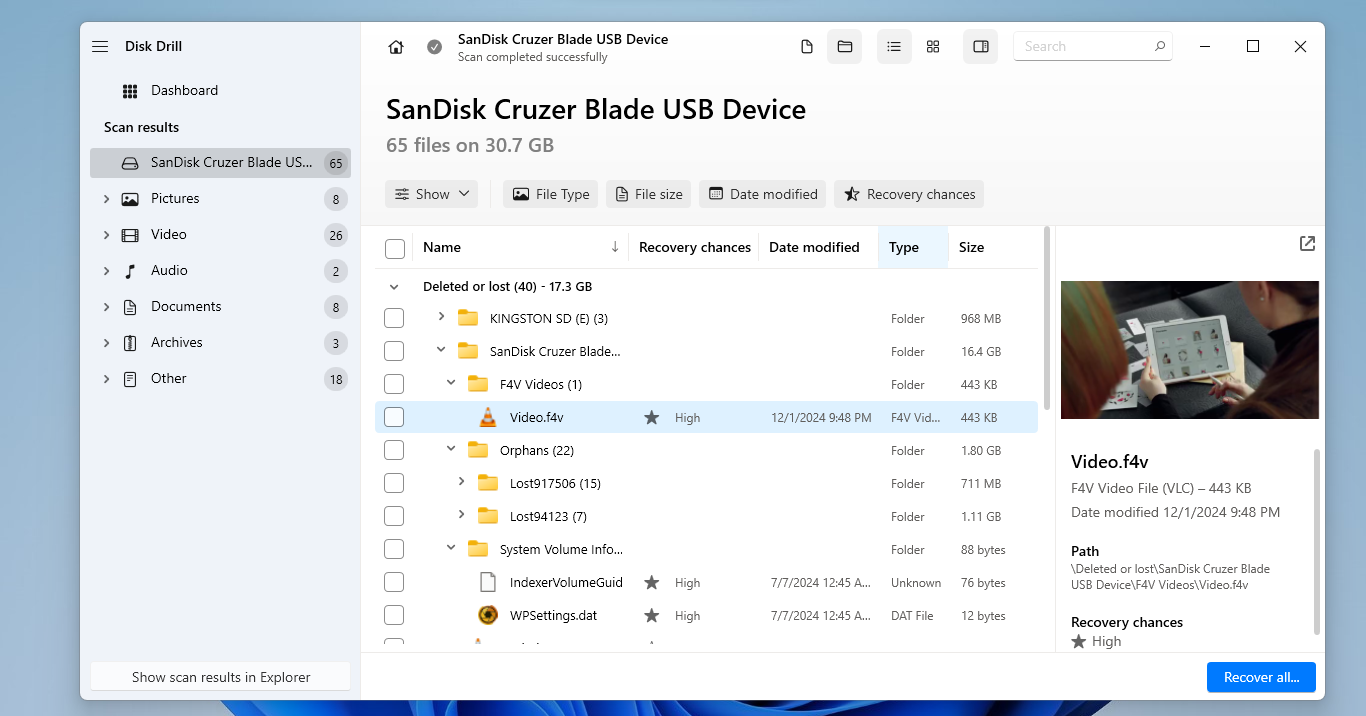
- The software will now proceed to scan the device for any missing or deleted files, sorting them by their file types for easier access. You can pause the scanning progress to view the files found so far, though it is best to let the scan complete first.
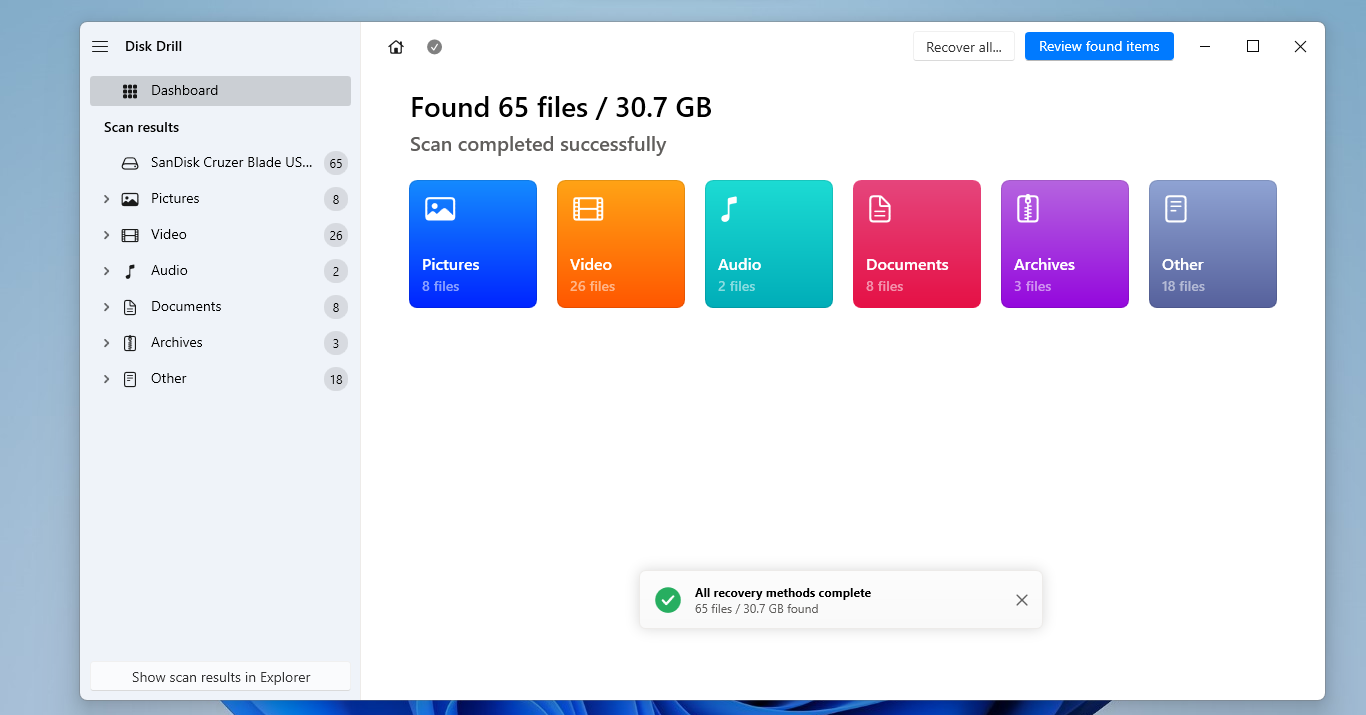
- After you are notified of the scan being completed successfully, click on the Review found items button on the top right.
- This brings you to the window where all the results of the scanning process are displayed. The files are divided into categories based on their file types on the left (videos, pictures, documents etc.) while the folders can be navigated in the middle. There is also a search bar at the top you can use if you remember the file name of the F4V video you are looking for.
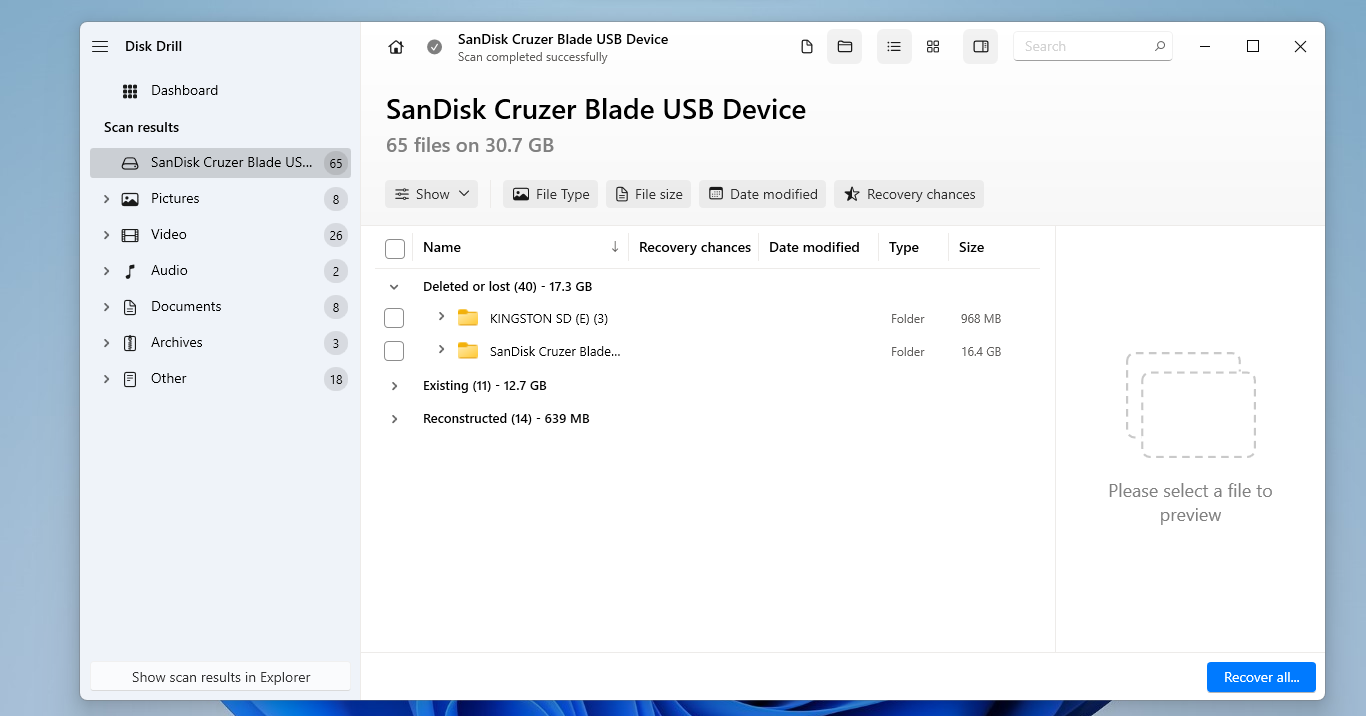
- After you locate the video by searching or browsing through the folders, you may also be able to preview it, though this function might not work for certain files.
- Now you just need to confirm the files you want to restore by selecting their checkbox. Since there is a limit on how much data you can recover in the free version, make sure that no unnecessary videos remain selected.
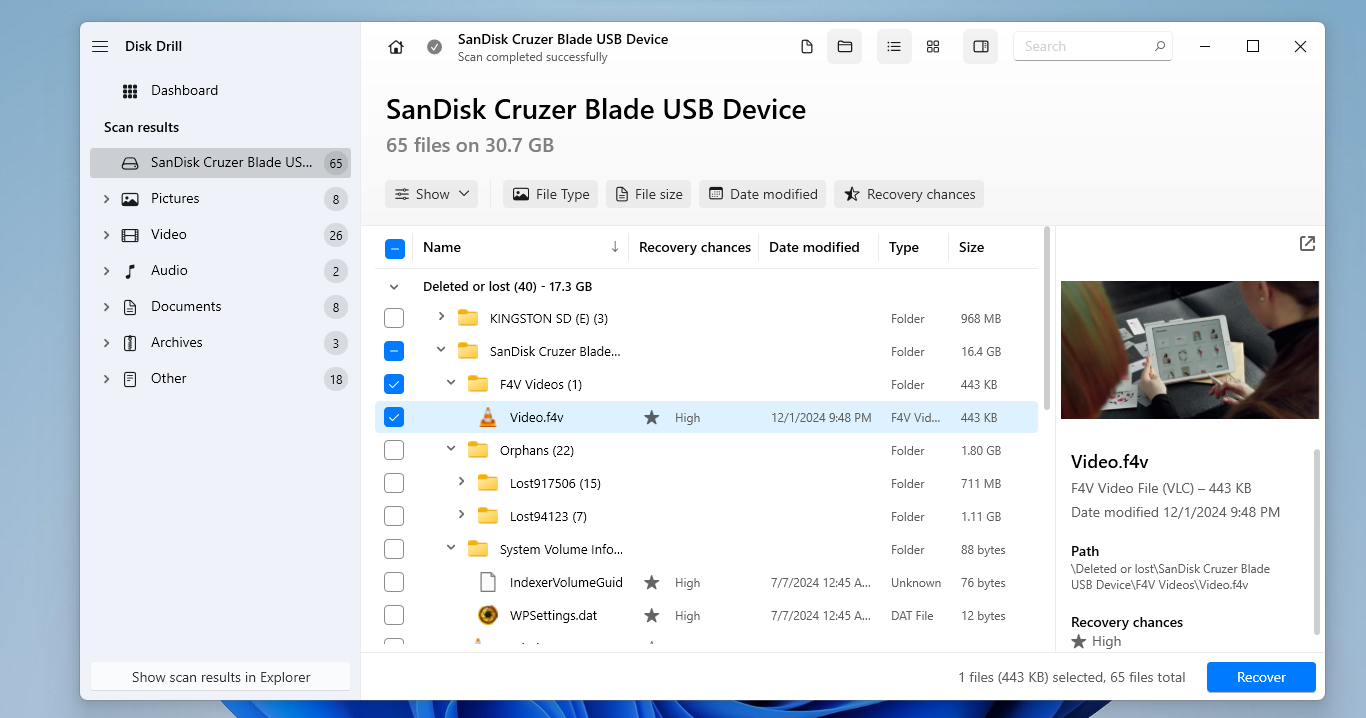
- Use the blue Recover button on the bottom right (it will show Recover All if nothing is selected) to start the recovery process. You will be prompted to select a destination folder to save the recovered F4V file into – just don’t pick a location on the very drive you are recovering from, and you are all good.

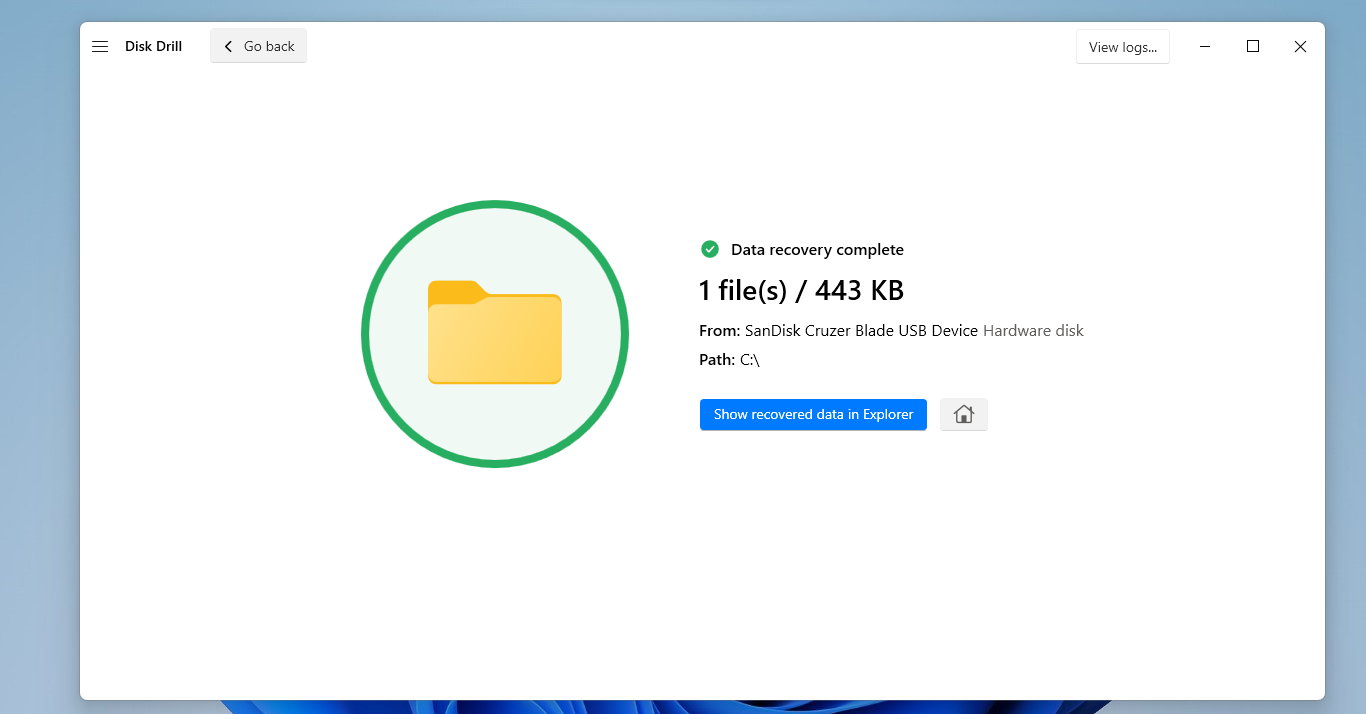
- You will get a success message when the recovery is complete, and can open and run the F4V video.
Are There Any Other Methods to Repair F4V Files?
We have mentioned several different ways of potentially repairing corrupted F4V files, but are there any methods we have neglected to mention? Installing codecs, for example, is advocated in many articles online.
But in practice, incorrect codecs are not behind an F4V file not playing. The format already uses the standard video and audio codecs (H.264 and AAC, respectively), which come pre-installed with every leading media player. This means reinstalling codecs cannot fix broken F4V files at all.
Of course, if you have a way of getting your hands on an older working version of the F4V video, that can sidestep the whole issue. If the file was downloaded, for example, you can just re-download it to check if the problem appeared due to an incomplete download. Similarly, if the file gets corrupted during a copying process, connecting the SD card to the PC again to recopy it might give you a working video.
You can also seek help from specialized communities like r/videography or reach out to a professional video repair service like Treasured by AeroQuartet.
So, What is the Best Way to Repair F4V Files?
The most reliable way of fixing an unreadable F4V file is to use a video repair utility. The problem is that video repair only works in specific cases, so it’s not a perfect solution.
If your F4V video is unplayable due to an interrupted recording (camera losing power, getting bumped, etc.), then yes, a repair service like Clever Online Video Repair can usually rebuild the broken “container” – once provided with a sample of a working video recorded with the same device.
For any other reason like malware, data corruption, or just file encoding issues, this method is unlikely to bear results. You can try converting the video to AVI and using VLC’s FLV repair utility as well, which can fix minor errors, but cannot reverse data corruption.
This article was written by Levin Roy, a Contributing Writer at Handy Recovery Advisor. It was also verified for technical accuracy by Andrey Vasilyev, our editorial advisor.
Curious about our content creation process? Take a look at our Editor Guidelines.