So, a cherished video recorded on your Sony camera isn’t playing. Or maybe, it is playing, but there’s random freezing, stuttering, or warping. Your heart sinks as you mentally prepare to remove that video since there’s no way you can actually get it to play like it should, right? Wrong. Repairing your Sony camera’s corrupted files isn’t just possible, it’s much easier than you’d think.
I tested several solutions and narrowed down the most reliable ones. These range from simply re-inserting the memory card in your Sony camera, to using dedicated online and offline video repair tools. All these fixes are fairly easy to execute and one of them will repair your Sony camera’s corrupt videos.
Fix #1: Insert the Memory Card Back Into the Camera
Before moving on to other fixes, try re-inserting the memory card containing the corrupt video into your Sony camera (while it’s switched off), and then switch on the camera. You’d be surprised how effective this simple method can be, especially when dealing with videos that were interrupted during recording.
But, why does this work?
It’s simple—when recording in formats like MP4 and AVCHD, your Sony camera fails to save crucial video metadata if the recording is rudely stopped because of a dead battery or power loss. Re-inserting the memory card allows it to finish writing this info to the video, making it playable again. That’s why it’s one of the most oft-recommended fixes on forums like Reddit.
However, this method only works if video corruption is limited to its metadata, and the raw video and audio information of the video is intact.
Pro Tip: Create a ZIP file of the corrupt Sony video, and compare it to the size of the original video. If the archive is unrealistically smaller in size—say, your video is around 1 GB and the ZIP file comes up to around 200 MB—it means the video contains little to no actual data, making recovery almost impossible.
Fix #2: Use an Online Video Repair Service
If re-inserting the memory card didn’t fix the video, try using an online video repair service. It’s easy—upload the corrupt video to the video repair website, then upload a healthy video recorded on the same Sony camera with similar recording settings, and click repair.
Choosing a good video repair service can be time consuming. Google, “video repair websites,” and you’ll be greeted with dozens of websites, all claiming to be the best. From the dozen or so video repair websites I’ve tested, the one that’s actually worth your time, is Clever Online Video Repair. The best part? It is completely free.
In addition to repairing MP4 (HEVC/H.265) videos used by most Sony cameras, it also supports MOV, DAT, 3GP, 3G2, M4V, M4A, M4R, M4B, F4V, F4A, F4B, GIFV, and QT repair. But what really seals the deal for me is Clever Online Video Repair’s support for videos up to 5 GB in size, compared to its competitors that only support videos up to 500 MB in size.
Important: You will need a healthy video file recorded on the same Sony camera as the corrupt one for this method to work.
Here’s how to perform Sony video file repair online using Clever Online Video Repair:
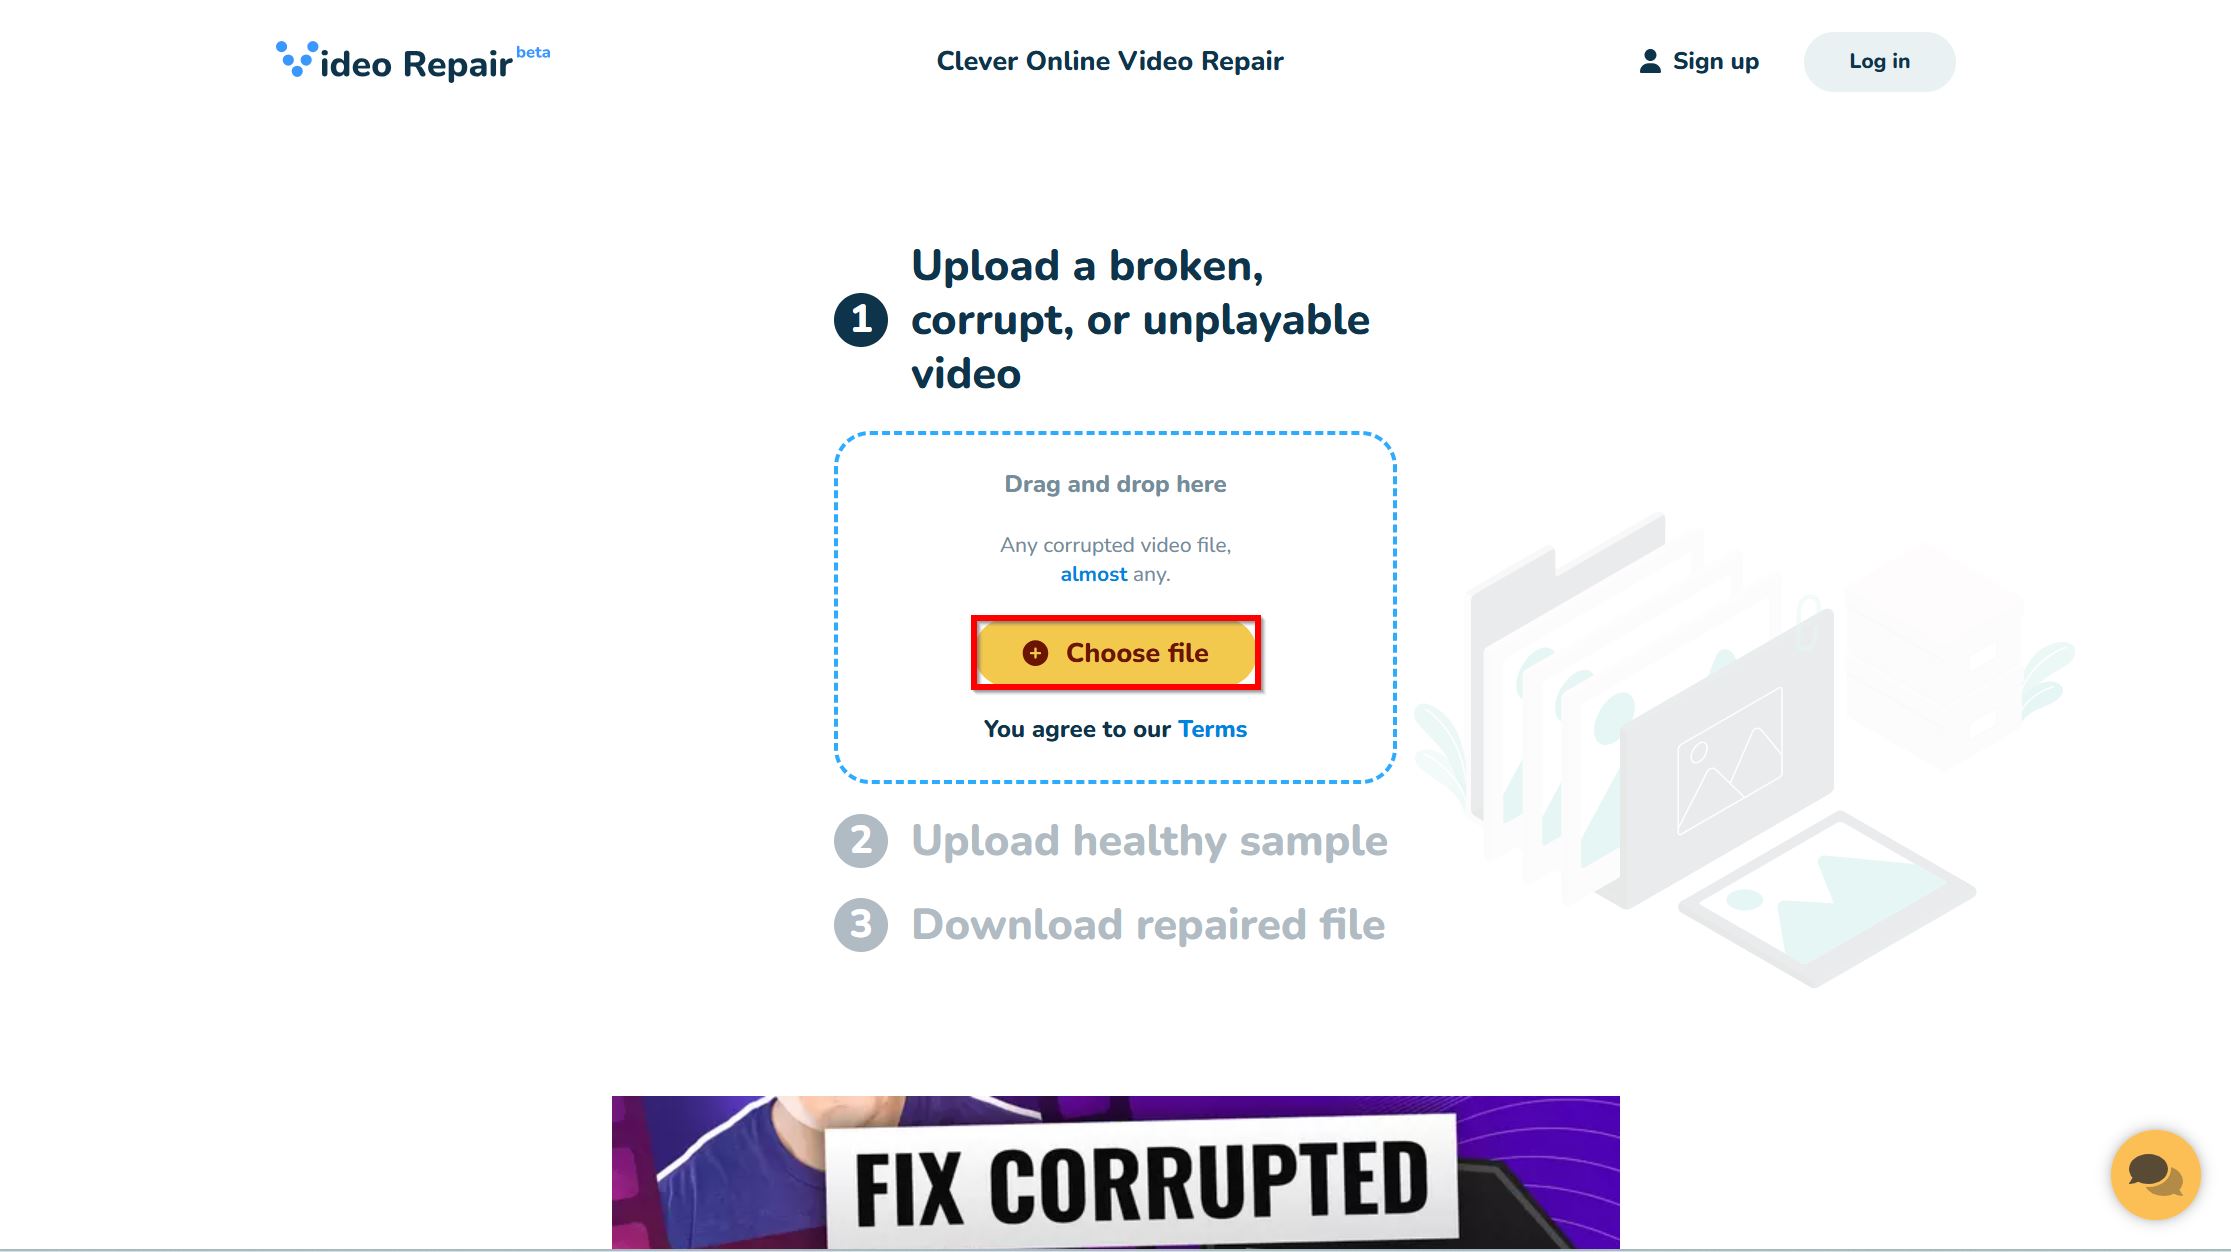
- Visit the Clever Online Video Repair website.
- Click on Choose file, browse for the corrupt video from your Sony camera, select it, and click Open.
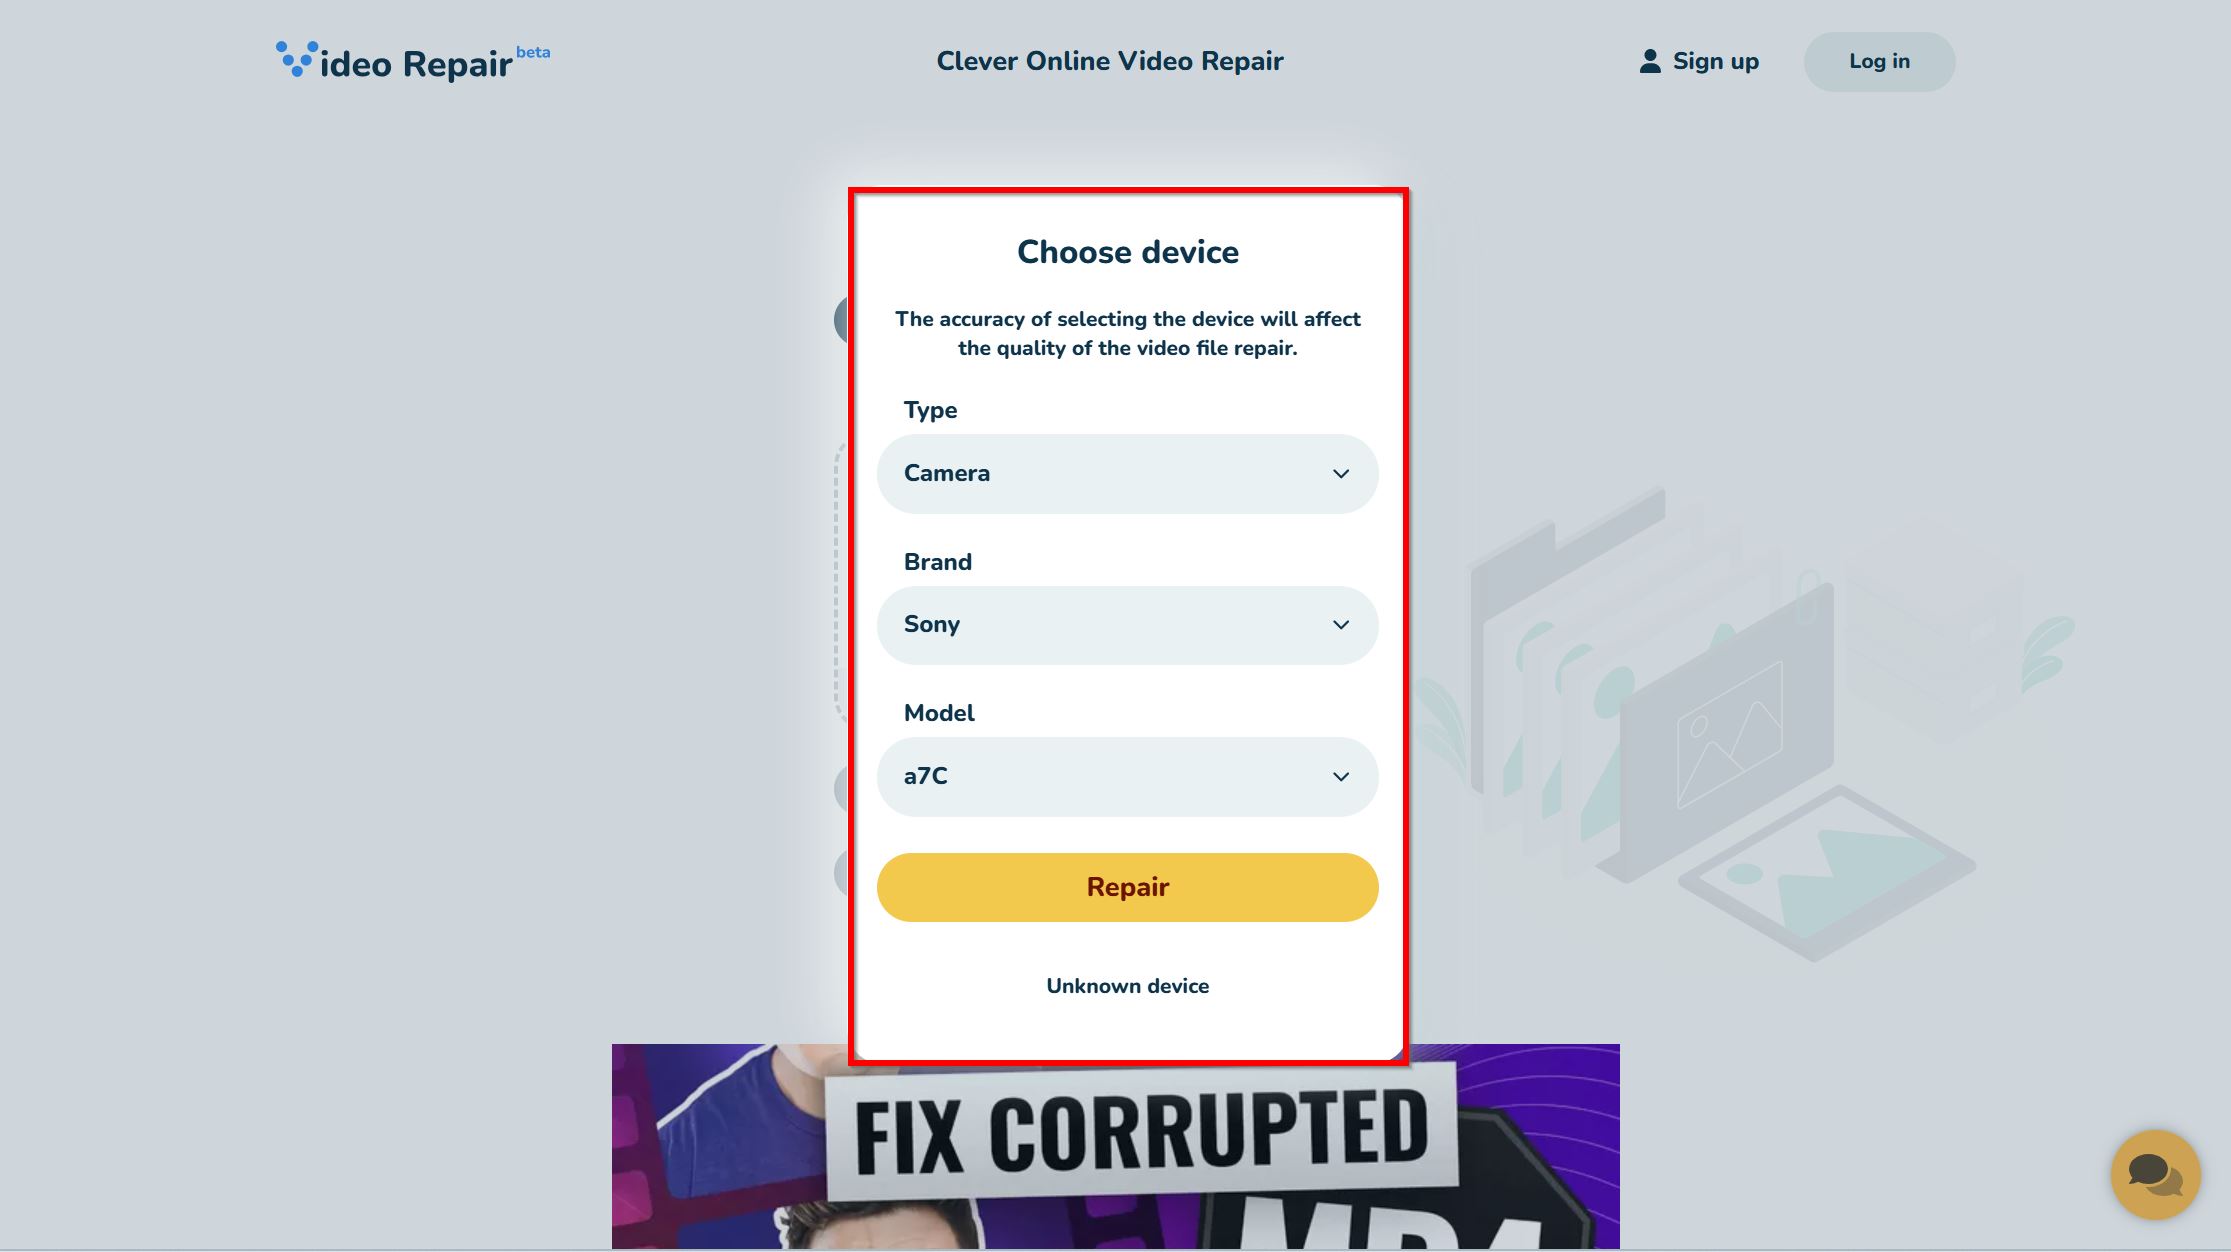
- From the drop-down menus, select the model of your Sony camera, and click Repair. If the model isn’t listed, click on Unknown device.
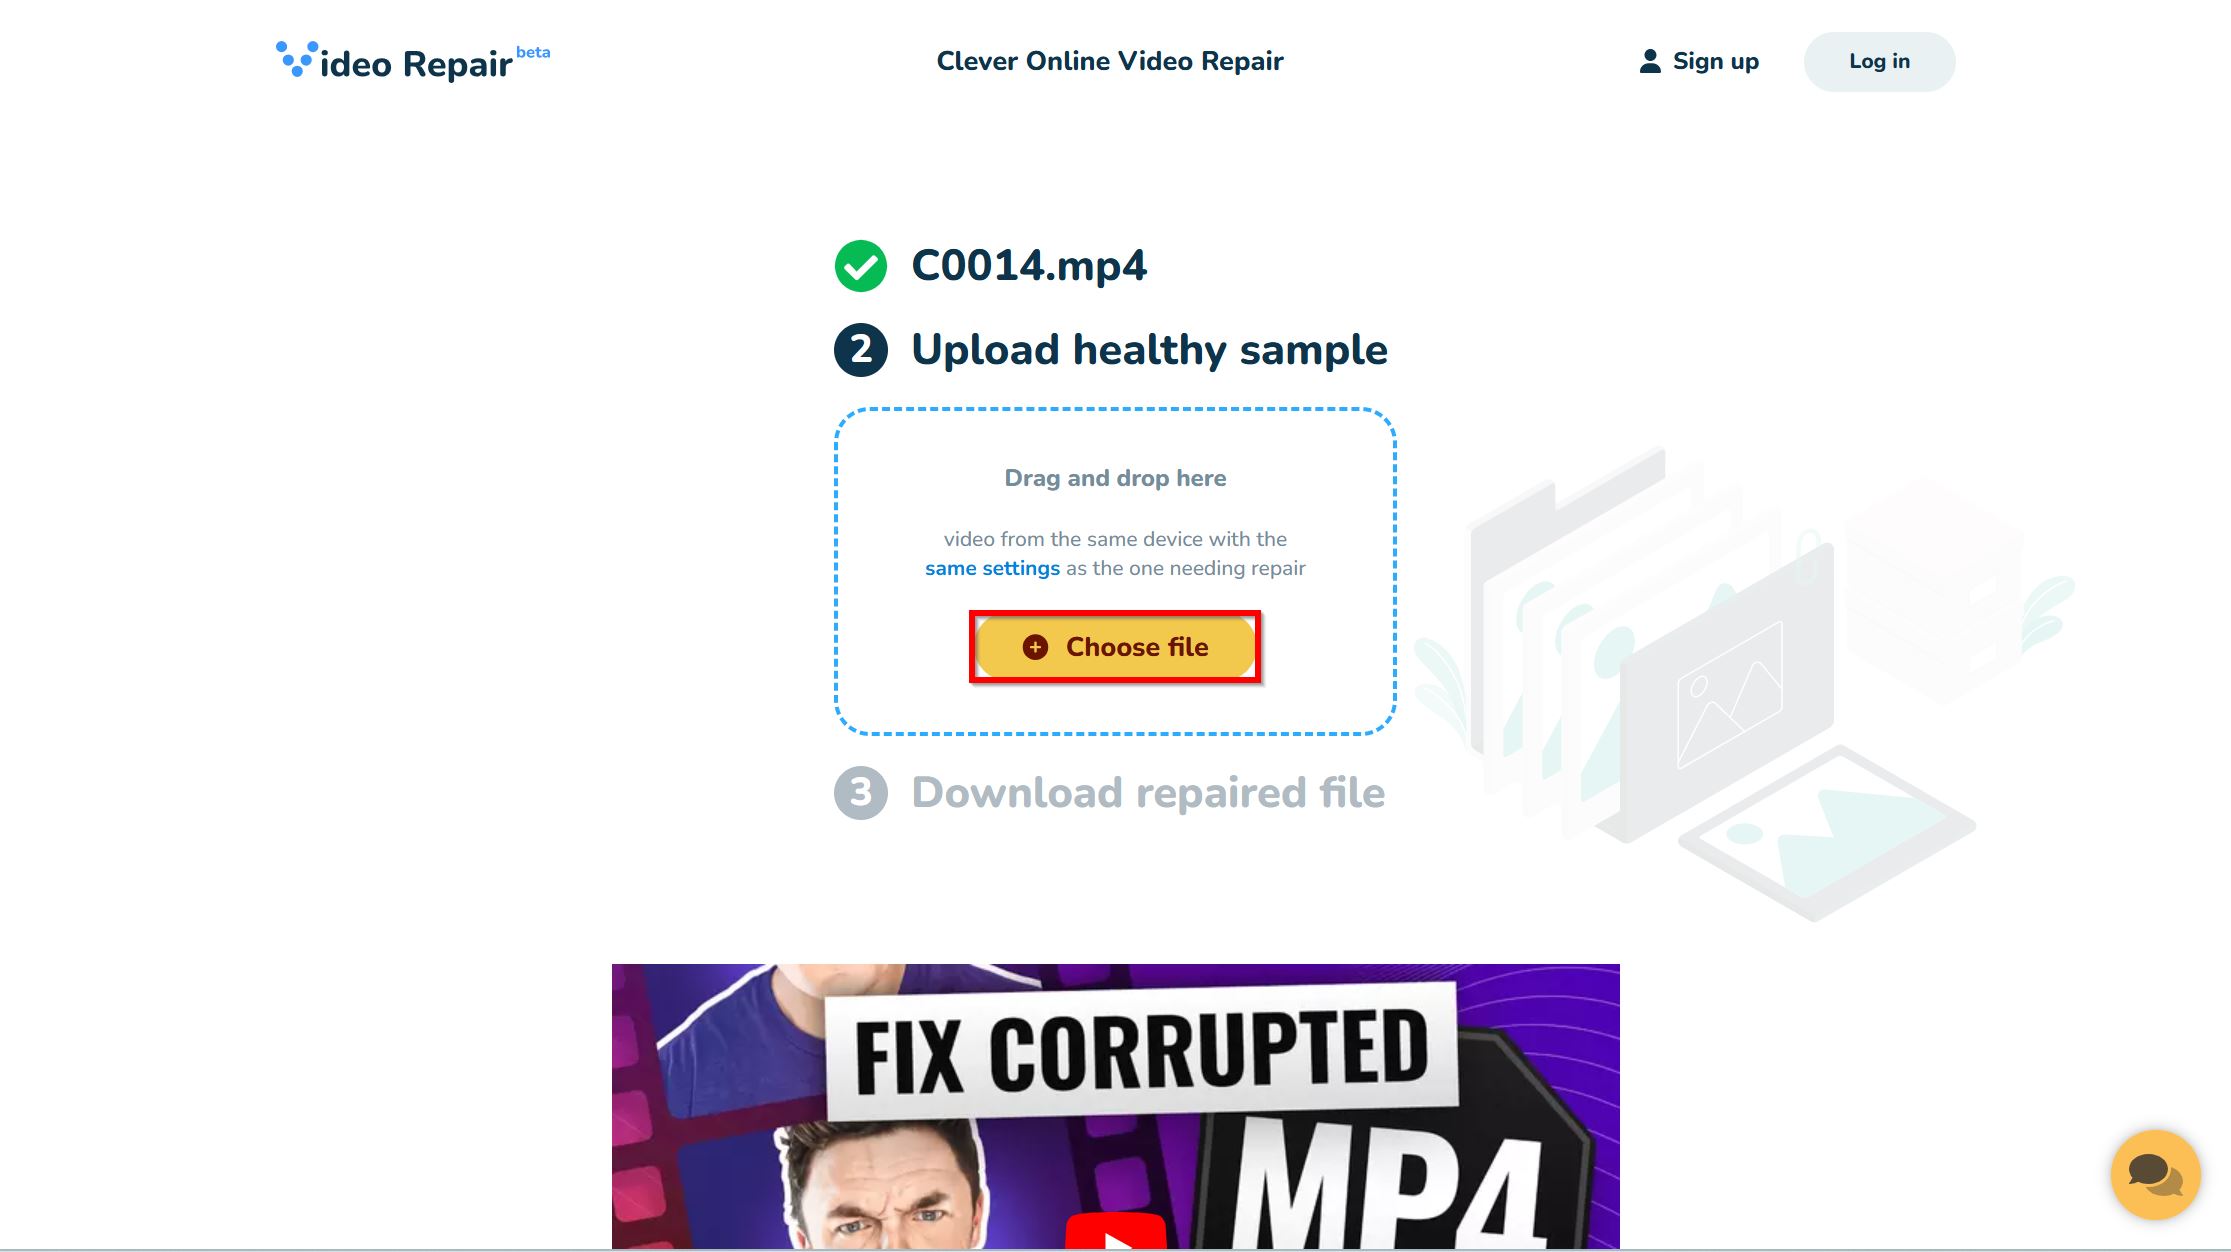
- Click on Choose file, select a healthy video recorded on your Sony camera, and click Open.
- Register on the website to begin repairing the video. If you choose not to, your uploaded video will be deleted from Clever Online Video Repair’s servers within 24 hours.
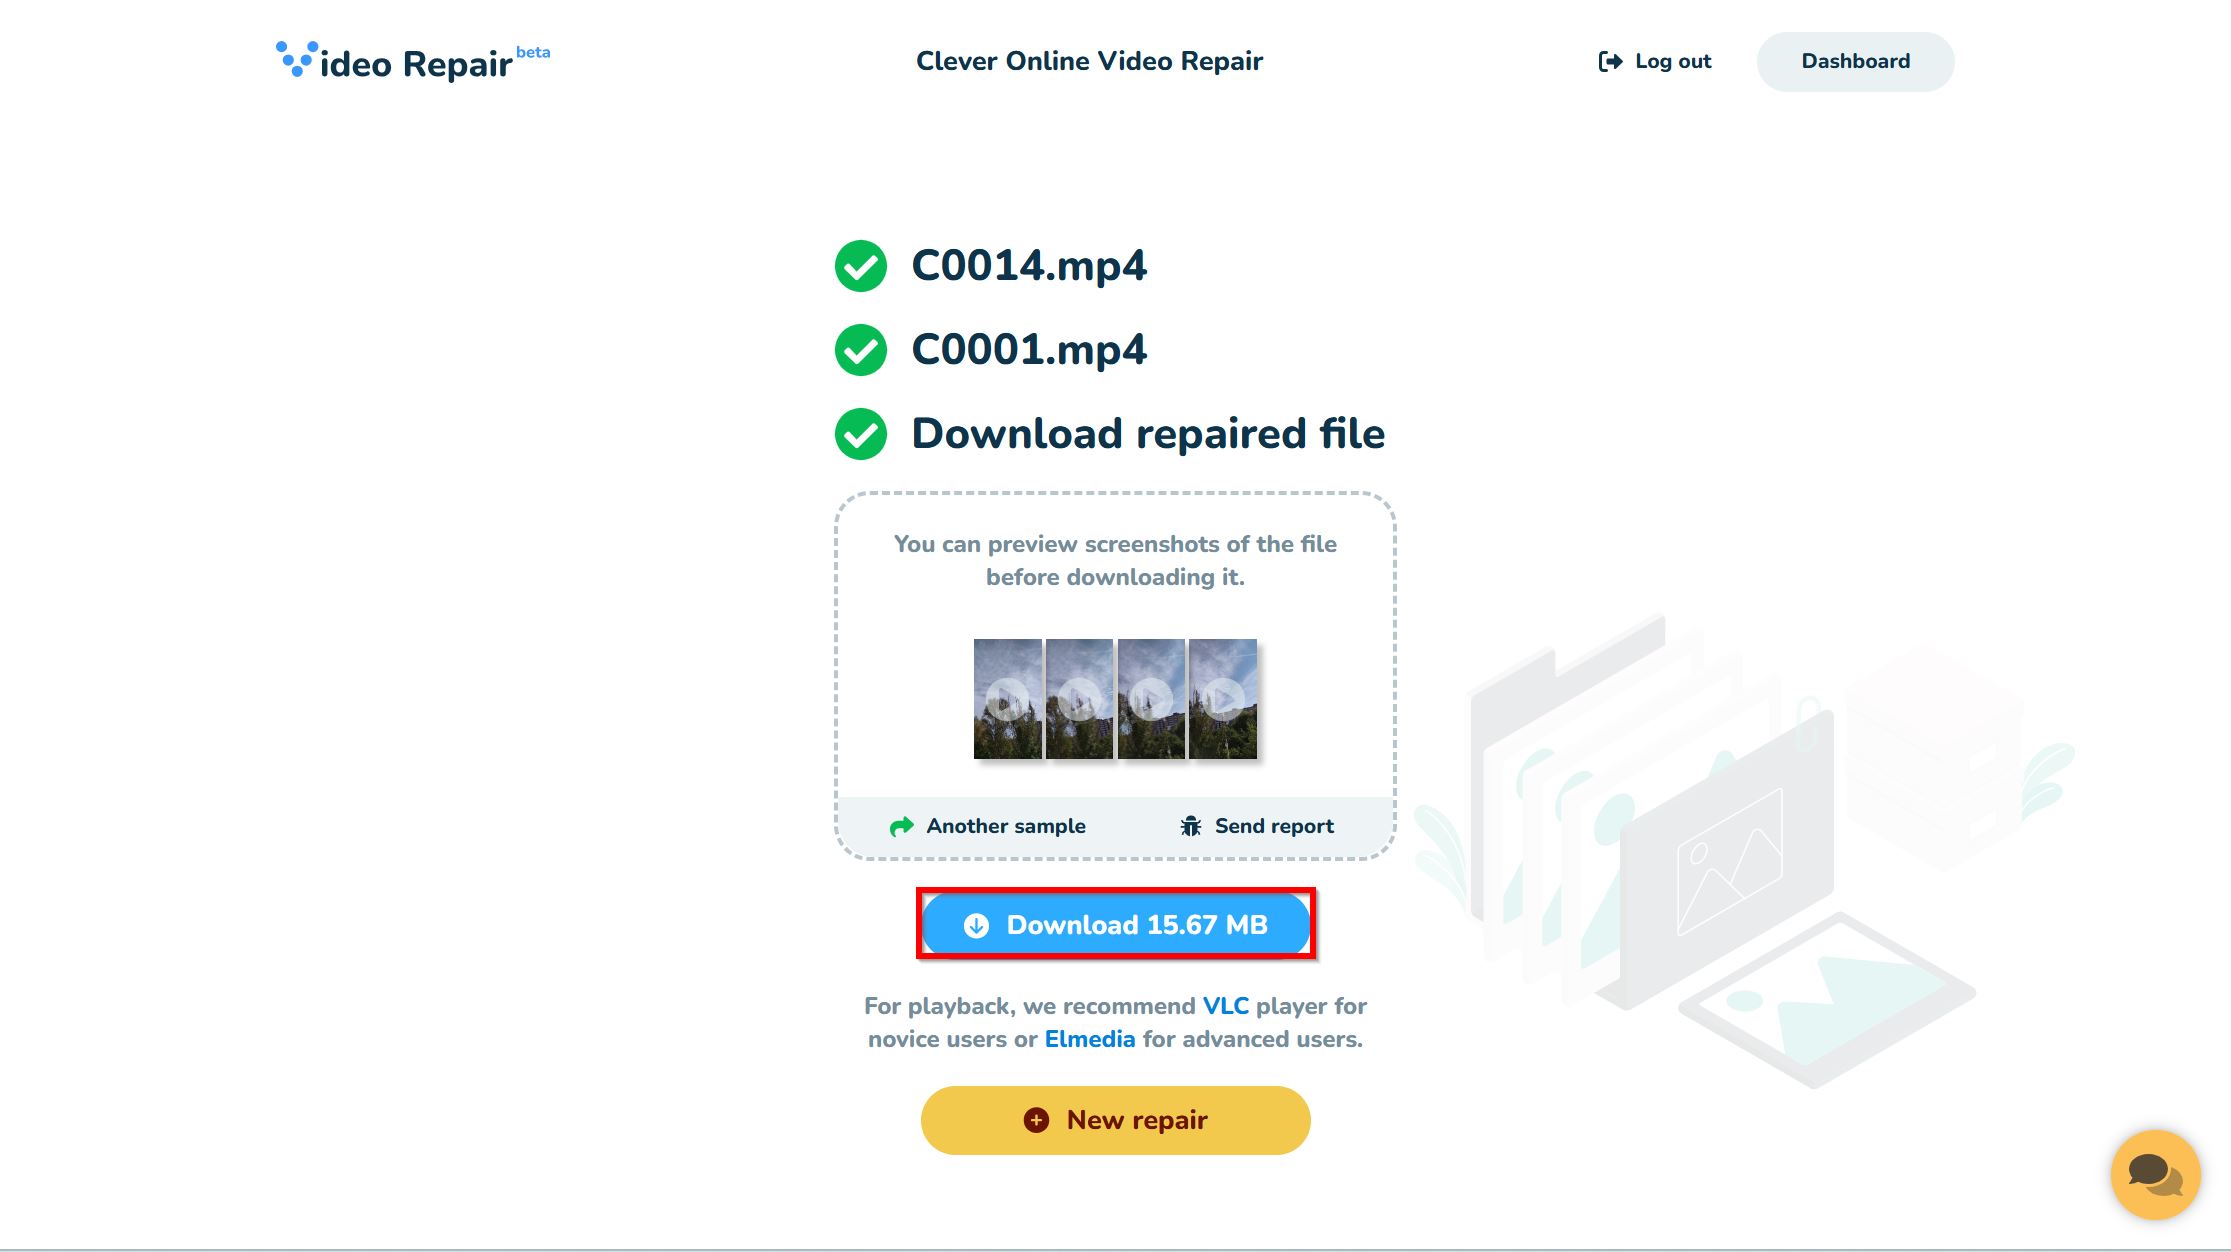
- Preview the screenshots of the repaired video to check its quality.
- If you’re satisfied with the video quality, click on Download.
Fix #3: Use VLC Media Player’s Always Fix Option
Arguably the world’s most popular third-party media player, VLC also doubles up as a video repair tool. But there’s one catch—its repair feature only supports AVI files. So, for this to work, you’ll need to change the corrupt Sony video’s file extension to AVI by renaming. If that doesn’t work, re-encode the video to AVI and try again. Further down in the article, I explain in detail how to convert/re-encode videos using a video transcoder, but VLC too has its own conversion feature that you can access using the Media > Convert/Save menu in the program.
To make it sound even easier, you should follow this sequence of steps: change the file name to AVI, and then try the guide below. If it doesn’t work, fully convert the file to AVI and repeat the procedure.
Note: VLC’s Always fix feature isn’t a substitute for dedicated video repair tools. It only fixes minor corruption, like a damaged index, or a few glitchy/missing frames, and that too depends on whether the video was successfully re-encoded to AVI. It definitely won’t work when dealing with more serious issues like the “MOOV atom not found” error.
Here’s how to enable VLC’s Always fix feature and use it for Sony video file repair:
- Download and install VLC Media Player.
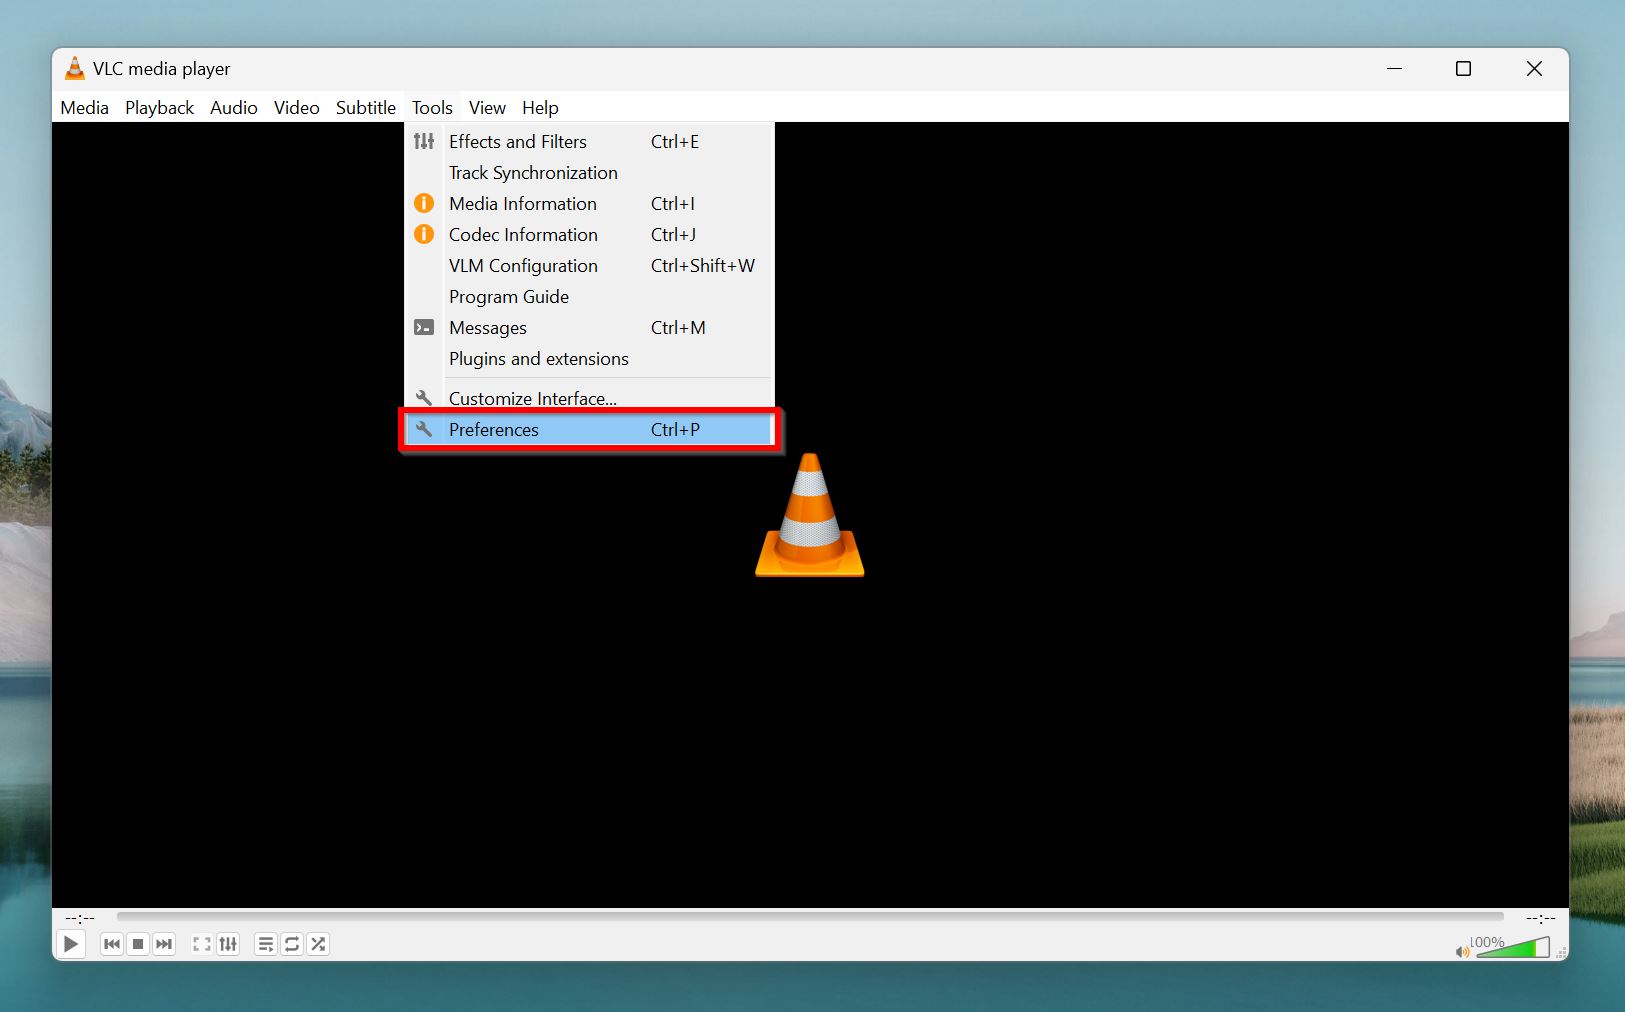
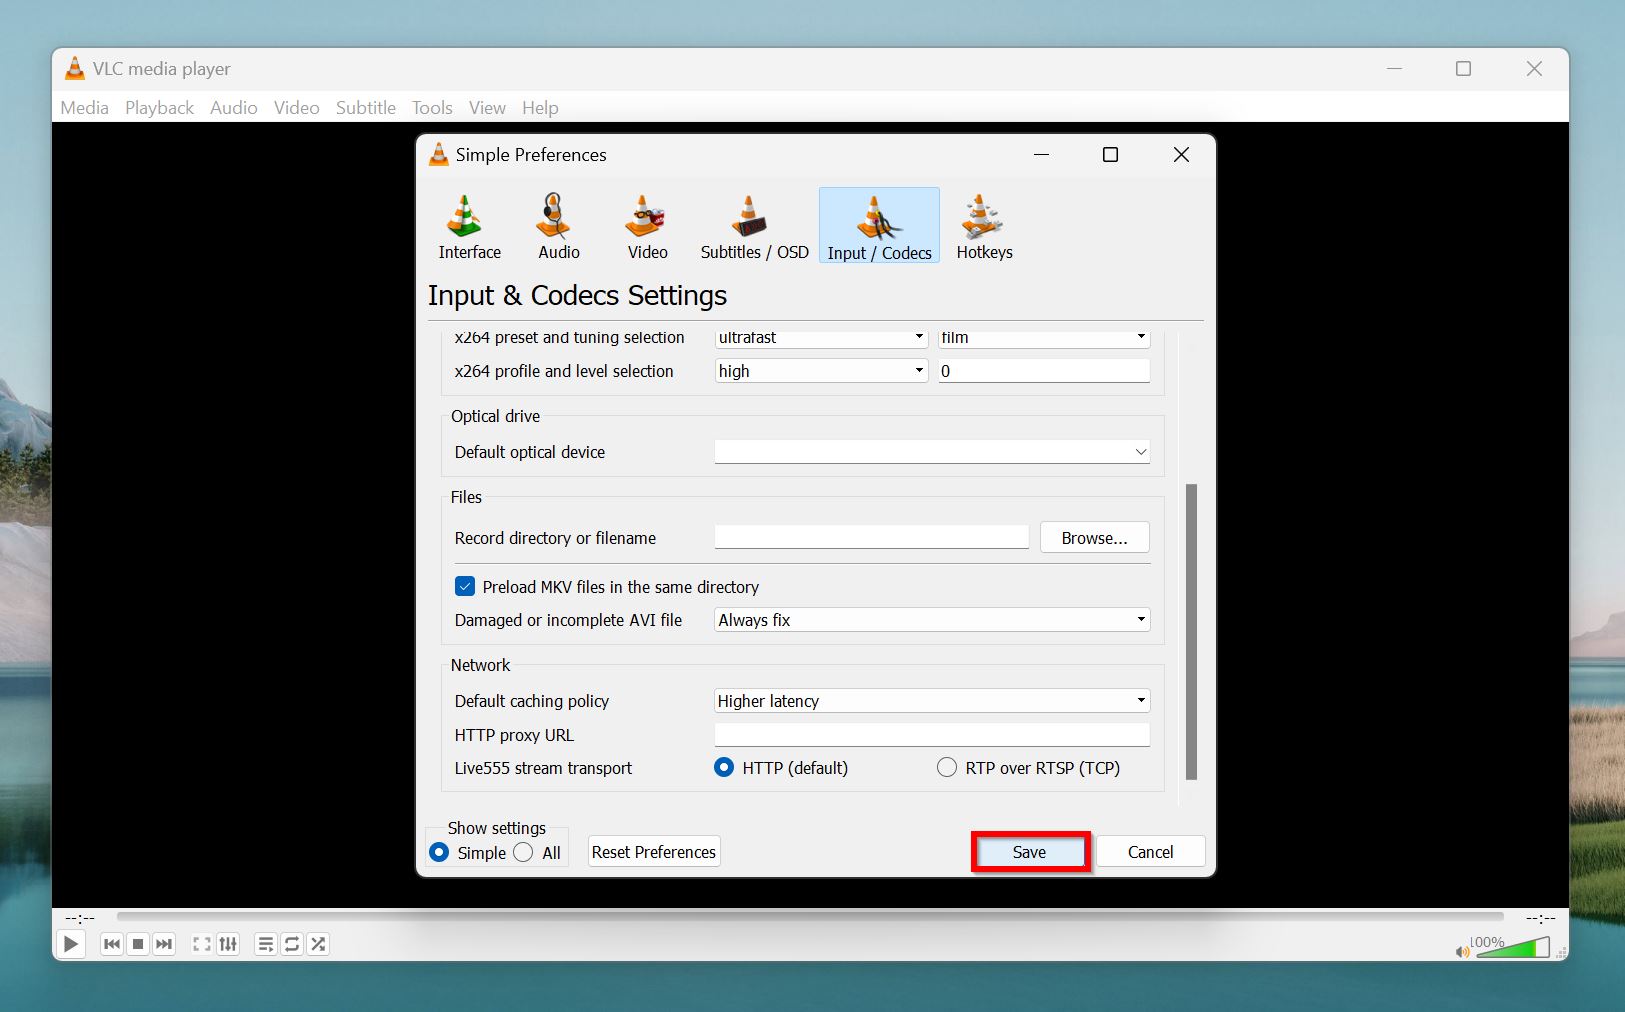
- On Windows, open VLC, and click on Tools > Preferences. If you’re on a Mac, click on VLC > Settings….
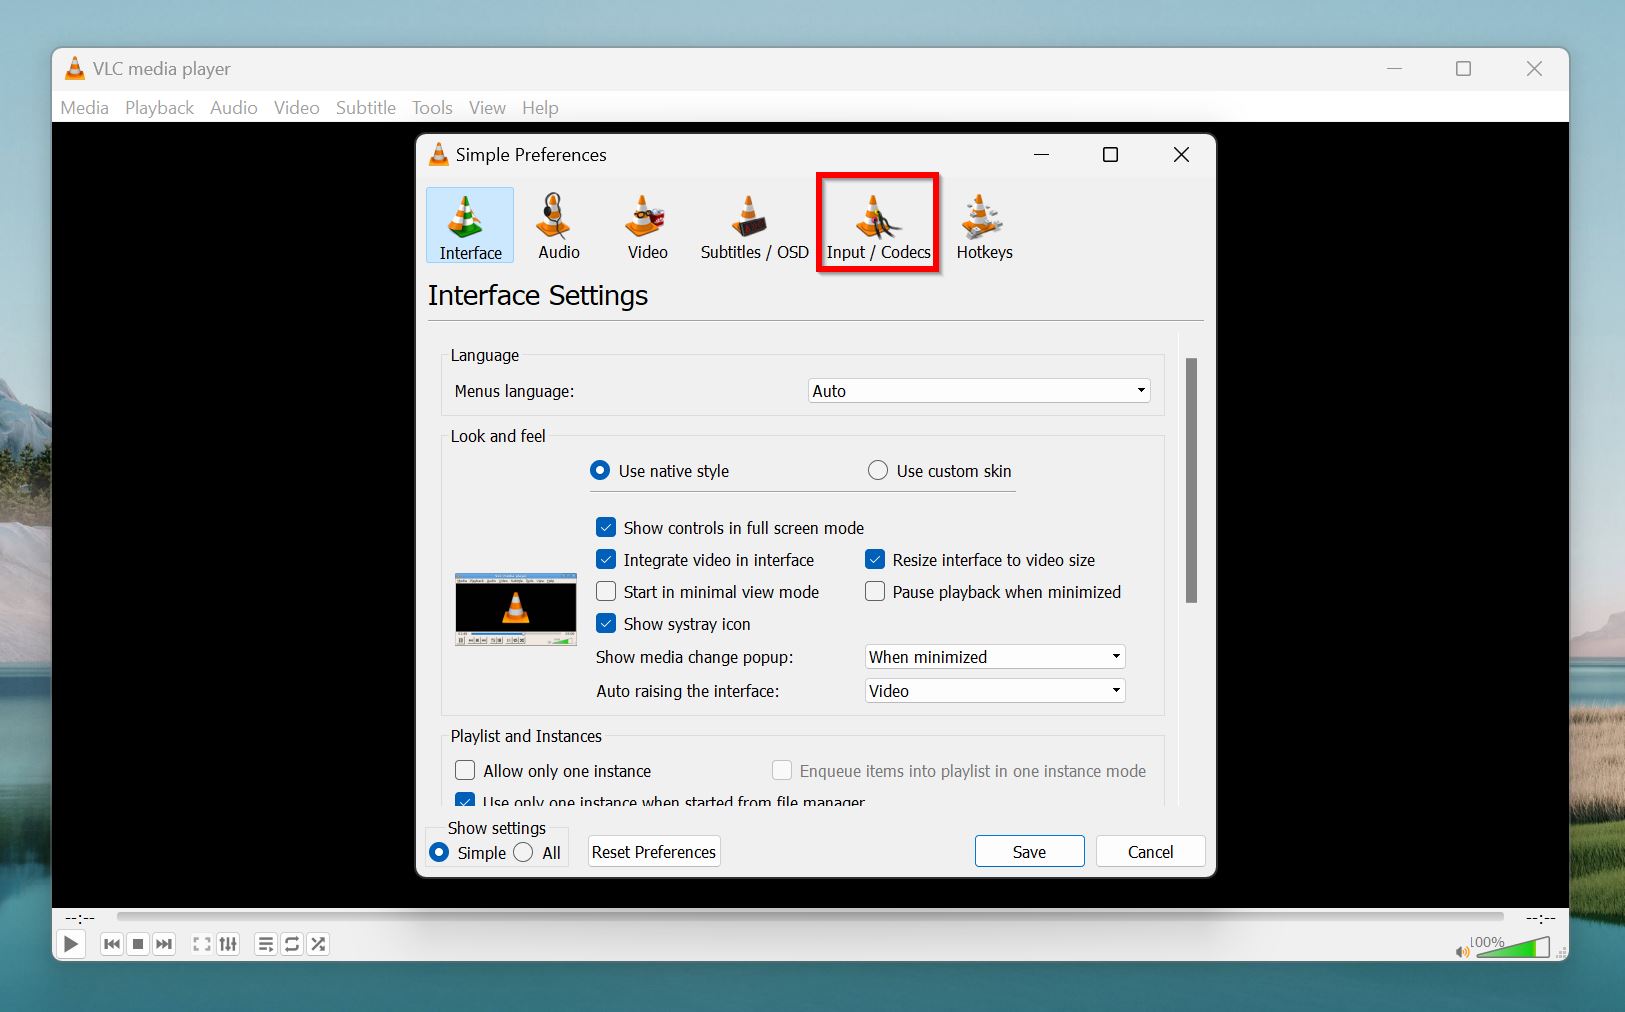
- Click the Input/Codecs tab.
- Click on the Damaged or incomplete AVI file drop-down menu, and choose the Always fix option.
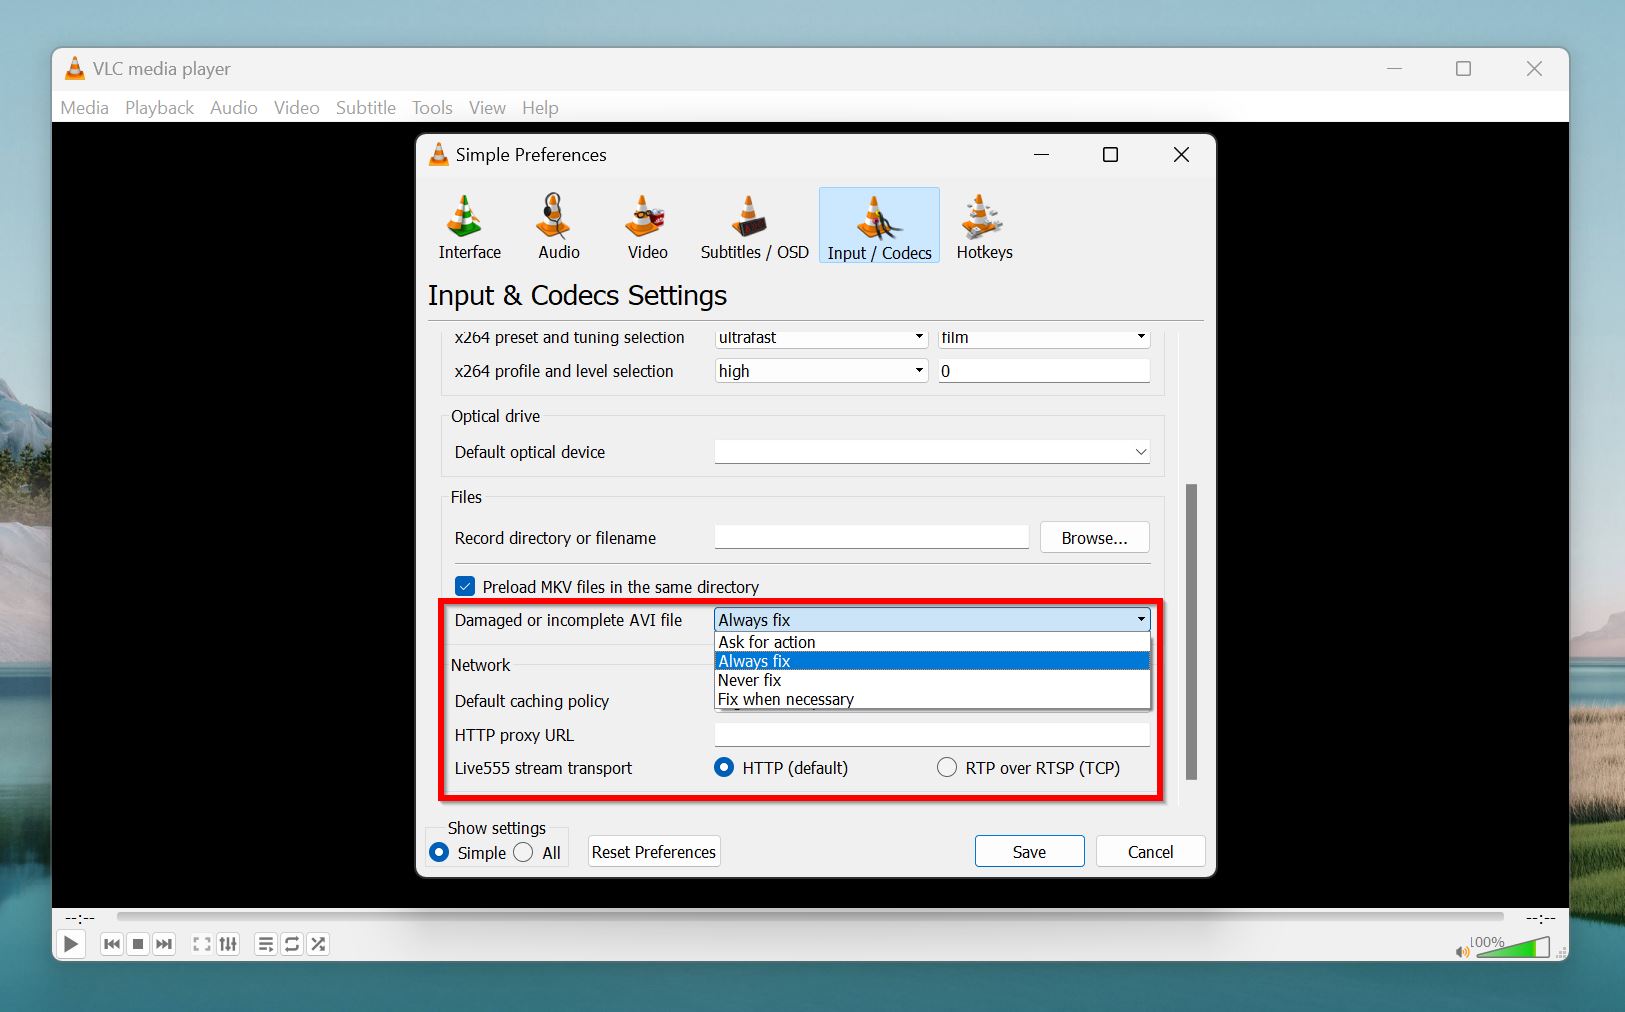
- Click Save.
- Open the corrupt Sony video you’ve renamed to .AVI, using VLC.
Fix #4: Use MP4 Repair
In case you’re hesitant to use online video repair tools, MP4 Repair is an excellent alternative that you can download and use offline. It’s essentially a GUI version of a popular command-line based video repair tool called Untrunc. With MP4 repair, you get the best of both worlds—the excellent functionality of Untrunc, and the ease-of-use of a GUI-based video repair program.
It supports MP4, MOV, M4V, and 3GP formats, as long as they use the AVC/H.264 compression standard. MP4 Repair specifically targets “unfinished” or truncated video files that may not have been finalized correctly.
For MP4 Repair to work, you’ll need a healthy sample video recorded on the same Sony camera. Once you have that, you can proceed to fix the corrupt Sony video:
- Download MP4 Repair Untrunc GUI, and extract the downloaded ZIP file.
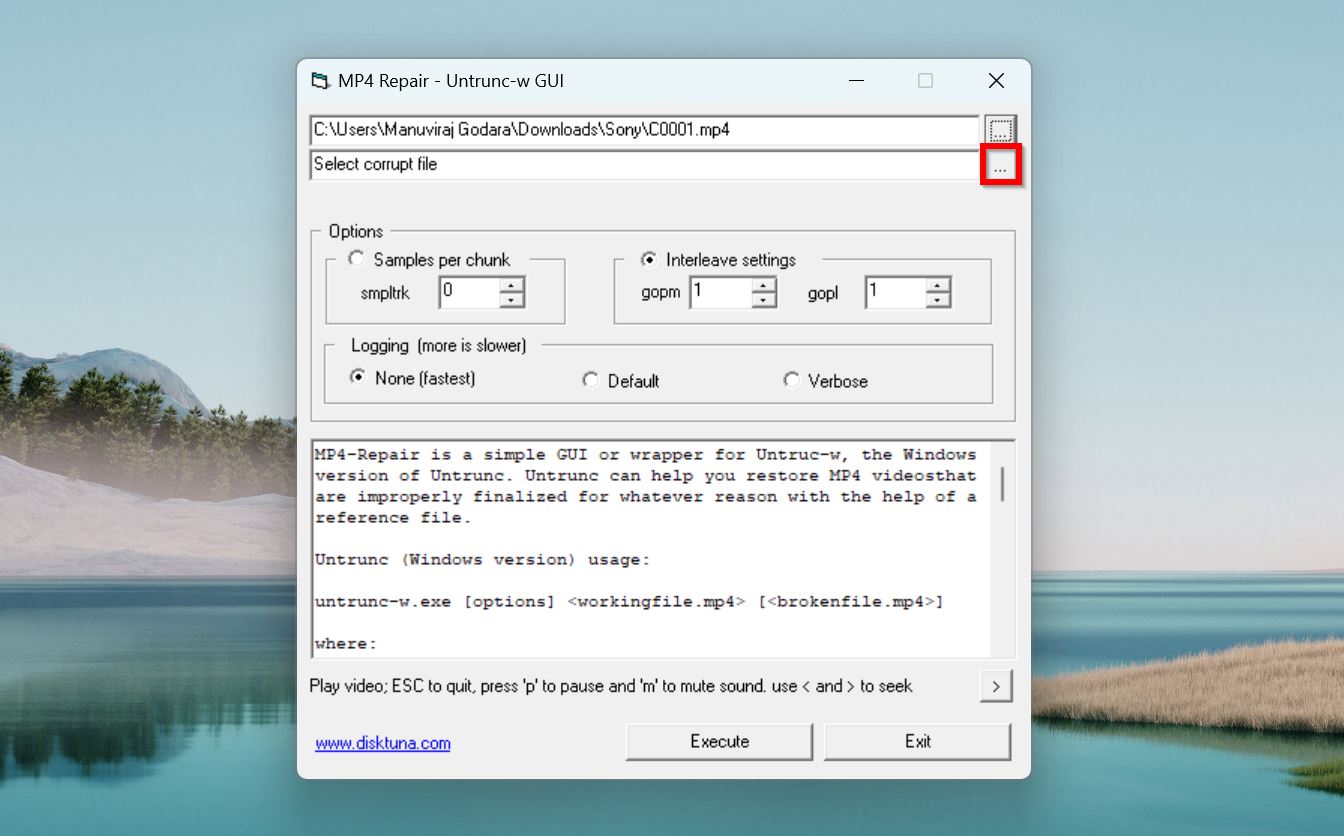
- Click on the three dots next to Select reference file, find a healthy video recorded on the same Sony camera and double-click it.

- Next, click on the three dots next to Select corrupt file, browse for the corrupt Sony video and double-click it.
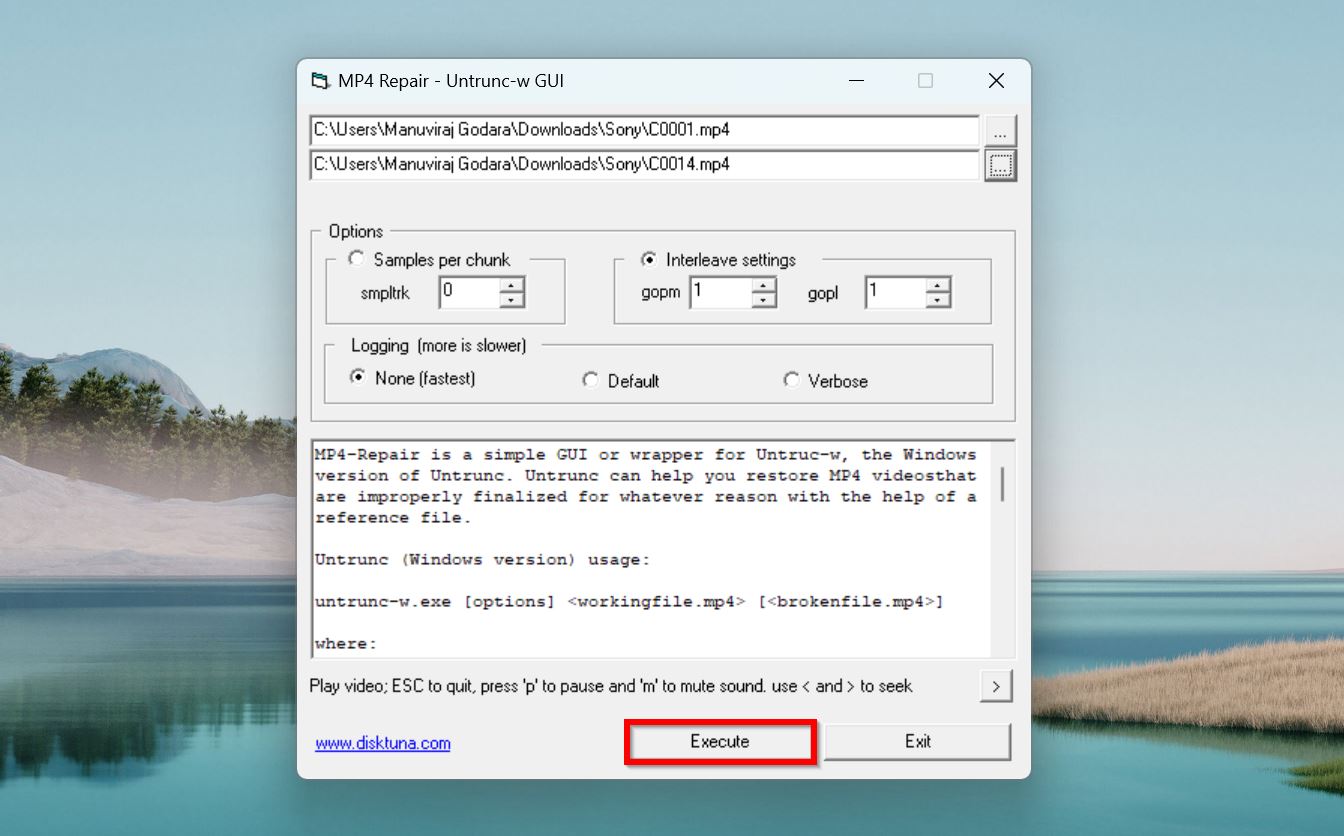
- Click the Execute button, and MP4 Repair will repair the corrupt Sony video.
Fix #5: Use Shutter Encoder
Shutter Encoder is an excellent free, open-source video transcoder you can use to fix your Sony camera’s corrupted files. It uses FFMPEG—a collection of libraries and programs designed for processing audio and video files—under the hood. Shutter Encoder is essentially a user-friendly, GUI wrapper for FFMPEG. There’ve been times when I haven’t had healthy sample videos at hand, and I’ve used Shutter Encoder to great success.
Now, there are two approaches you can take when using a video transcoder to fix corrupt videos—remuxing, or re-encoding.
Remuxing takes the audio, video, and subtitle streams of a video from a container, say MP4, and puts them into the same container, or another container like MKV. Think of it as picking a book from a flimsy bookshelf and placing it, either on a sturdier version of the same bookshelf, or another, much better bookshelf. Remuxing is faster and less resource-intensive than re-encoding, but it’s only effective at dealing with container level corruption, i.e., misaligned indexes or missing metadata.
During re-encoding, the video is decoded and uncompressed, then re-encoded and converted into the same, or different format. It’s rebuilt from the ground-up. Re-encoding takes much longer and uses much more computing power. But, it’s also more effective than remuxing—allowing you to fix a wider range of video corruption.
I suggest taking a combined approach. First, remux the video and see if it fixes the video. If not, proceed to re-encoding it. Here’s how to remux and re-encode a corrupt Sony video in Shutter Encoder:
Part 1: Remux the Video
- Download and install Shutter Encoder.
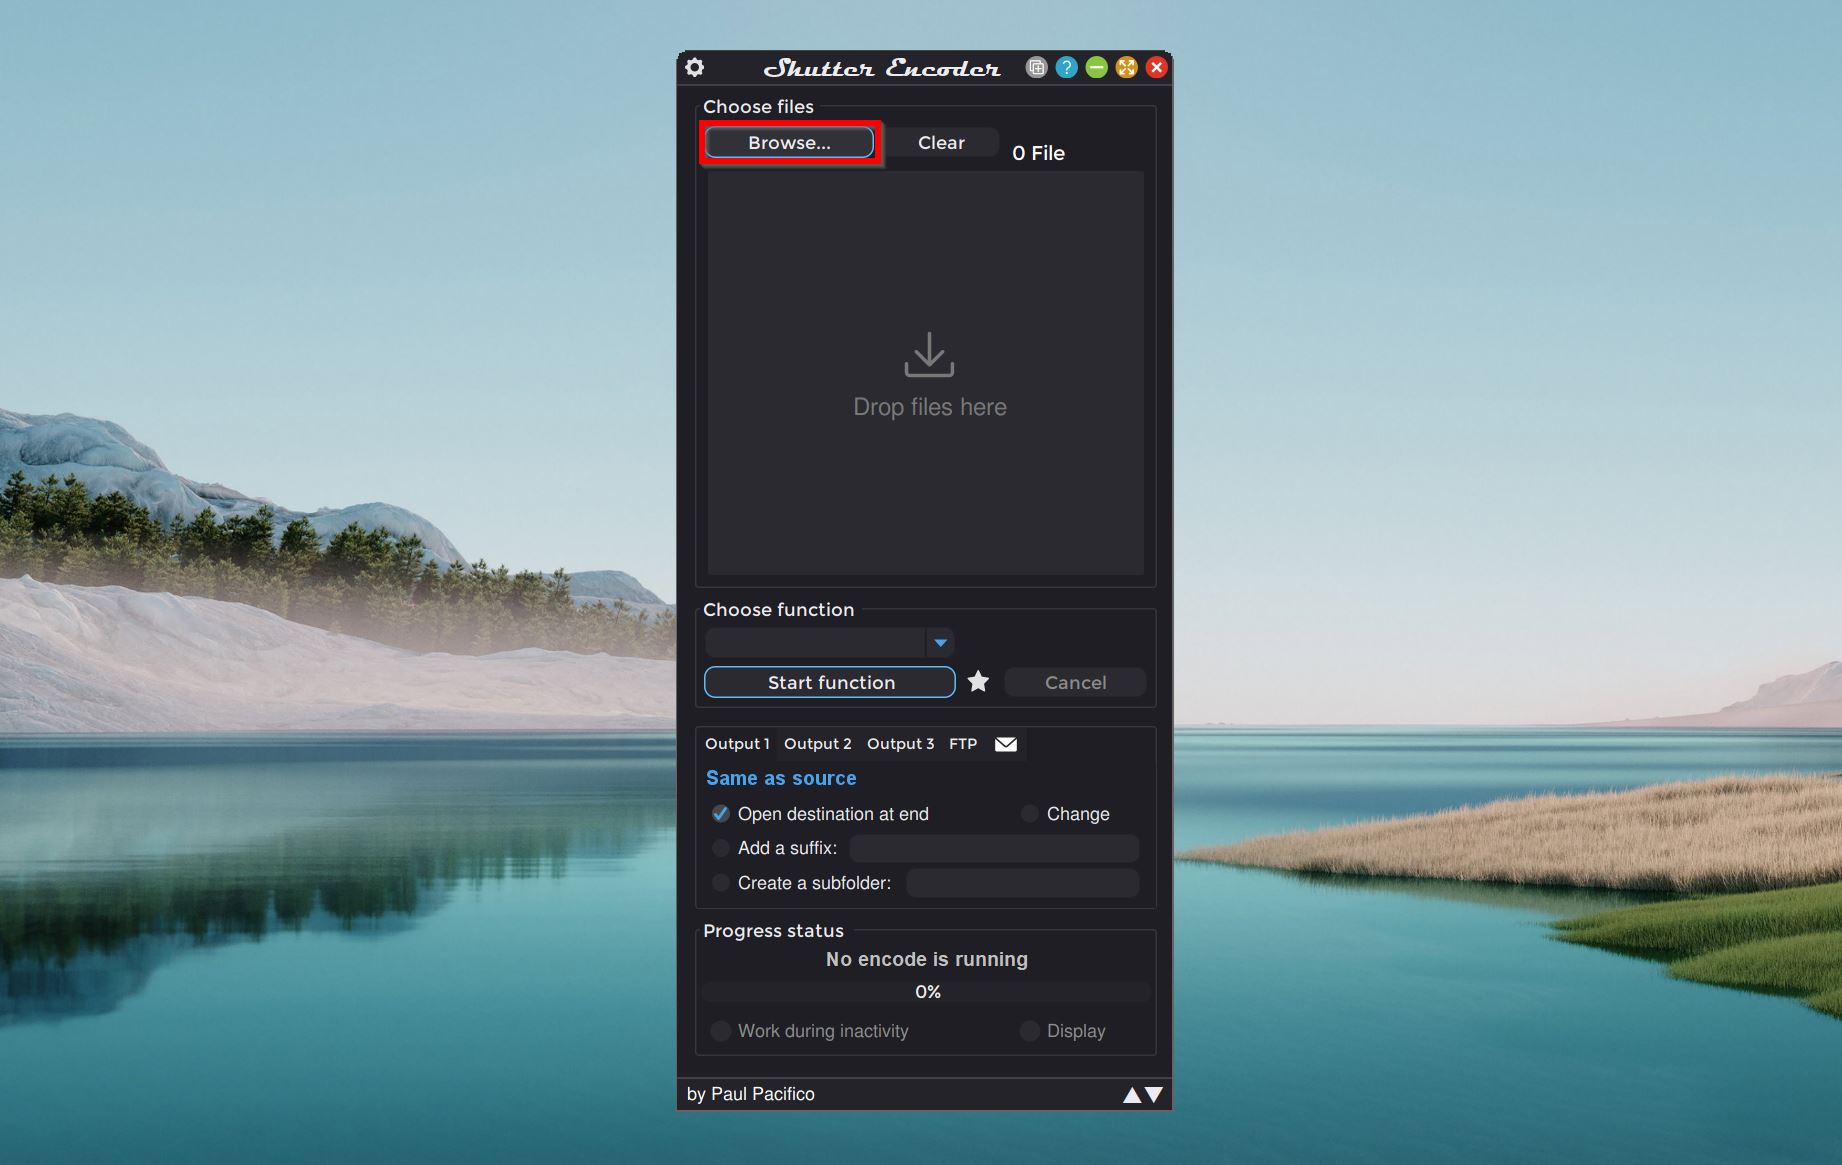
- Open Shutter Encoder, and click Browse. Look for the corrupt Sony video and double-click it.
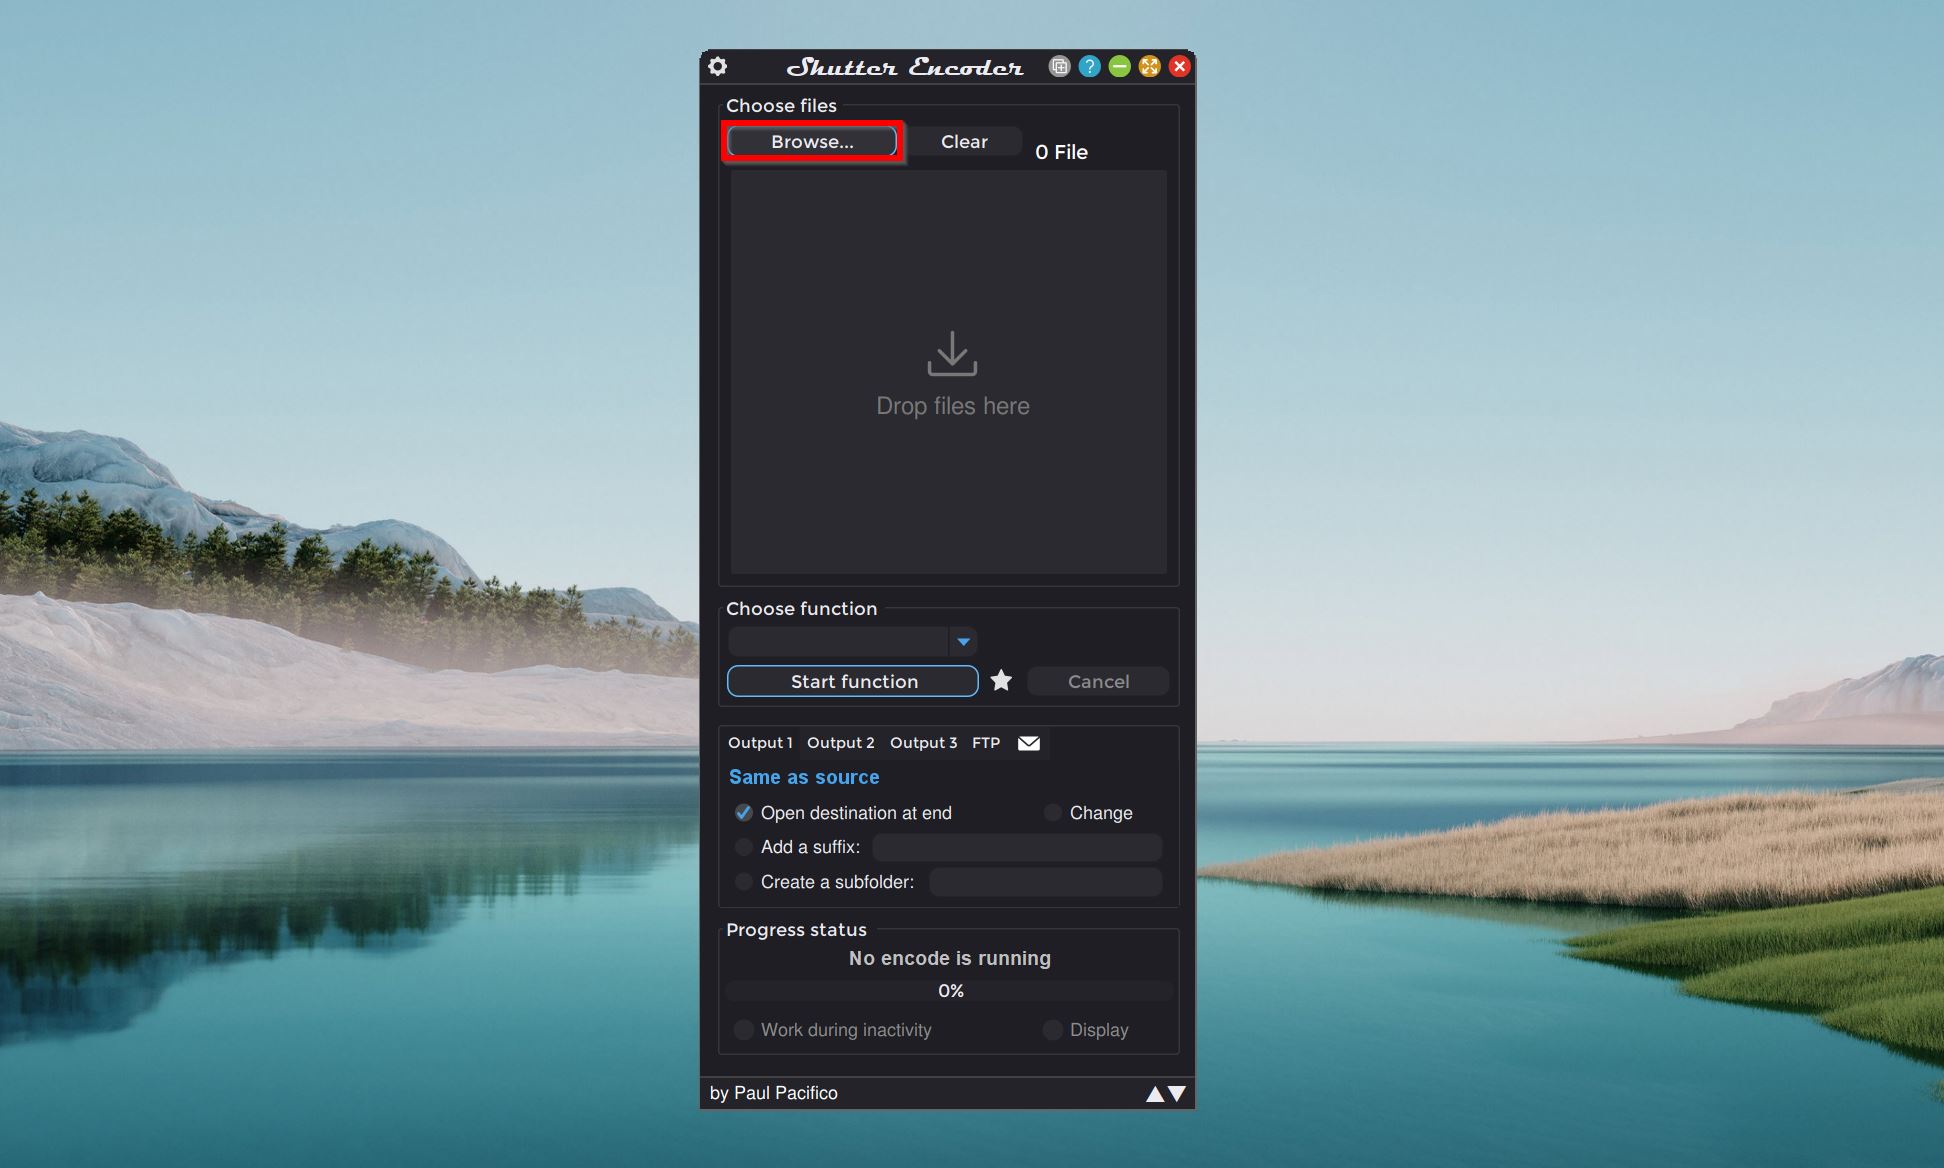
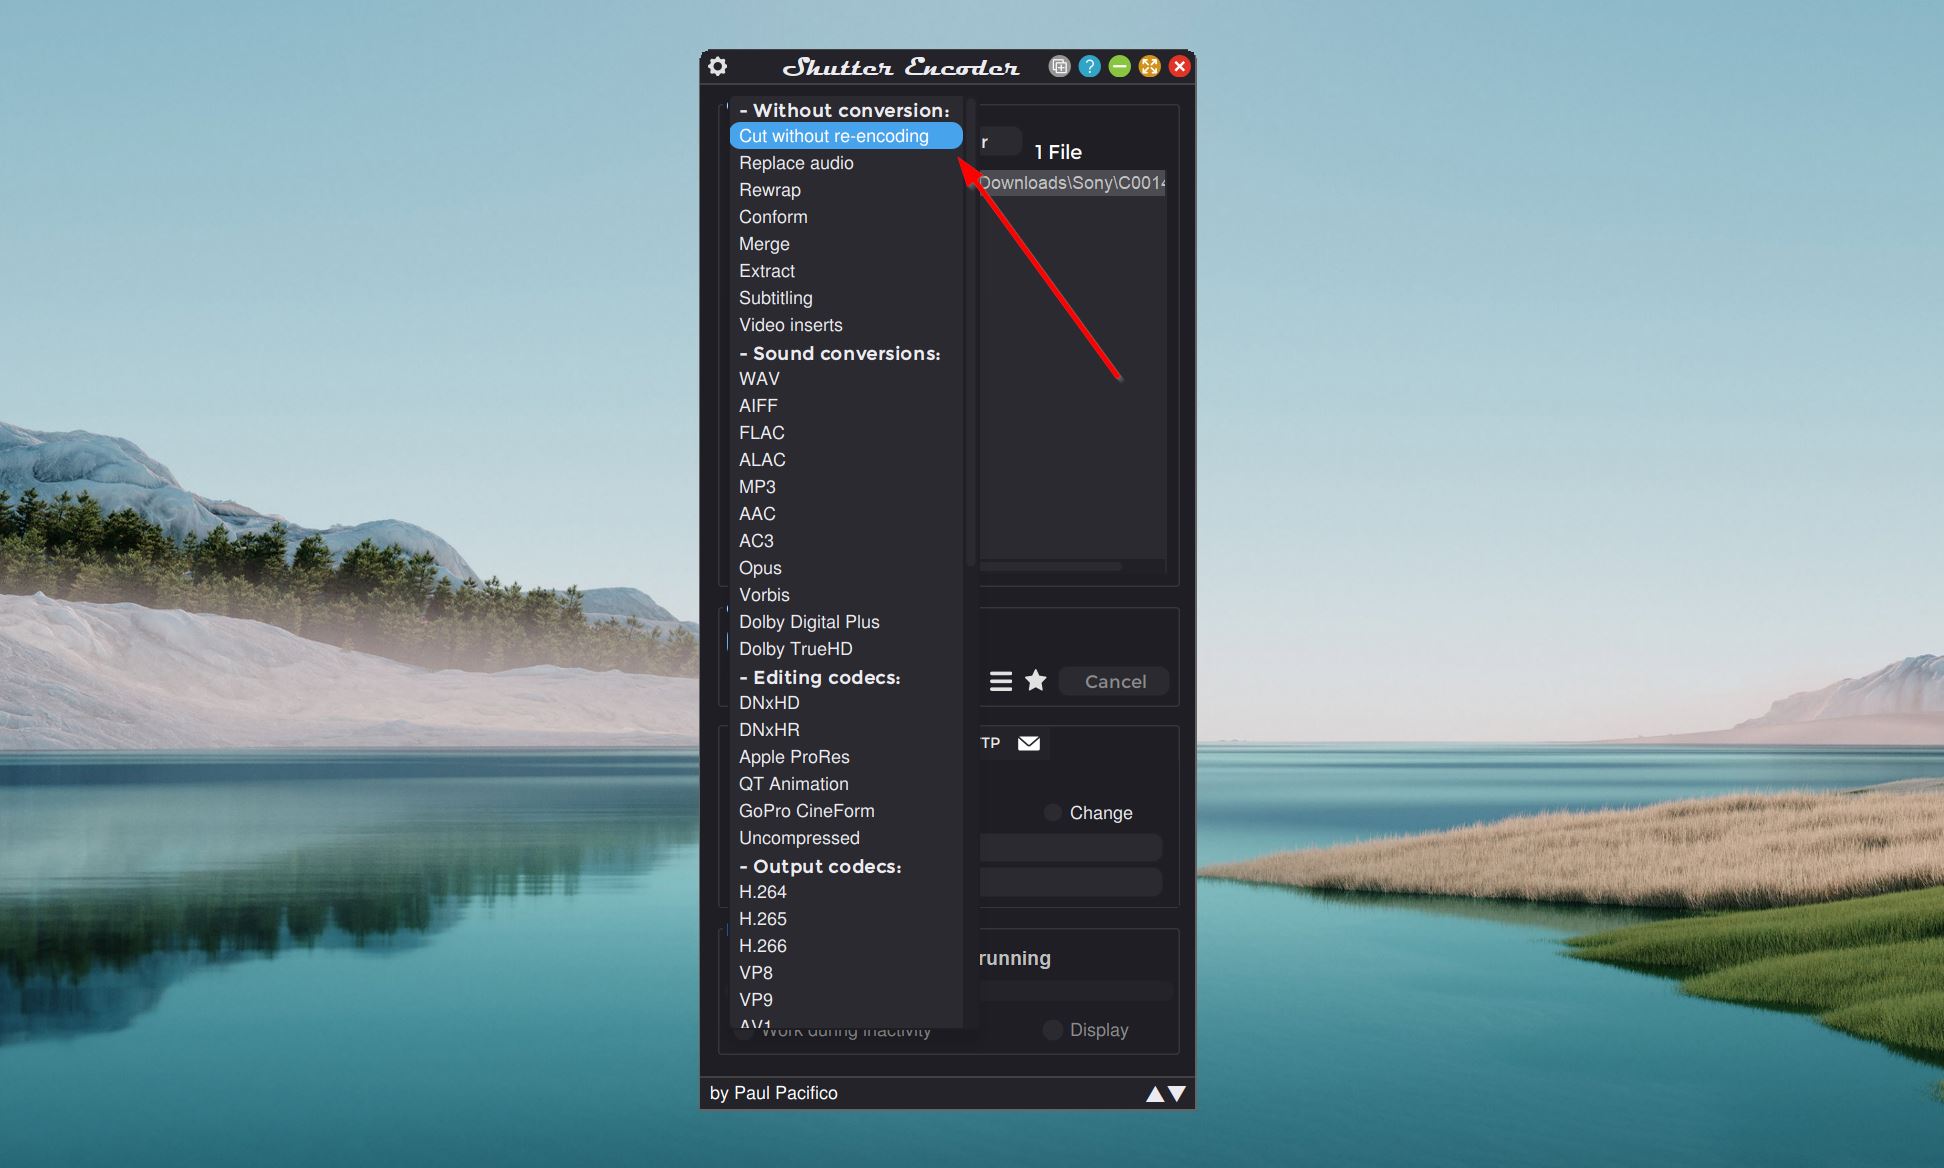
- Click the Choose function drop-down menu, and select Cut without re-encoding.
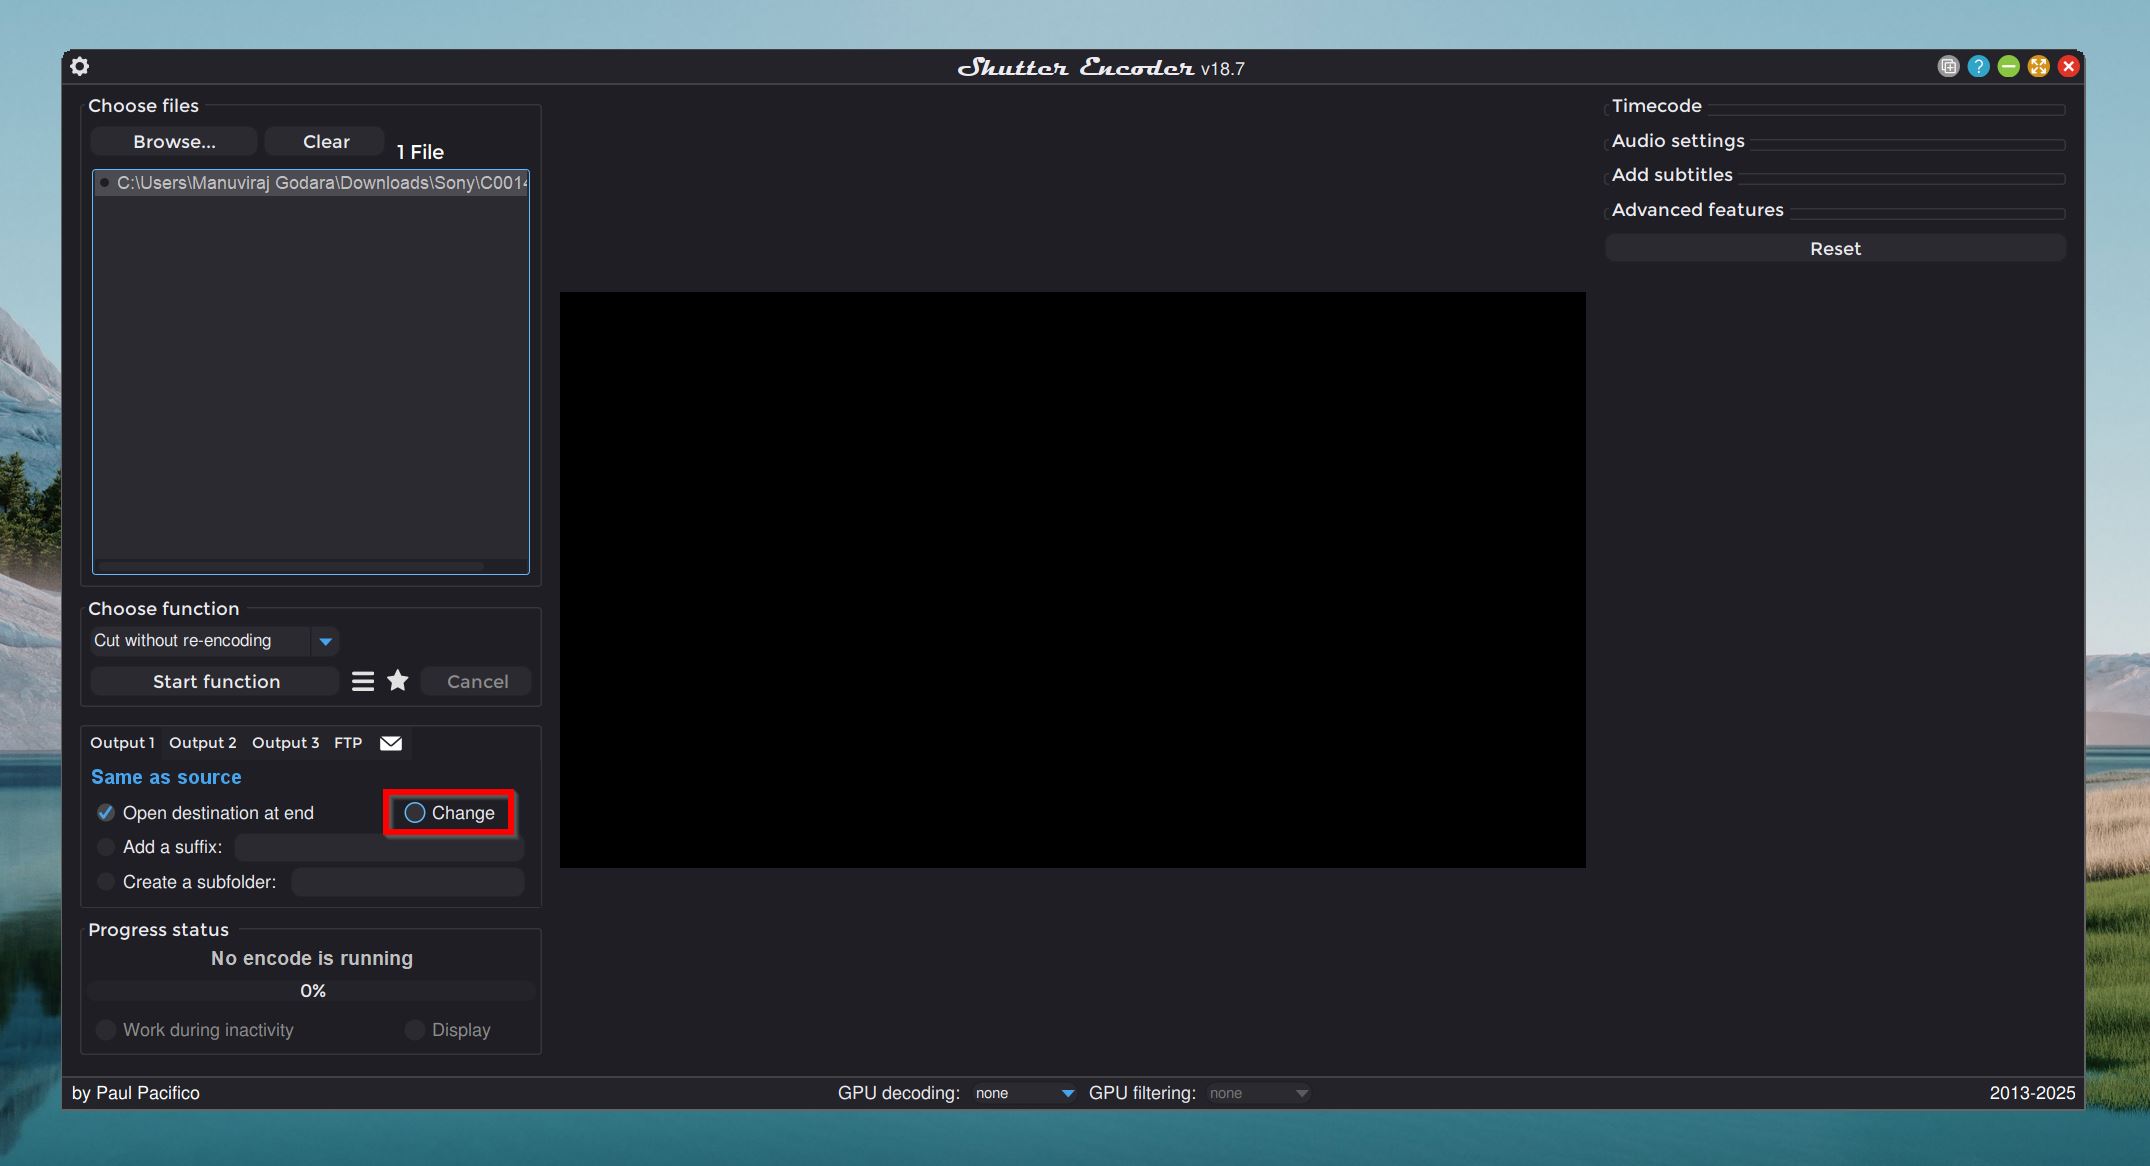
- (Optional) By default, Shutter Encoder saves the remuxed video file to the same location as the original one. To change this, click on Change, then browse for the desired folder.
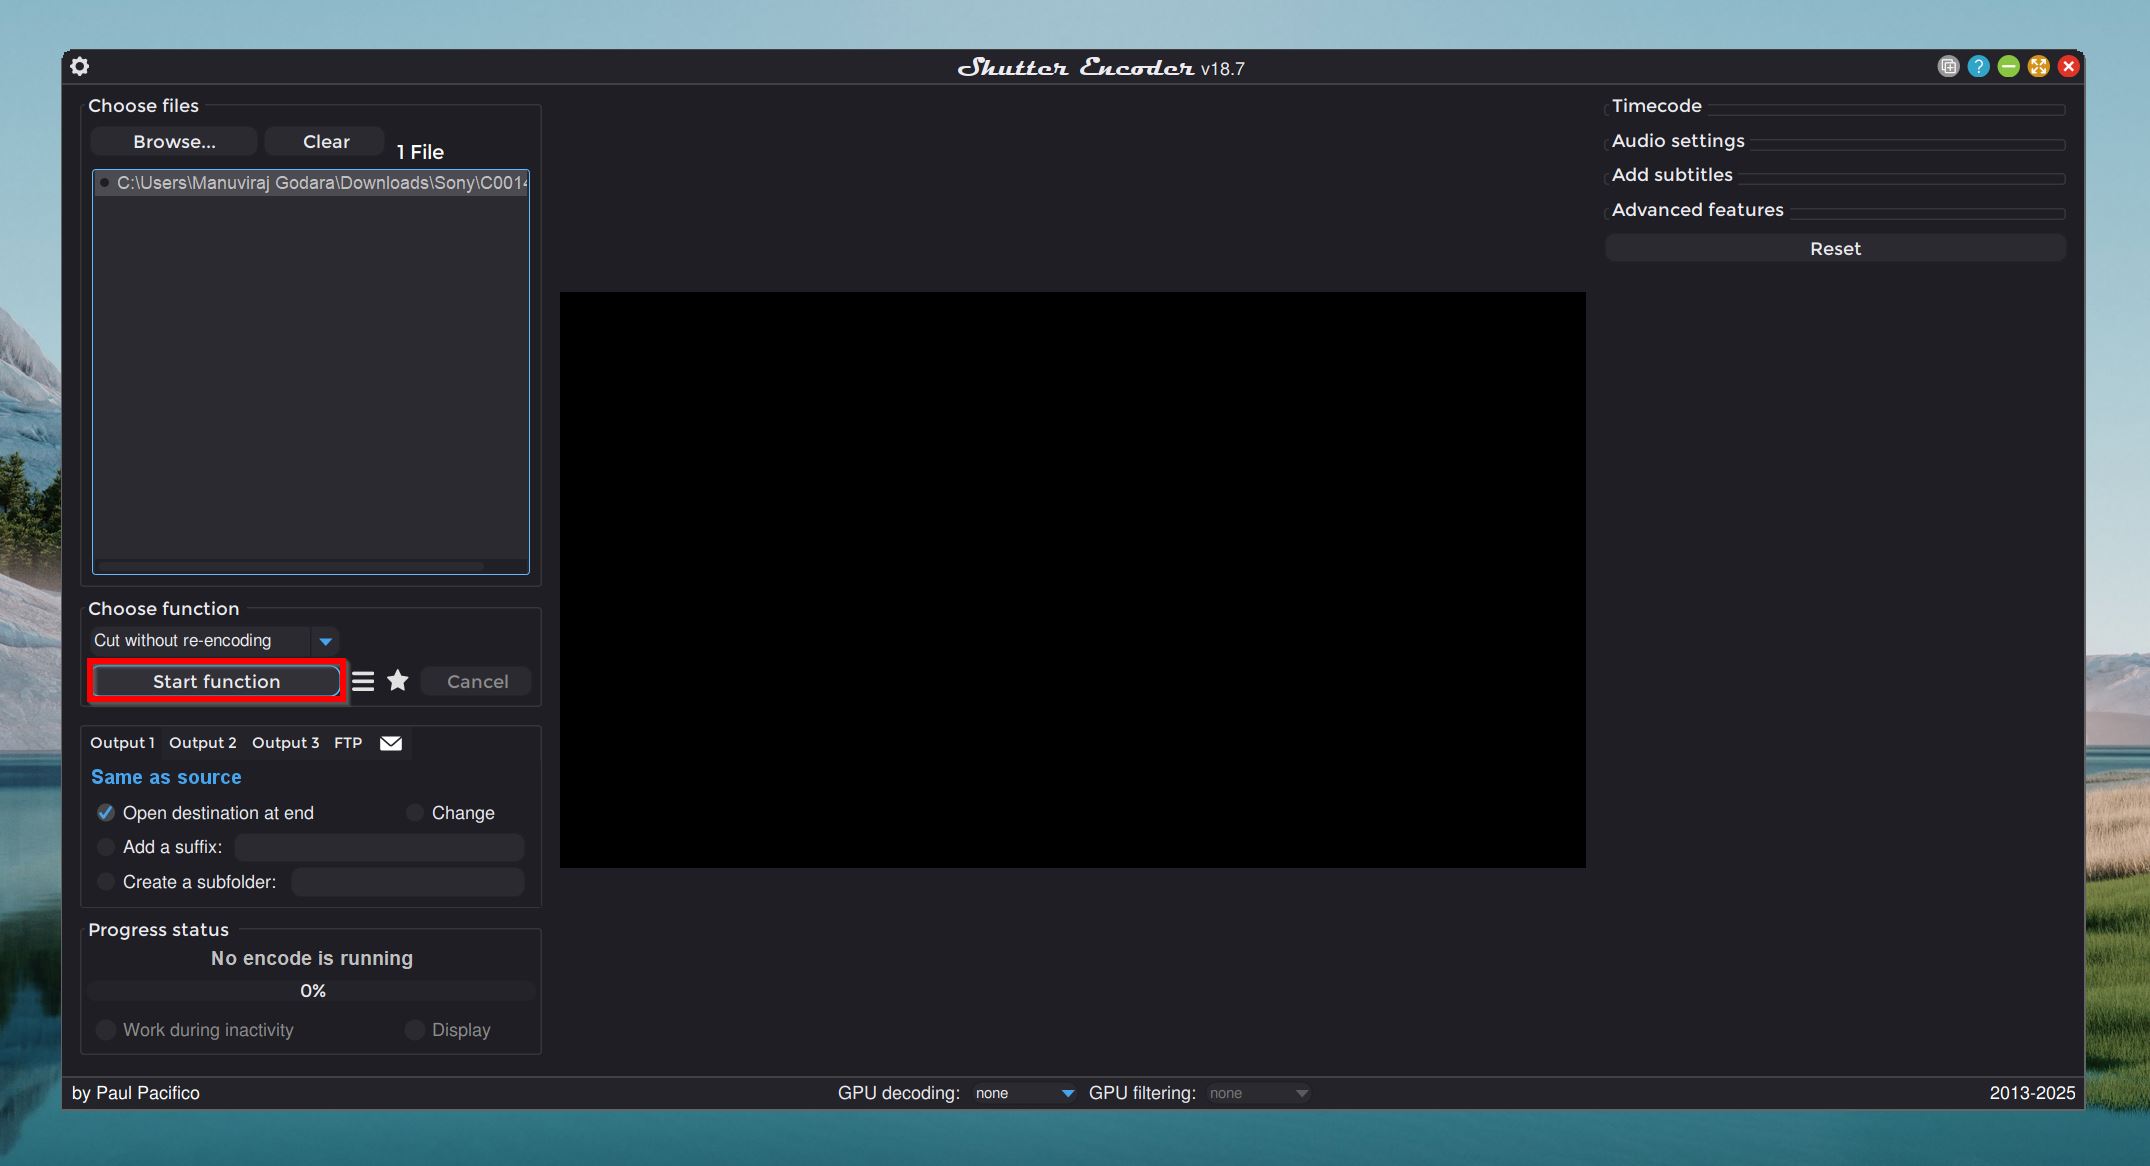
- Click on Start function to begin remuxing.
- Try playing the remuxed video to see if it’s fixed.
Part 2: Re-encode the Video
- Open Shutter Encoder.
- Click Browse, find the corrupt Sony video and double-click it. If you remuxed the video, I suggest adding the remuxed video instead of the original corrupt video.
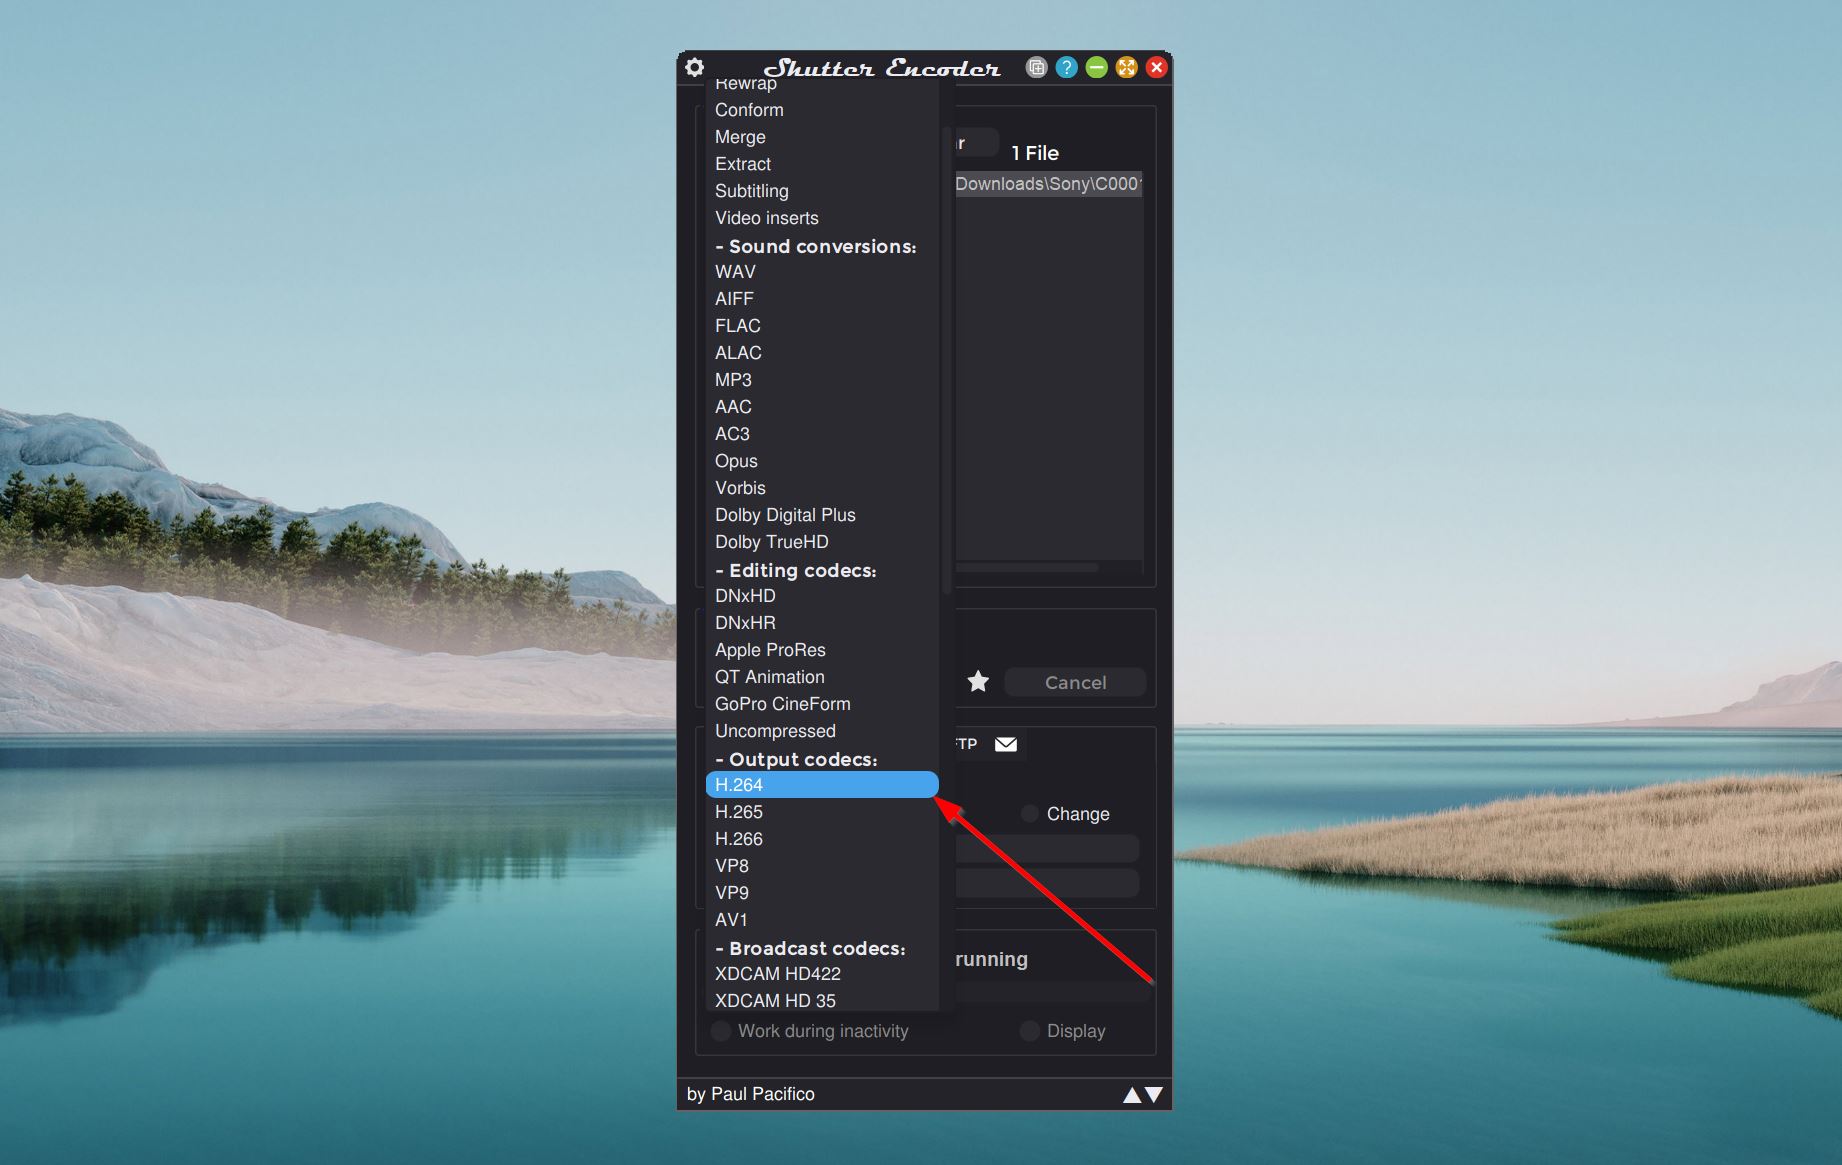
- Click the Choose function drop-down menu and choose H.264 under Output codecs.
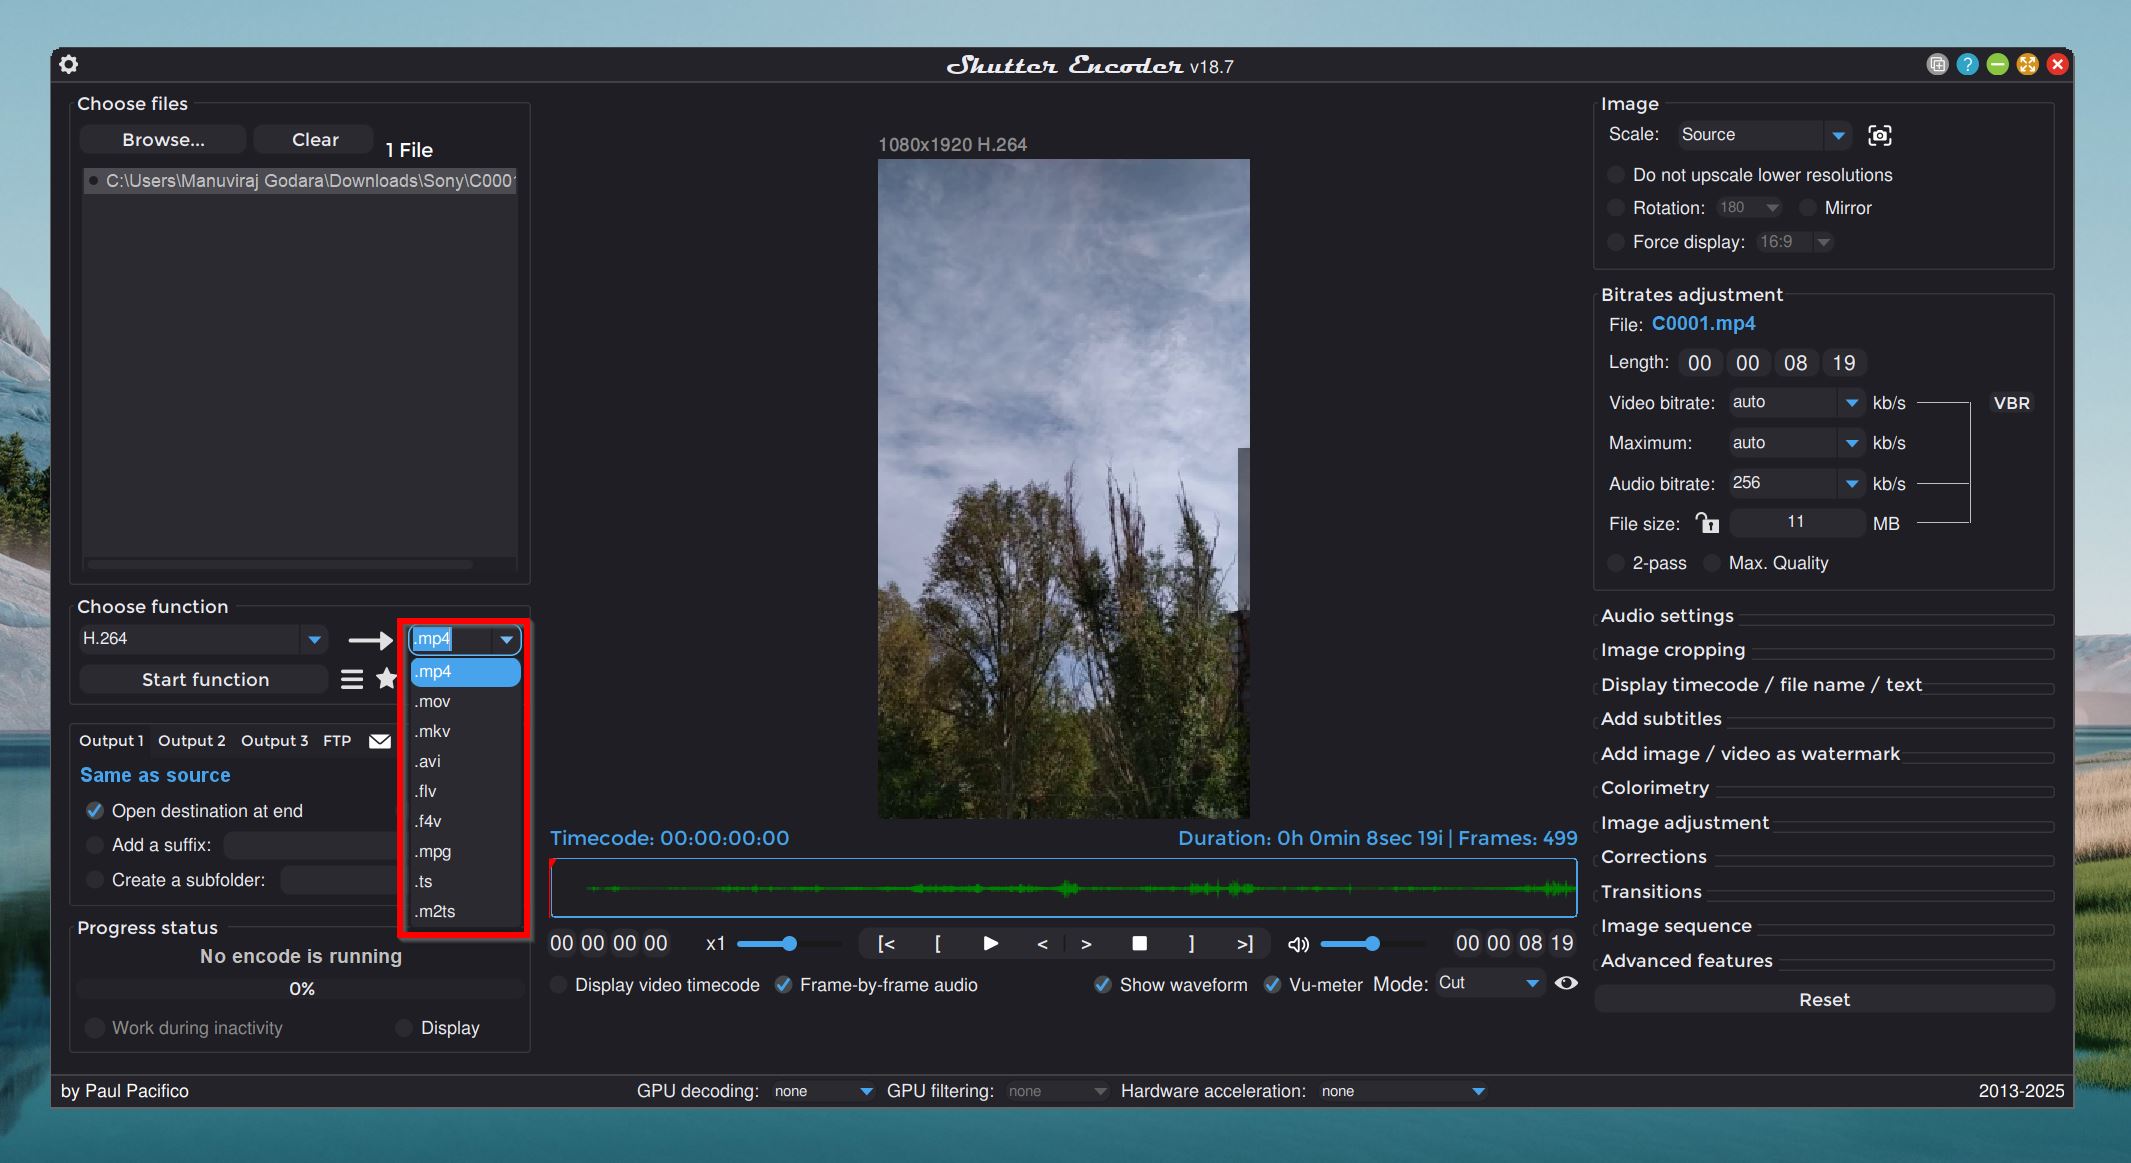
- Click the drop-down menu adjacent to Choose function, and select a video format. You can pick the same format as well.
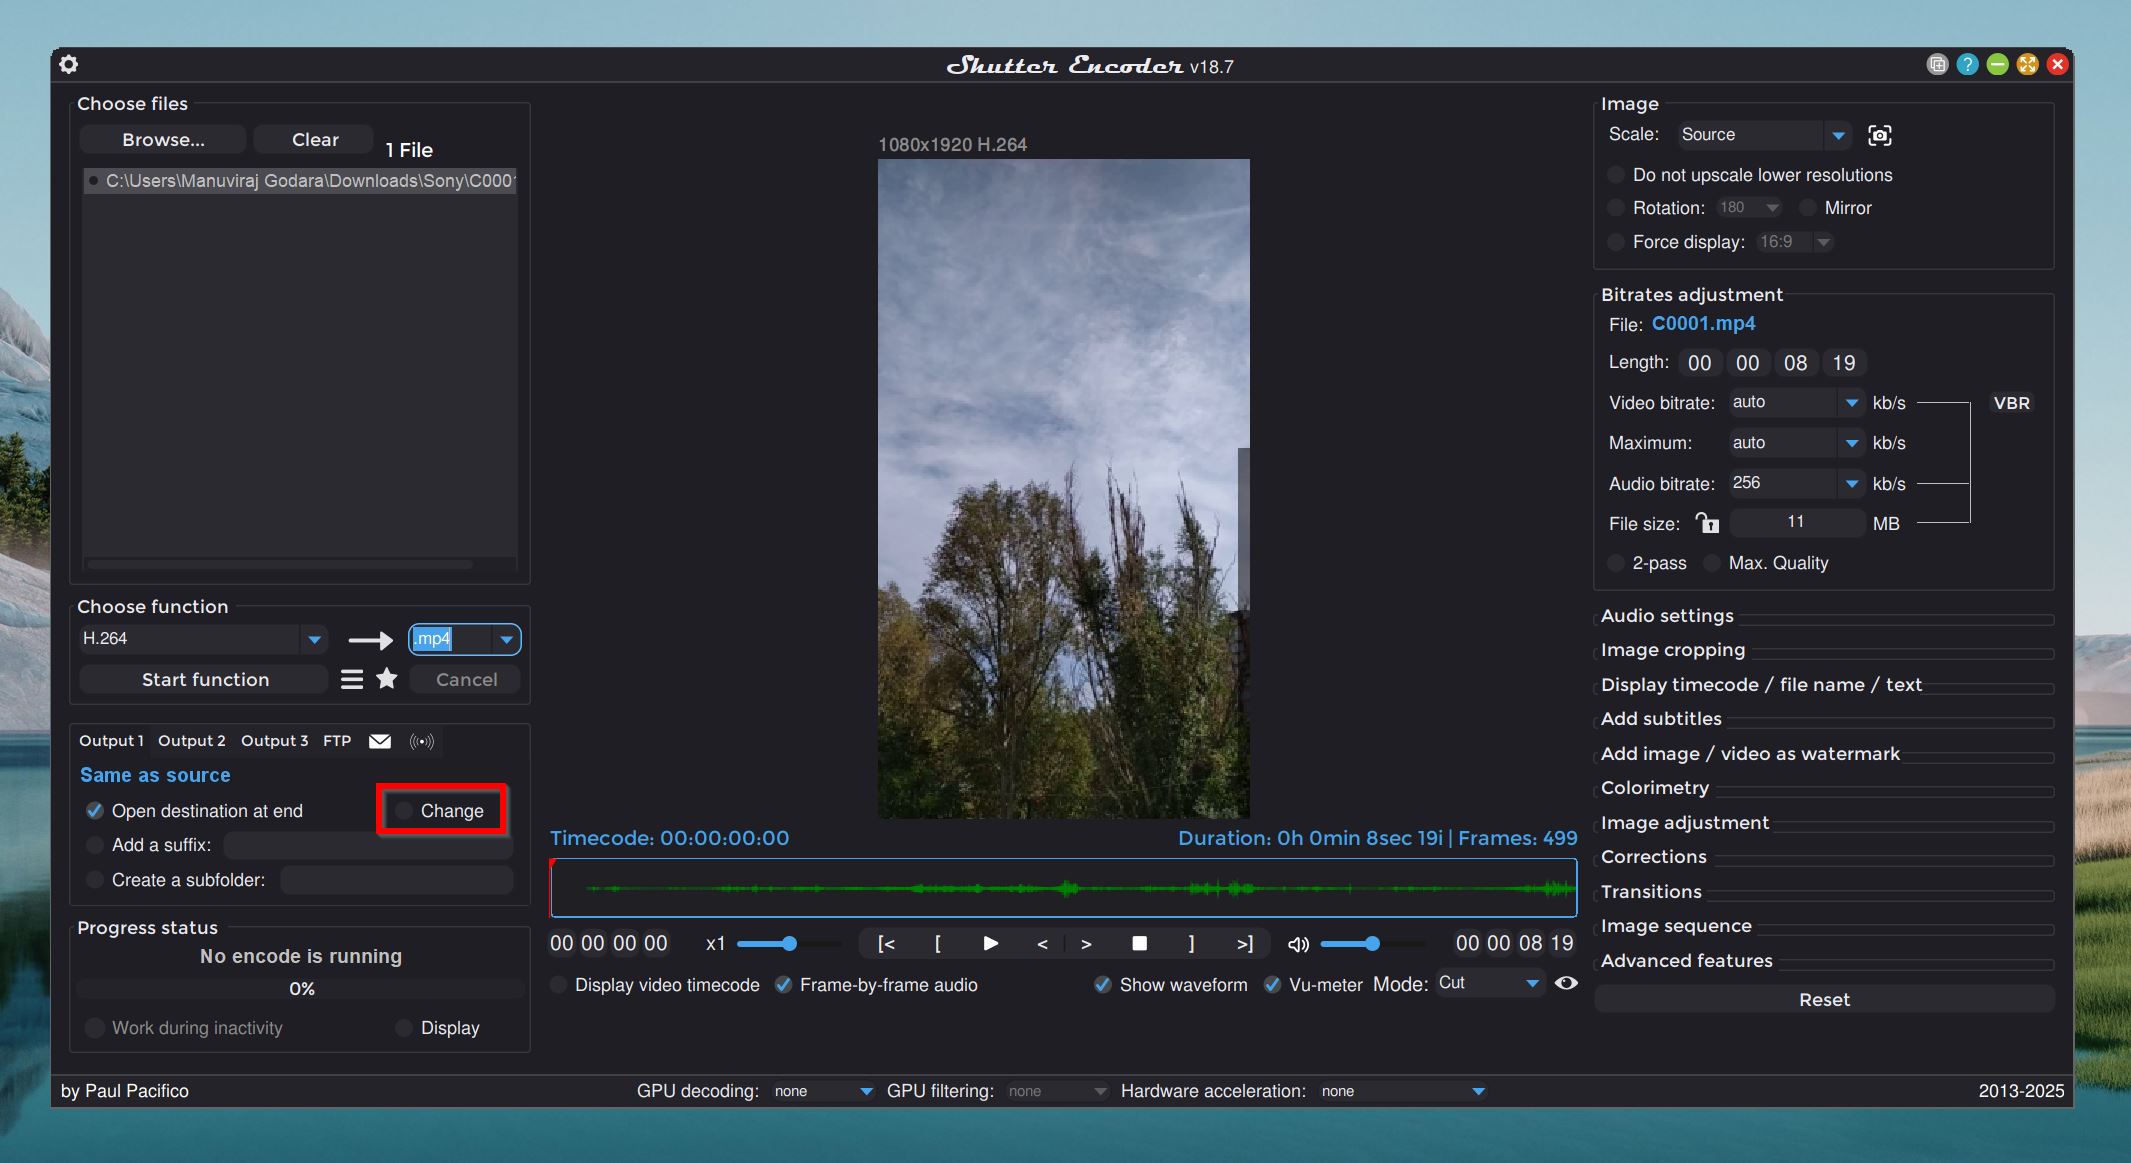
- (Optional) Shutter Encoder will save the re-encoded video in the same directory as the original video. To change this, click the Change button and choose a folder that you want.
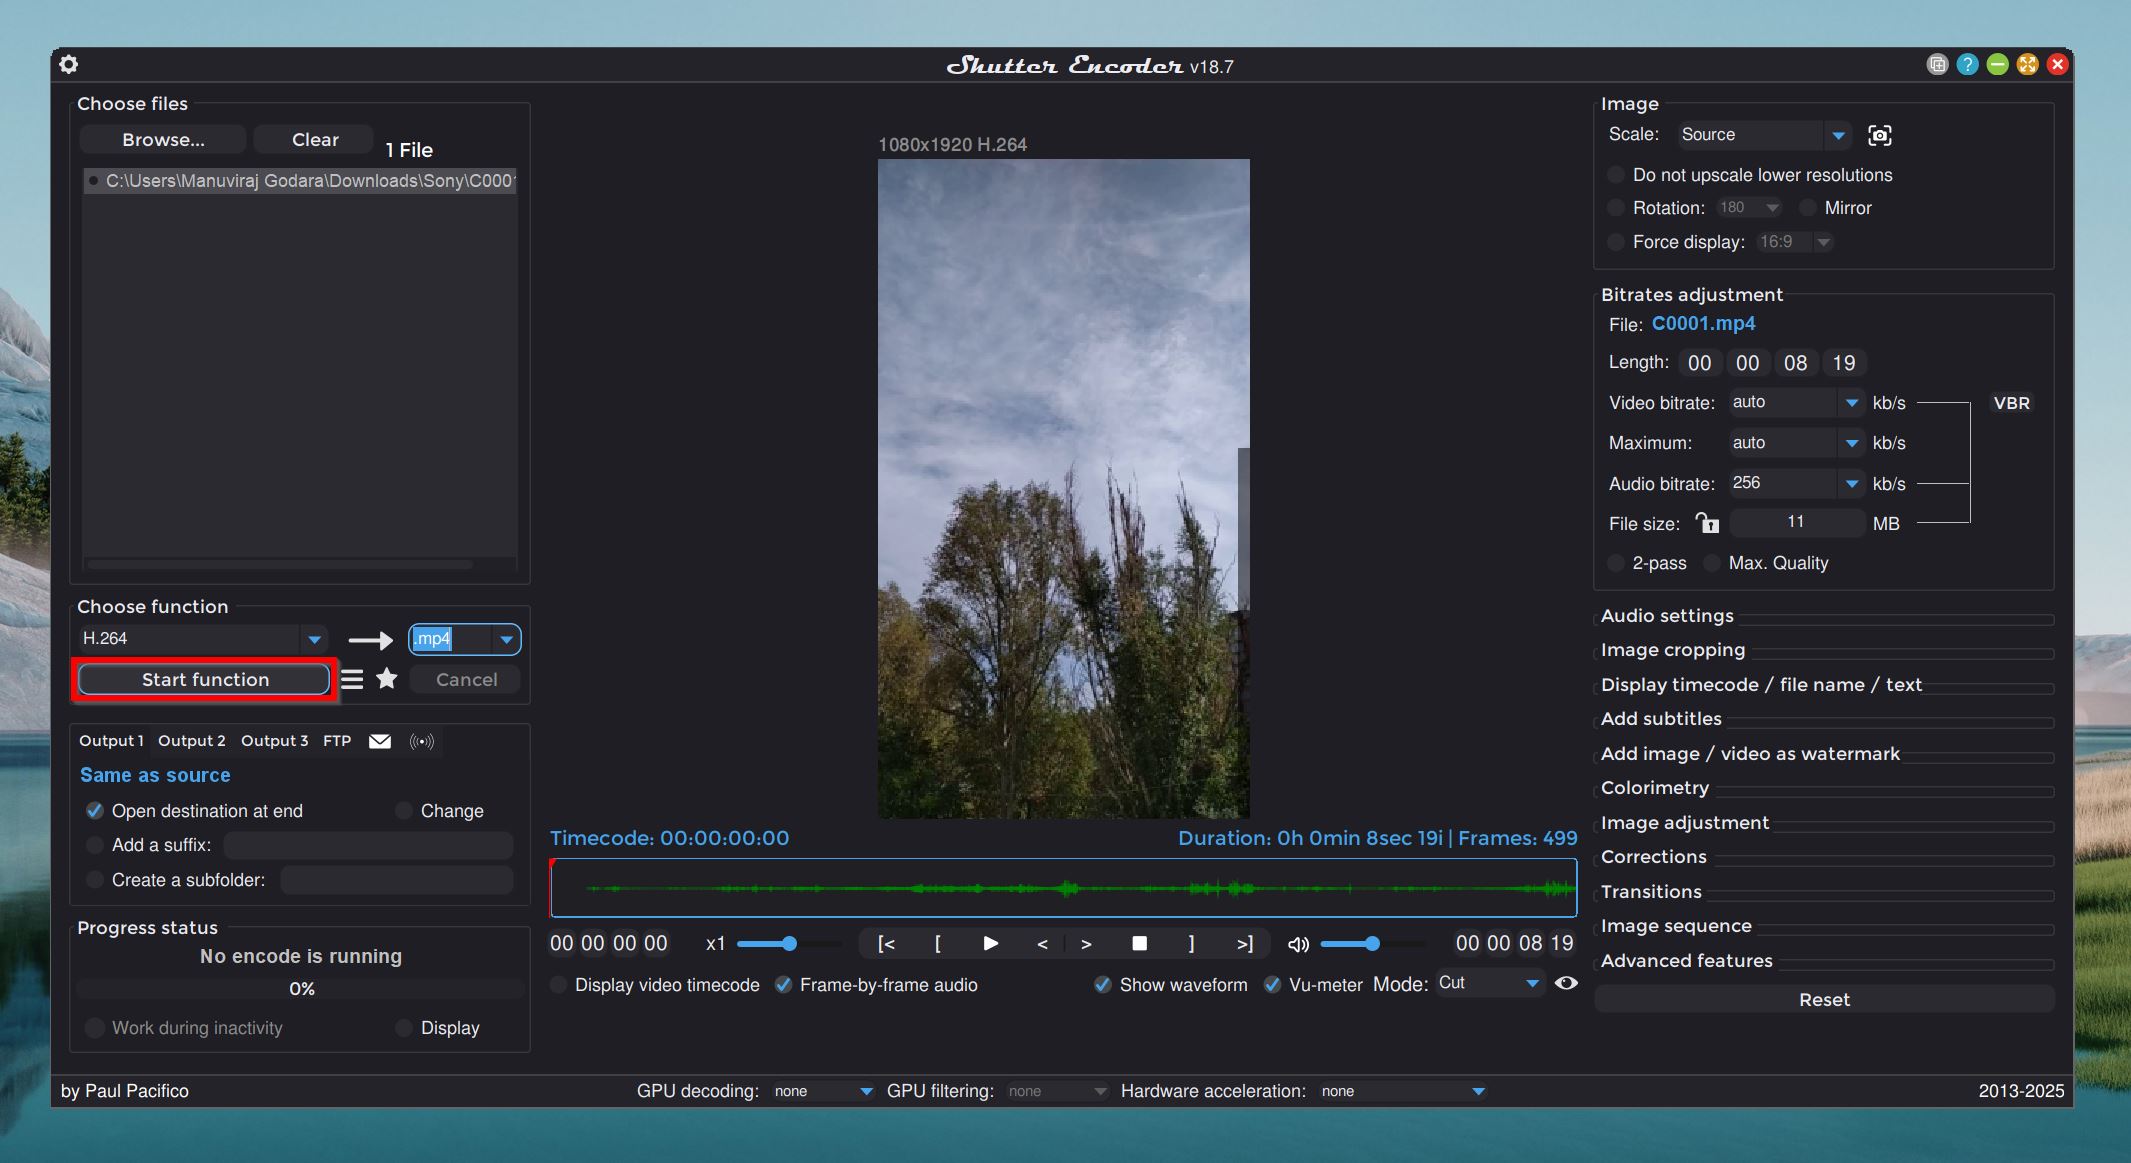
- Click Start function to begin re-encoding the corrupt Sony video.
Note: Re-encoding often results in a minor dip in video quality, especially if you choose a lossy video format during re-encoding.
Can’t See Your Videos After Recording or Transferring? Try This
Often, when video recordings or video transfers are interrupted, the affected videos may disappear from your camera altogether. However, it’s a common issue faced by numerous people, like this user on the Sony Alpha forum. And it’s not just limited to Sony camera’s either.
The good news is that you can get back these disappeared videos.
Sony has a dedicated video recovery tool for Windows, and macOS, called Memory Card File Rescue, that can find missing videos and recover them. It recovers a wide range of file types, including MP4 and AVCHD that are commonly used in Sony cameras.
For better user-experience and functionality, you can opt for third-party data recovery tools—Disk Drill is a good one that I frequently suggest to users because of its speed, reliability, and ease-of-use.
Check Out: We have dedicated guides on how to recover videos from Sony SD cards, cameras, and even Sony handycams using data recovery tools.
Once you’ve recovered the videos from your Sony camera, play them all the way through to confirm the quality, and playback. If you notice skipped frames, distortion, truncation, or unplayability, use the methods listed above to fix them.
FAQ
Why do videos from Sony cameras get corrupted?
Videos from Sony cameras usually get corrupted because of interrupted recordings—be it a dead battery, or a shut-down without stopping recording first. Other reasons include damaged or incompatible SD cards, interrupted file transfers, file system errors, encoding errors, and physical damage.
What tools are best for Sony video file repair?
The best tools fro Sony video file repair include Clever Online Video Repair, and Untrunc wrappers like MP4 Repair. Both tools require a healthy video file from the same Sony camera in order to work. If you don’t have one, use a good video trancoder like Shutter Encoder to remux and re-encode the video.
Are free Sony video file repair software safe to use?
Free Sony video repair tools, as long as they come from a trusted developer, are safe to use. Choose tools that at least let you preview the repaired video before any financial commitment. Two free tools I can confidently recommend are Clever Online Video Repair, and MP4 Repair.
Can I fix a corrupted Sony video file using Windows built-in utilities?
No, you cannot repair a corrupt Sony video file using in-built Windows utilities. You will need to use third-party video repair websites, or local tools. However, if you suspect logical corruption on your SD card, you can run CHKDSK on it to potentially repair it—be sure to back up all your videos before doing this since this tool can lead to data loss.
What should I do if none of the fixes work to repair my corrupted Sony camera videos?
In case none of the fixes work, contact a professional video repair service. Choose one that has good reviews, and ideally, has experience in recovering videos from Sony cameras. Most professional recovery services have a 24*7 hotline that you can use in emergencies.
This article was written by Manuviraj Godara, a Staff Writer at Handy Recovery Advisor. It was also verified for technical accuracy by Andrey Vasilyev, our editorial advisor.
Curious about our content creation process? Take a look at our Editor Guidelines.