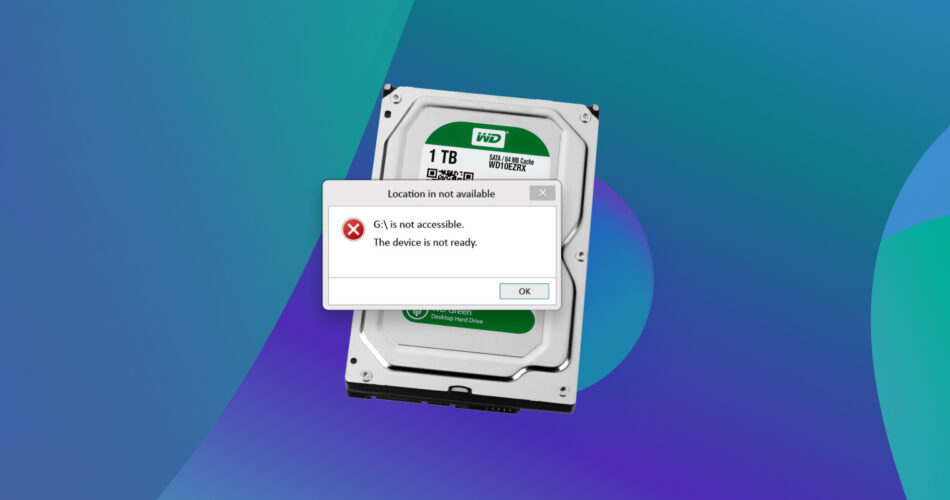
You’re sure a storage device you’re trying to access worked normally the last time you used it. Now, it appears inaccessible, in sight but out of reach, as your computer claims that “the device is not ready”.
We’ve dealt with such issues before and mentioned potential remedies in many of our guides in the past. However, we decided it would be best to dedicate this separate article to the particular issue, to cover all its aspects spherically. So, let’s see what “the device is not ready” errors mean, their causes, and potential solutions.
What Do Errors Stating “The Device is Not Ready” Mean?
There are many reasons a computer might claim that “the device is not ready” regarding storage devices, and they always mean the same thing: the computer, and by extension you, cannot access the storage device “as usual”.
That message made more sense in the context of old disk drives: the computer “could see” the storage device, but “it wasn’t ready to use” until you’d place a floppy disk in it.
Today, that message means the same thing but applies to all types of storage devices: the computer “can see them”, but one of the causes we’ll see next prevents their use.
What are the real causes of “the device is not ready” errors?
Some of the following causes are the reasons you might meet an error stating that “the device is not ready”:
- 🔌 The device might not be correctly connected to the computer.
- 🔨 The actual hardware might have developed a problem or “conflict” with another device.
- 🪳 A bug in a driver or other crucial piece of software might prevent access to the device.
- 📱 An app or system-level process might have “locked access to the device”.
- 🔓 Wrongly configured system-level software and permissions may restrict or prevent access to the device.
- 🧩 An abrupt shutdown, interrupted write process, or other cause might have corrupted the data structures on the storage device.
- 💀 The device might have failed beyond repair – rare but possible with old, ultra-cheap, or hardware of “questionable quality”.
Thankfully, most of those issues can be solved, as we’ll see next.
How Can I Deal With “The Device is Not Ready” Problems?
When your PC informs you that “the device is not ready”, you may think the files you’d stored there are gone, and it’s time to replace the seemingly problematic storage device. And yet, most problems that lead to such error messages can usually be solved in one of the following ways.
Solution 1: Check the Cabling
Most storage devices require two connections with the PC: one for power, and one for the exchange of data. If either of those connections is fiddly, the storage device might “misbehave” in various ways.
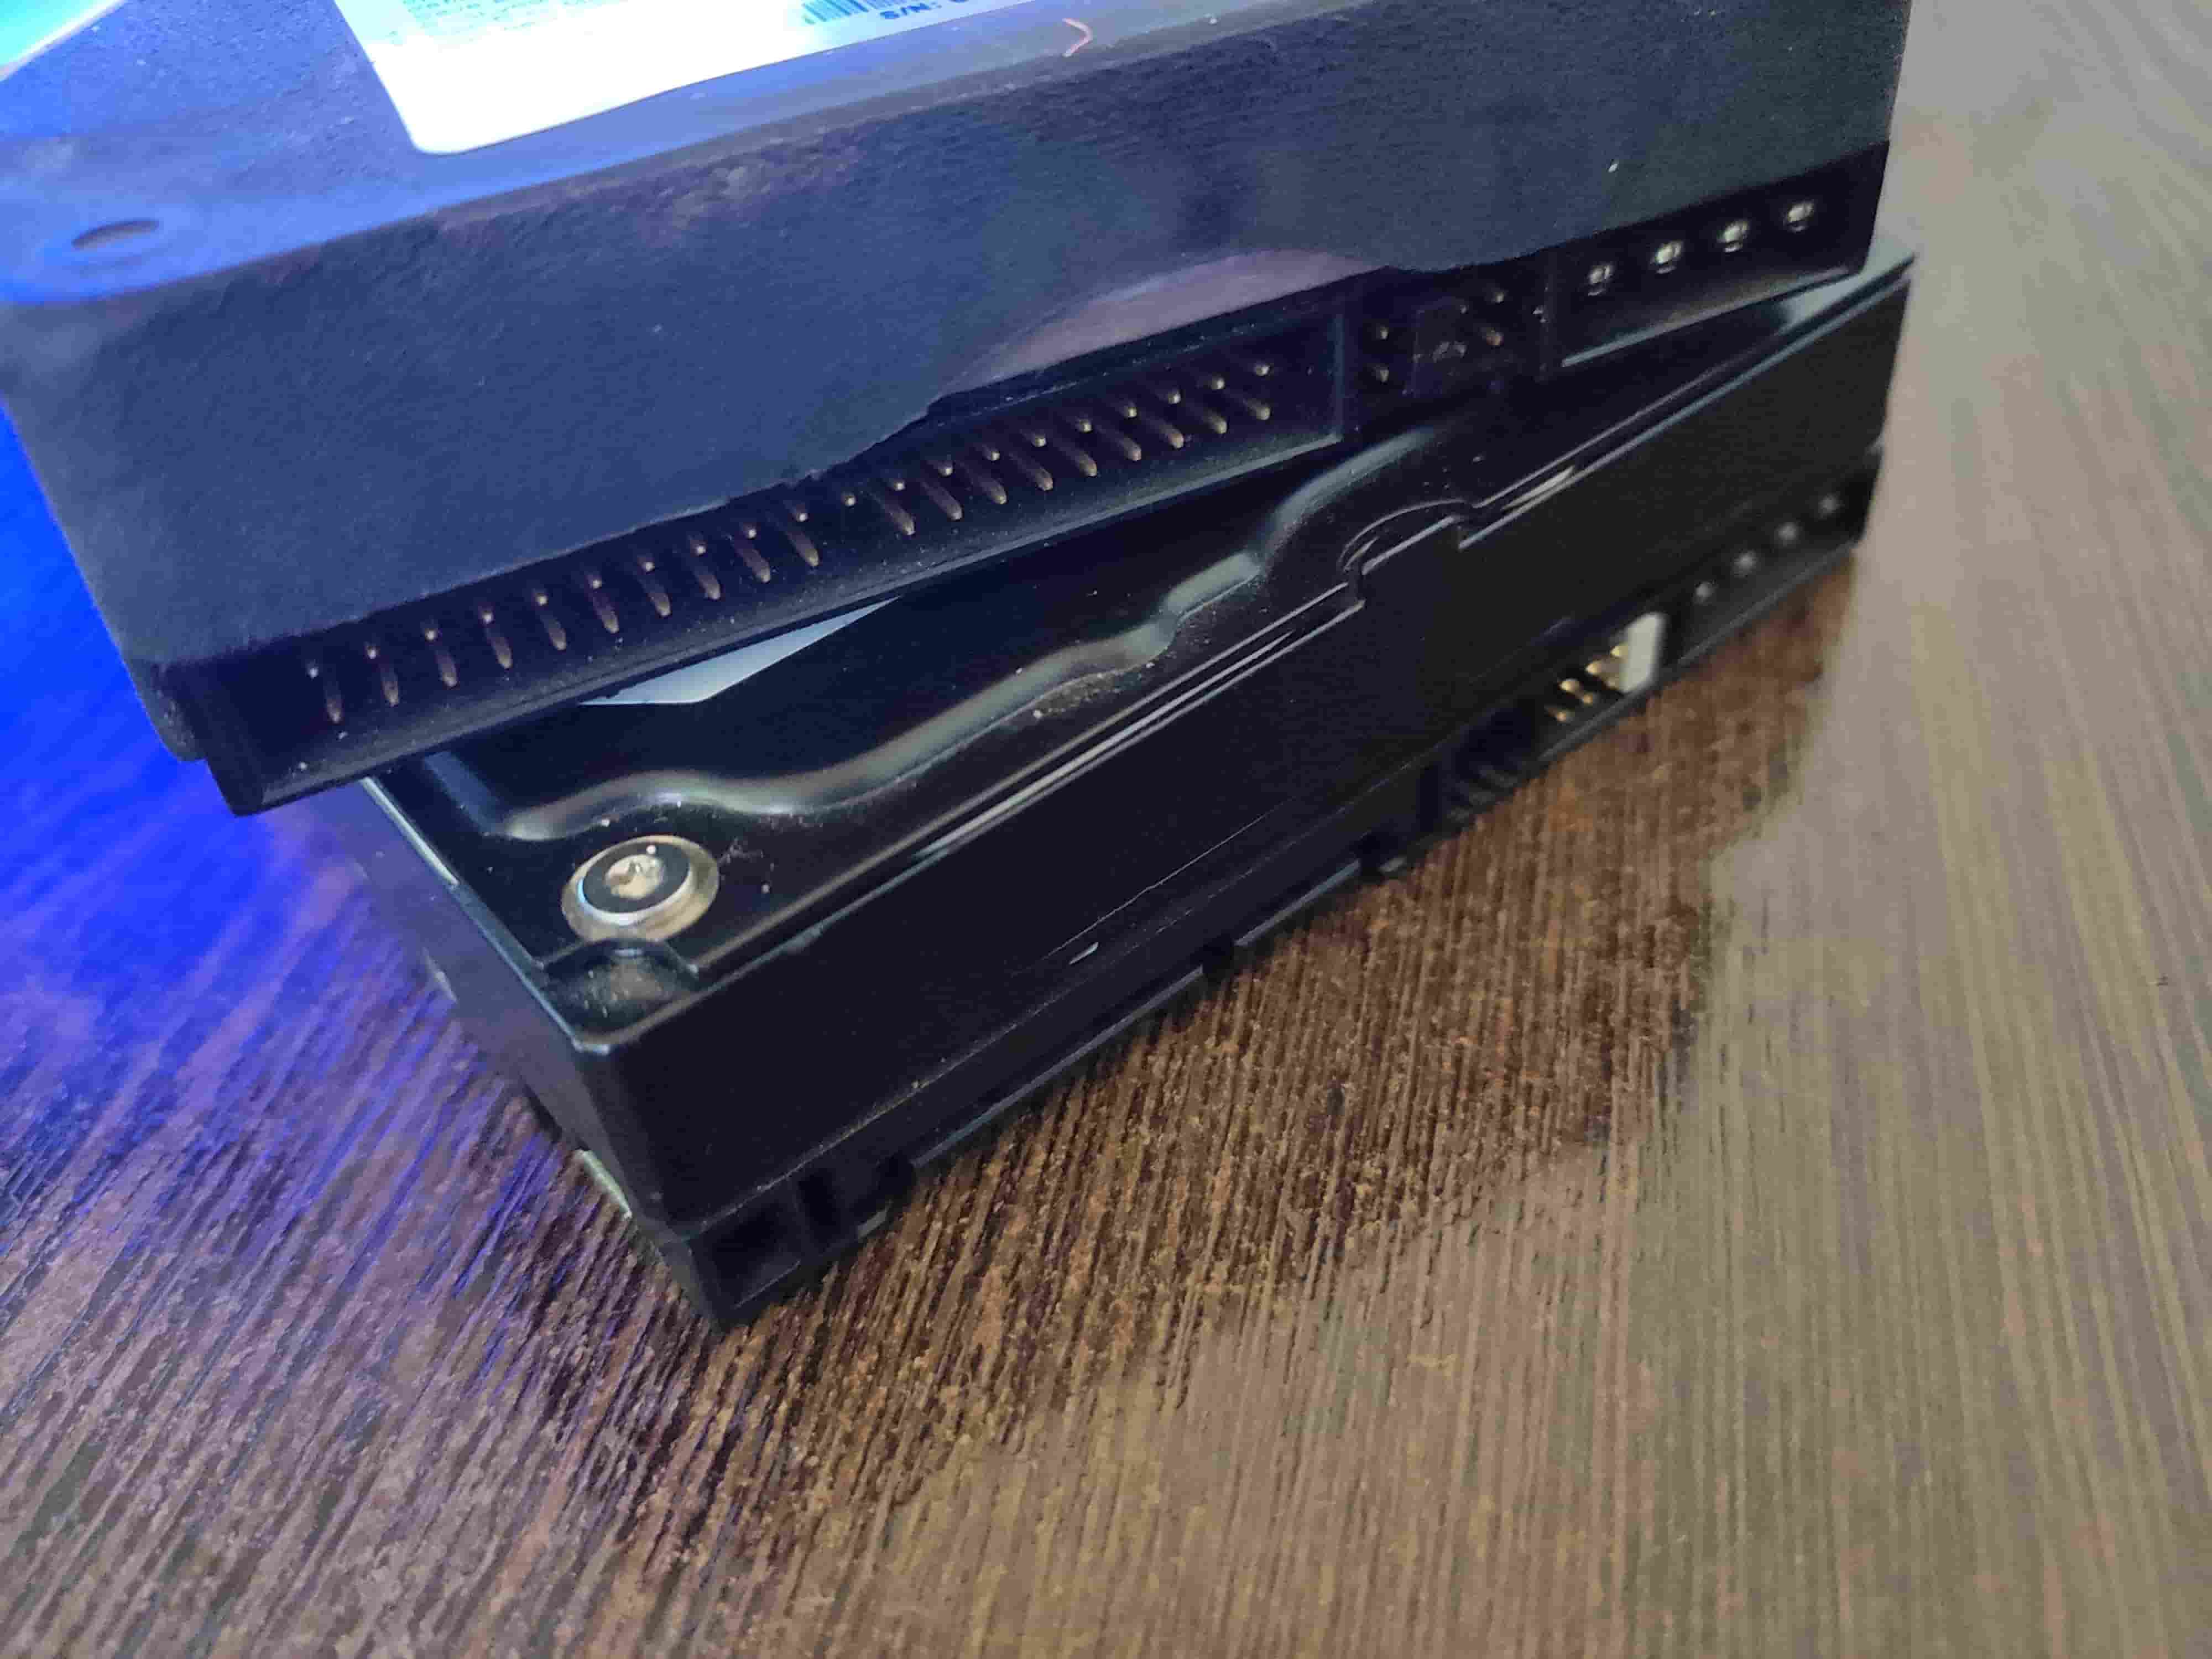
To check if this is the reason your storage device doesn’t work as expected:
- Power off your PC.
- Detach both cables (or the whole storage device) from your PC.
- Reconnect both cables (or the whole storage device) to your PC, making sure the connectors are fully and firmly plugged in.
If the problems persist, it’s also worth replacing those cables with new ones.
If your PC is equipped with a modular PSU, make sure to check the power cables on its side, too! Likewise, the problem can manifest with powered external drives when their data cable is but their power cable isn’t connected. Replugging their power cable may render such “not-ready” external storage devices usable again.
Solution 2: Update Related Drivers & Software
Inaccurate or defective drivers and malfunctioning software may often be the reasons for various issues, including errors like “the device is not ready” that we’re tackling in this article. It’s worth updating everything that could be related in any way to the problem at hand. This includes:
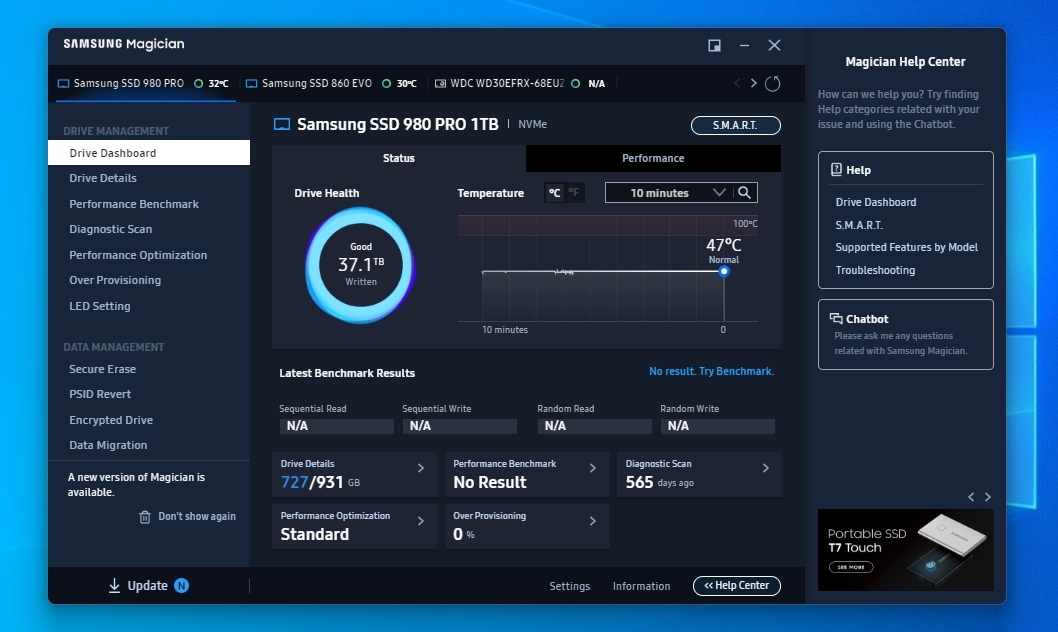
- Resident device-specific software (like Samsung Magician, Western Digital Dashboard, Crucial Storage Executive, Kingston SSD Manager, etc.).
- Device-specific drivers & firmware.
- Storage controller/motherboard chipset drivers (like Intel’s Chipset Device Software, AMD RAID Software, Marvell Storage Drivers, ASMedia SATA Drivers, etc.).
- Any software directly or indirectly related to managing storage devices (including SMART monitoring tools like Hard Disk Sentinel and CrystalDiskInfo, file managers like Directory Opus, Total Commander, XYplorer, or Explorer++).
It’s also worth updating Windows itself. By updating Windows, you ensure that you’re using the latest version of Microsoft’s OS and the least problematic versions of its individual “parts”.
To get the newest versions of all Windows “parts” and all Windows-certified drivers that are available through Windows Update:
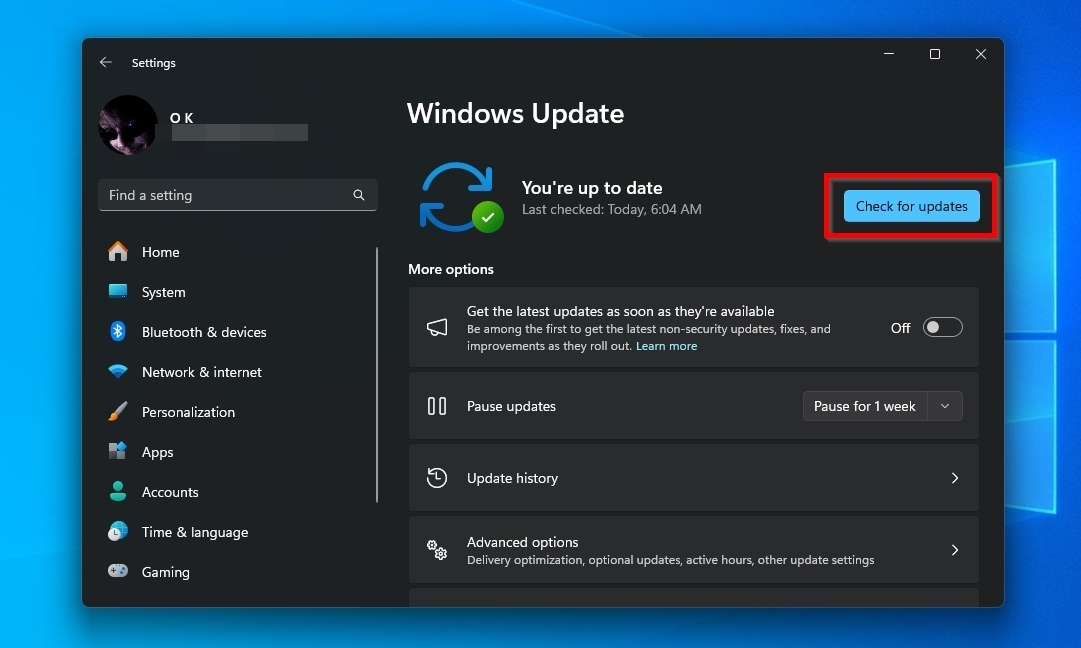
- Seek “Windows Update settings” using the Start menu and launch it.
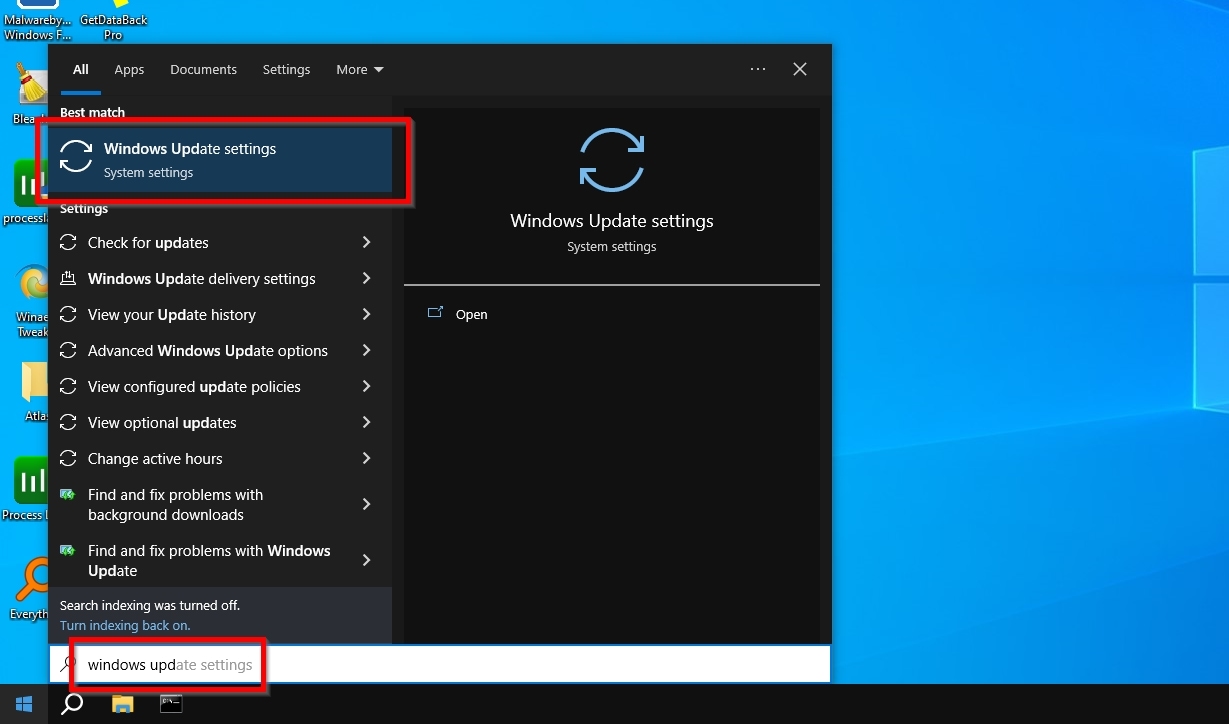
- Even if it states “You’re up to date”, click Check for updates to ensure no crucial update has been released since the last check.
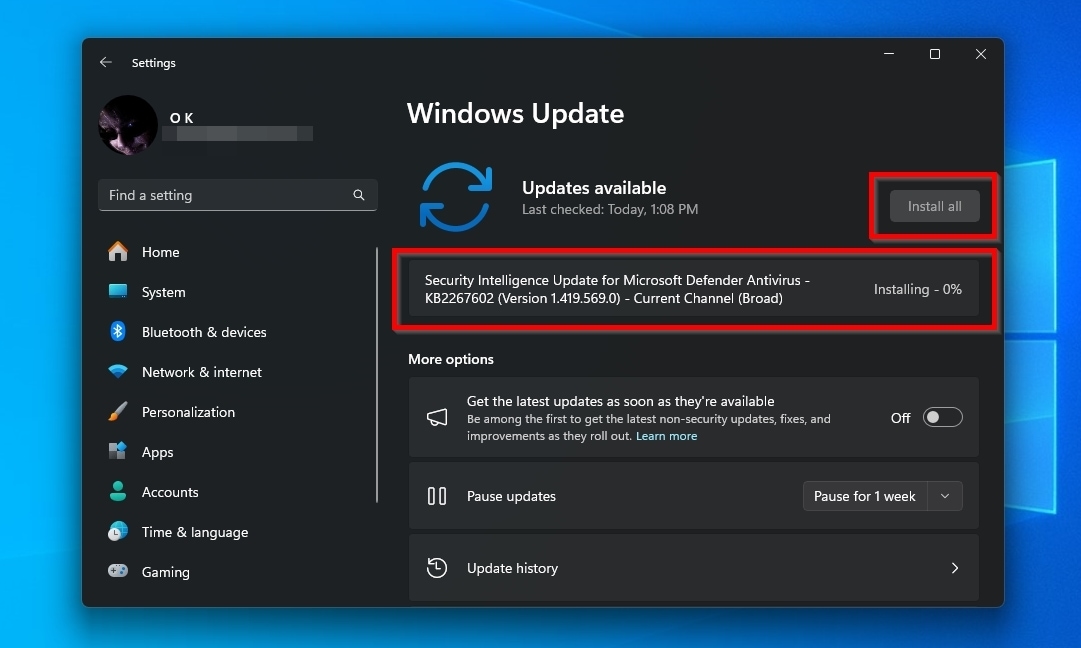
- If any updates are found, allow Windows to download them, and, if needed, follow the on-screen instructions to install them.
Solution 3: Check Your Active Apps
A “glitchy” piece of software or a never-before-seen piece of malware may have somehow “locked access” to a storage device. Thankfully, it’s easy to find out what accesses your storage devices.
To check what keeps accessing your storage using the free Process Hacker app:
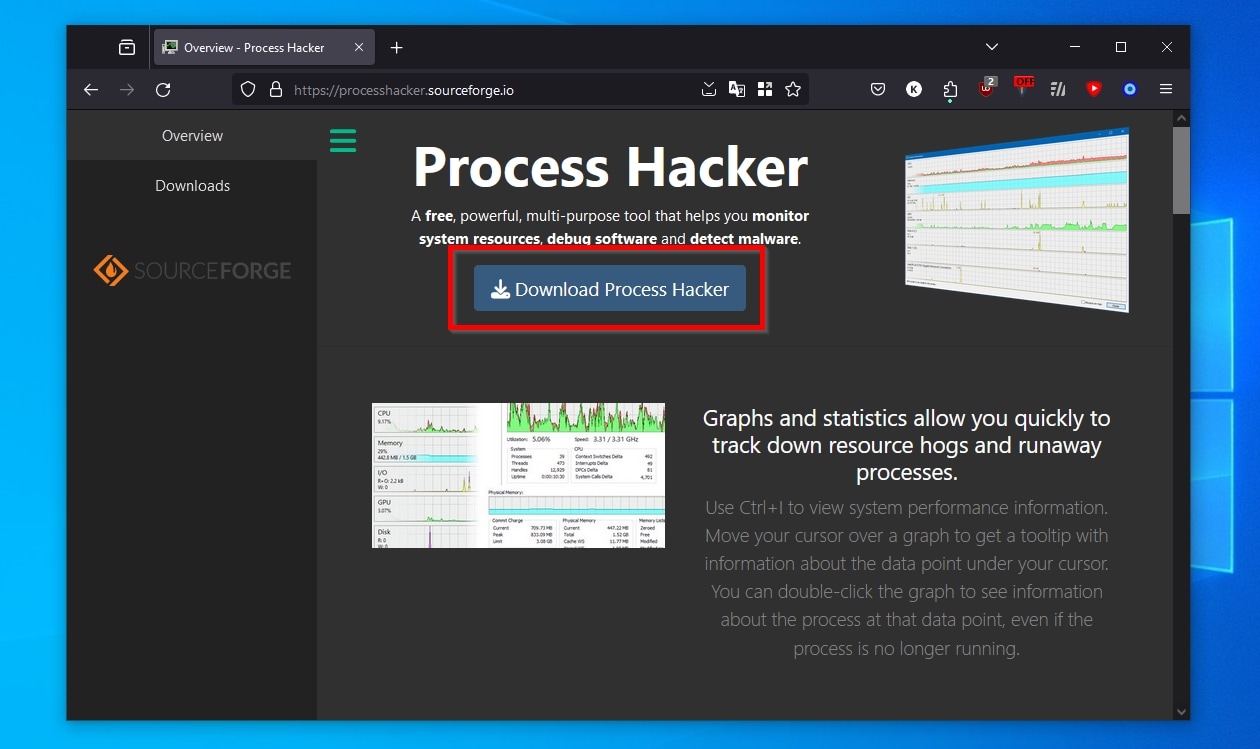
- Download the tool from Process Hacker’s official SourceForge page.
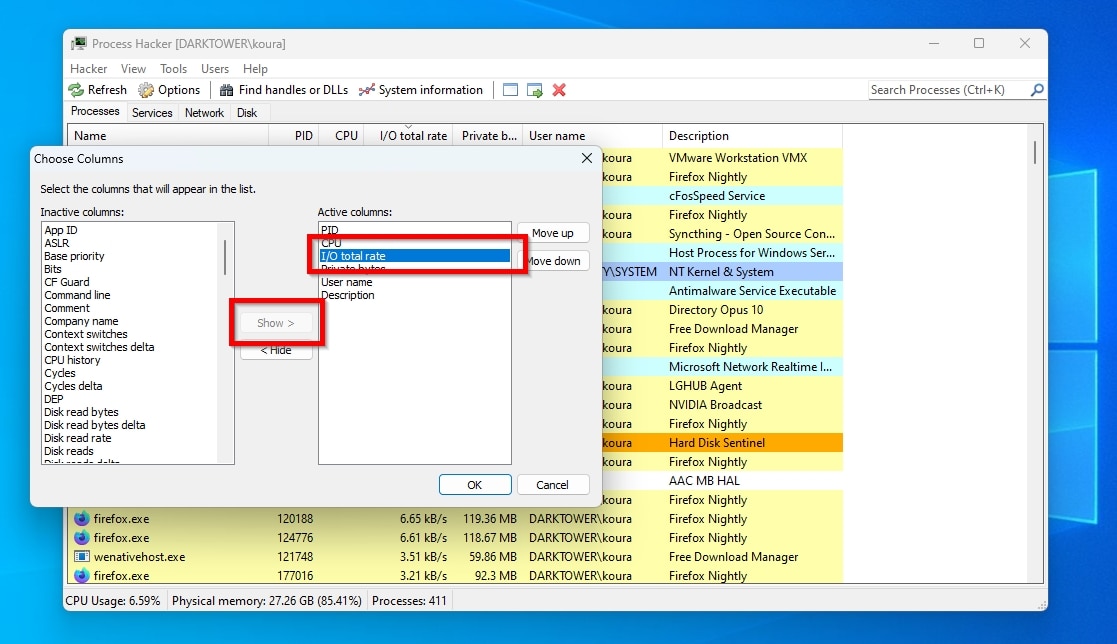
- Run the Process Hacker executable you’ve downloaded. If the column I/O total rate is not visible, right-click on any of the process list’s columns and click Choose Columns. Locate the I/O total rate entry on the left, select it, and click Show > to add it to the visible columns list on the right. Then, click OK.
- Click on the I/O total rate column to sort all active software by that metric.
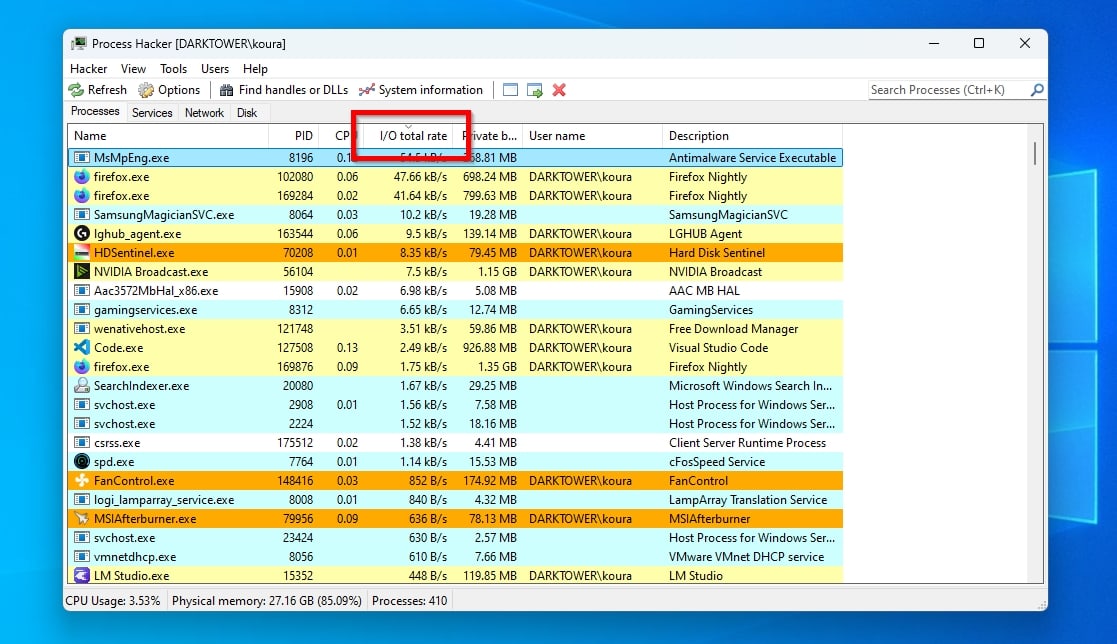
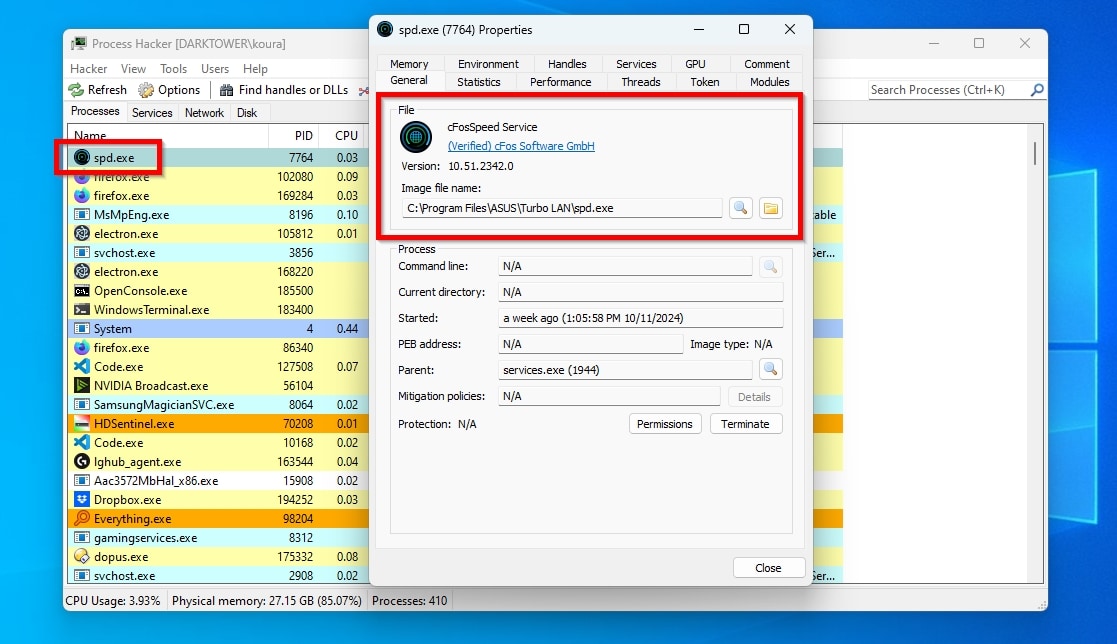
- If you see any unfamiliar piece of software continuously accessing your storage, dive deeper: right-click on it and choose Properties. Find more about it on the General tab, and check its I/O reads and writes on the right side of the Statistics tab.
- If an app’s I/O total rate remains high, its details seem suspicious, and keeps going after you give it five minutes, try forcefully terminating it: while on Process Hacker’s main window, right-click on the app’s entry and select Terminate, or left-click on it and hit Delete on your keyboard.
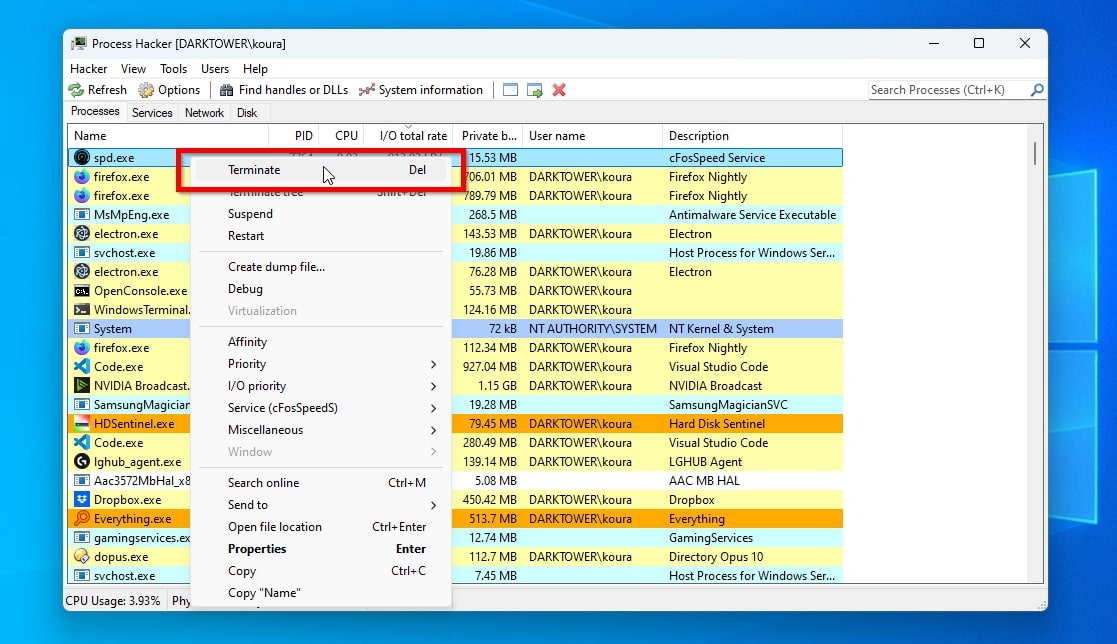
Terminating apps that are actually useful could impact your PC’s usability or stability.
If this fixes the problems, and the offending software isn’t crucial to your line of work, for the way you’re using your computer, or required by its hardware, uninstall it to prevent the issue from reappearing.
Sometimes, an app you rely on may cause “the device is not ready” error messages. For example, a Redditor claims the root for such error messages on their PC was Veeam’s software, which many others use on a daily basis as a secure and easy-to-use backup solution.
Solution 4: Go Over Access Permissions
Although it’s also rare for permission-related restrictions to lead to “the device is not ready” error messages, it doesn’t hurt to ensure they’re not preventing you from accessing your own storage.
To check the permissions of a storage device on Windows:
- Run Windows File Explorer (or any compatible file manager you prefer – I’m using Directory Opus).
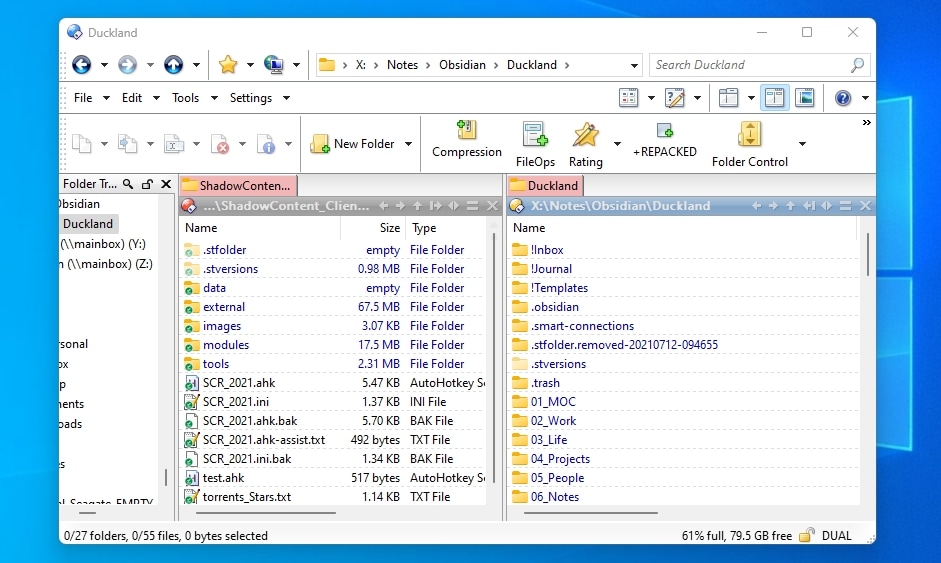
- Right-click on the storage device and select Properties.
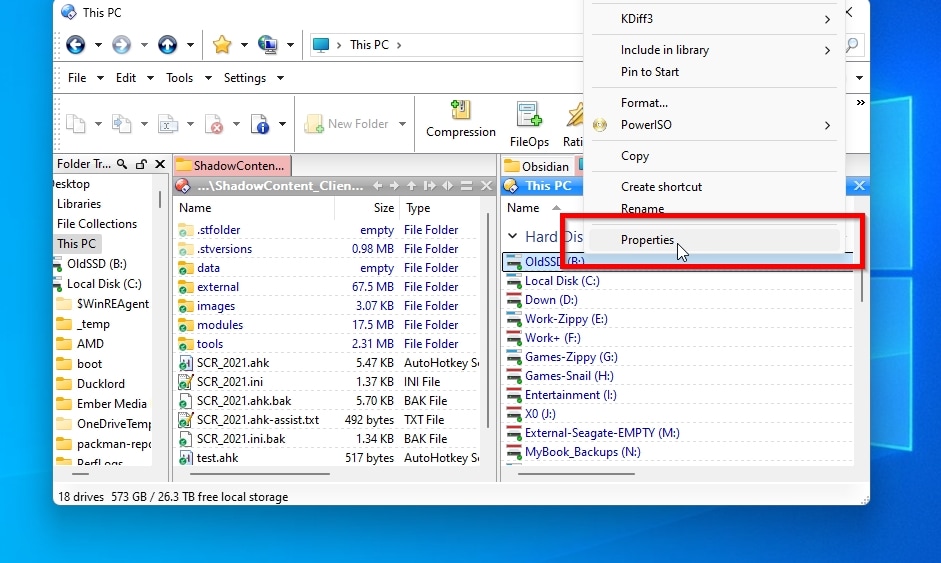
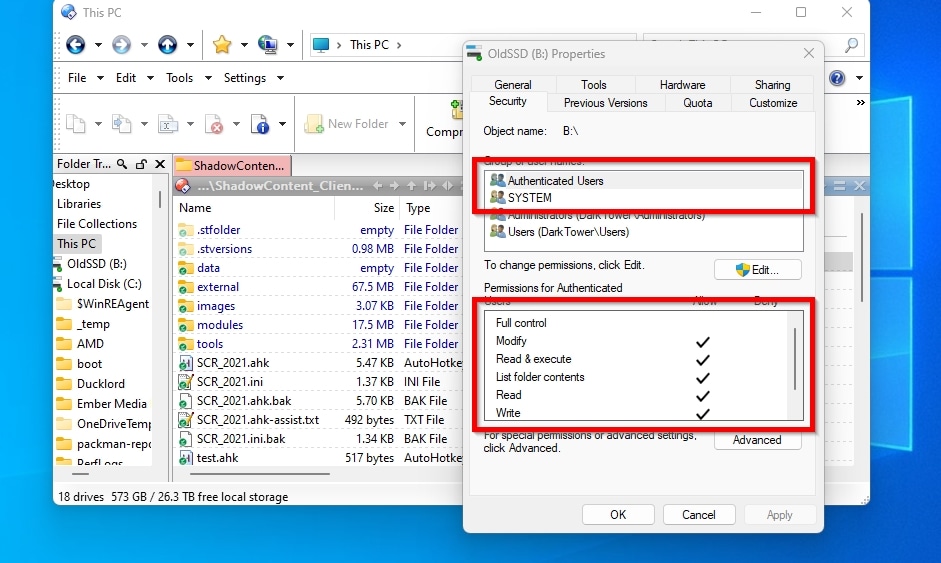
- Move to the Security tab. Make sure that SYSTEM has a checkmark on all entries on the Allow column, and that Authenticated Users have all entries except Full control and Special permissions enabled.
The “read-only” attribute is configurable through a user-friendly interface only for folders on Windows. However, it is possible for a whole storage device to be set as “read-only” and vice-versa, using diskpart.
To make a read-only device writable again using diskpart:
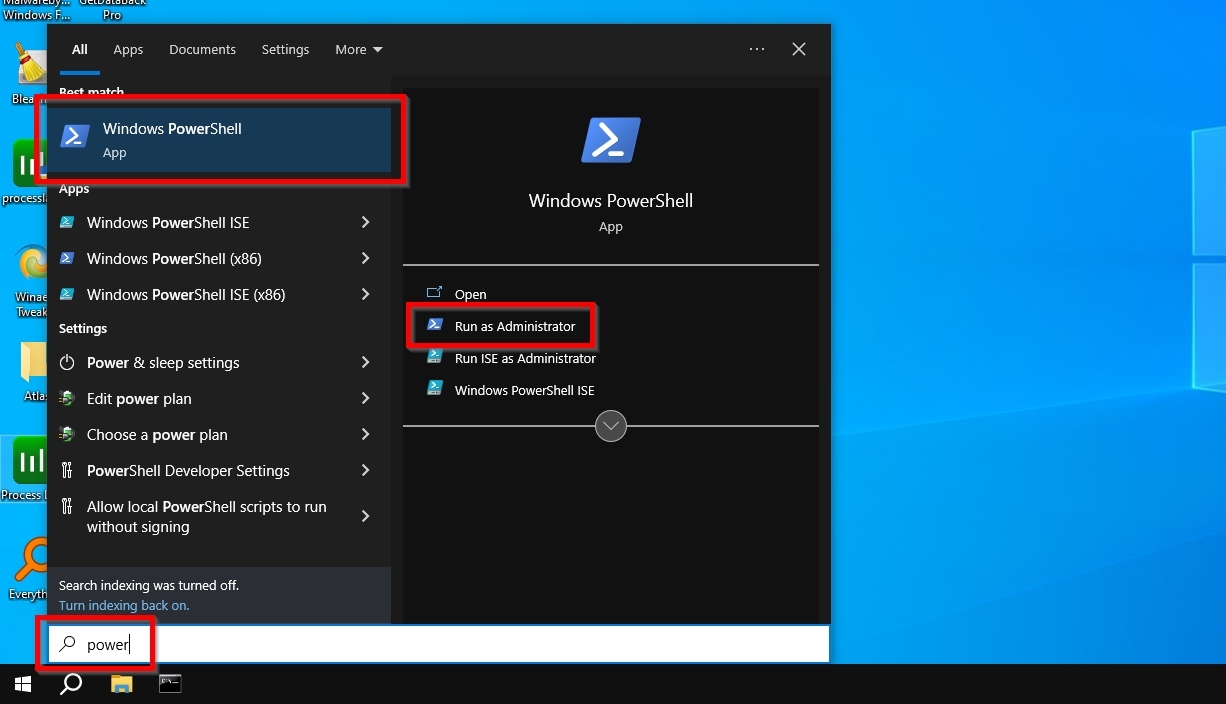
- Search for Command Prompt (CMD) or PowerShell using the Start Menu, and launch them with elevated privileges by selecting Run as administrator.
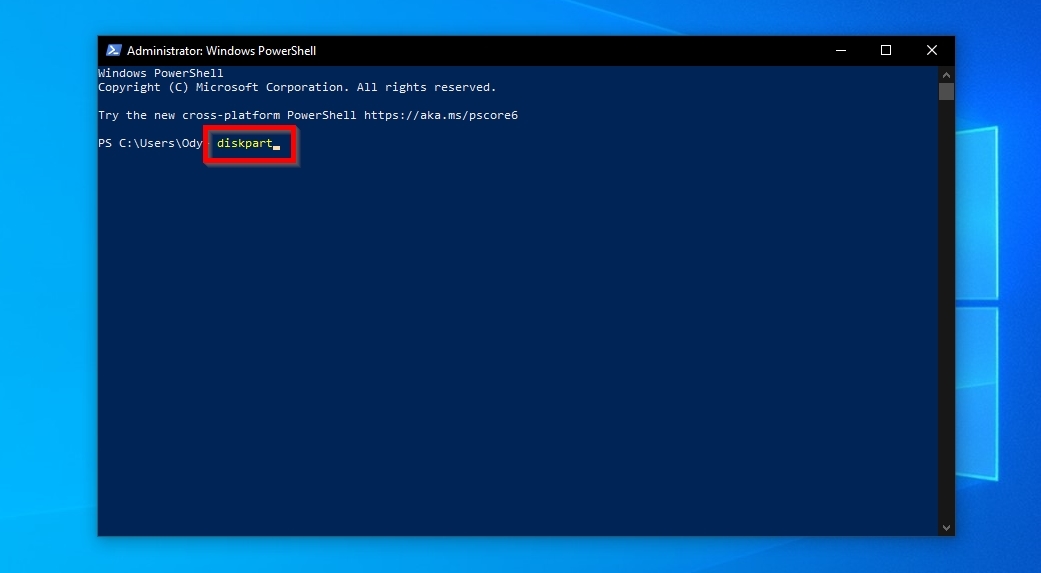
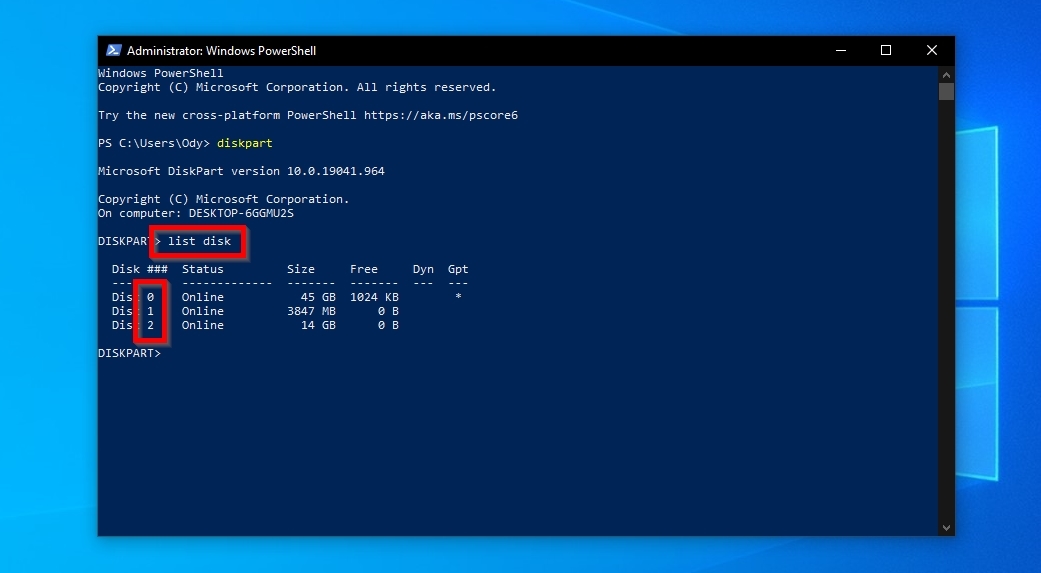
- Type diskpart and press Enter.
- Use the command list disk to see all storage devices detected by diskpart. Note the number of the one you want to “make writable” again.
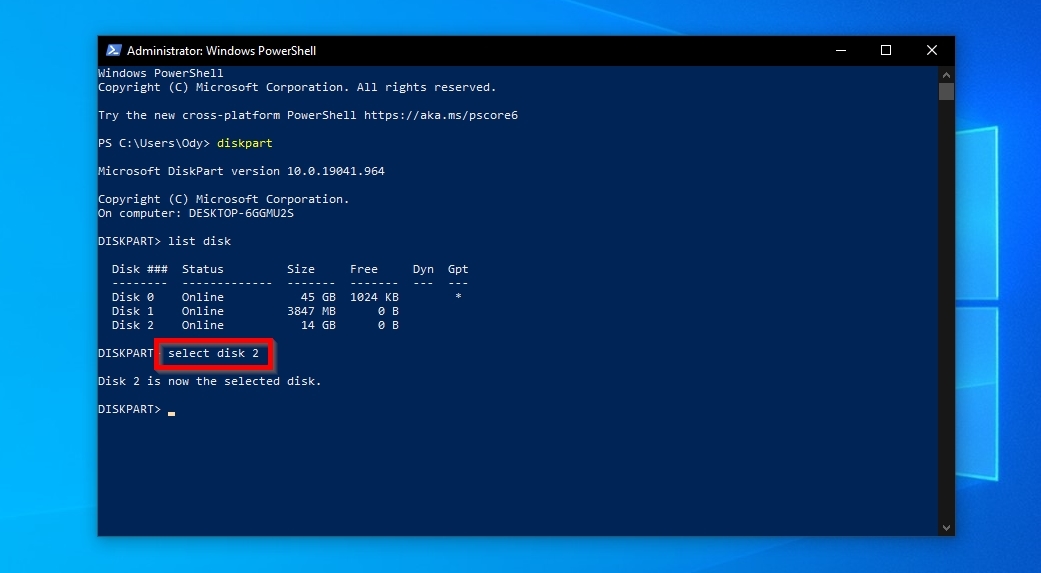
- Type select disk NUMBER, where “NUMBER” is the one you noted in the previous step. For example, select disk 1.
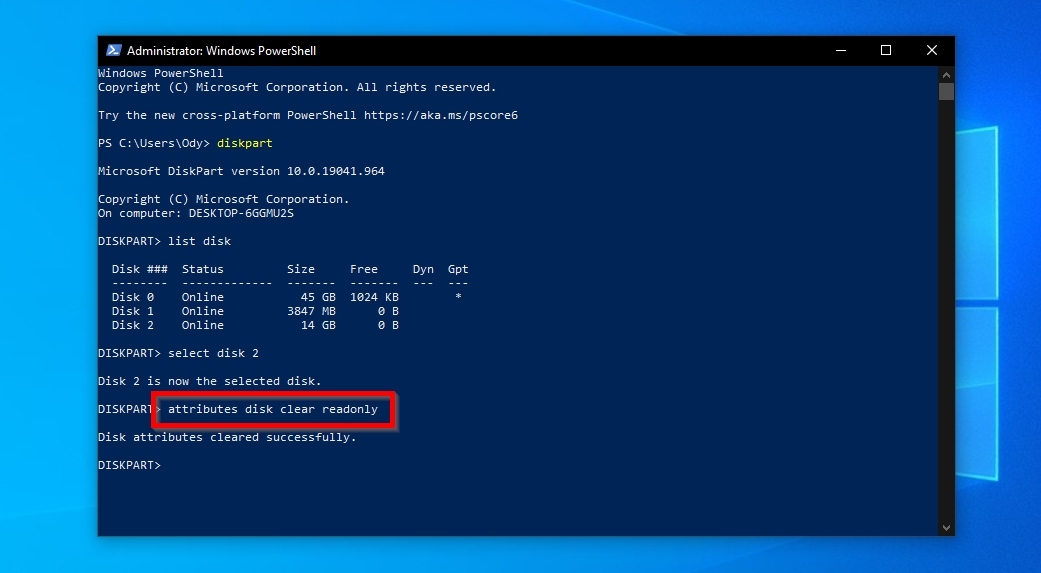
- Issue the command attributes disk clear readonly.
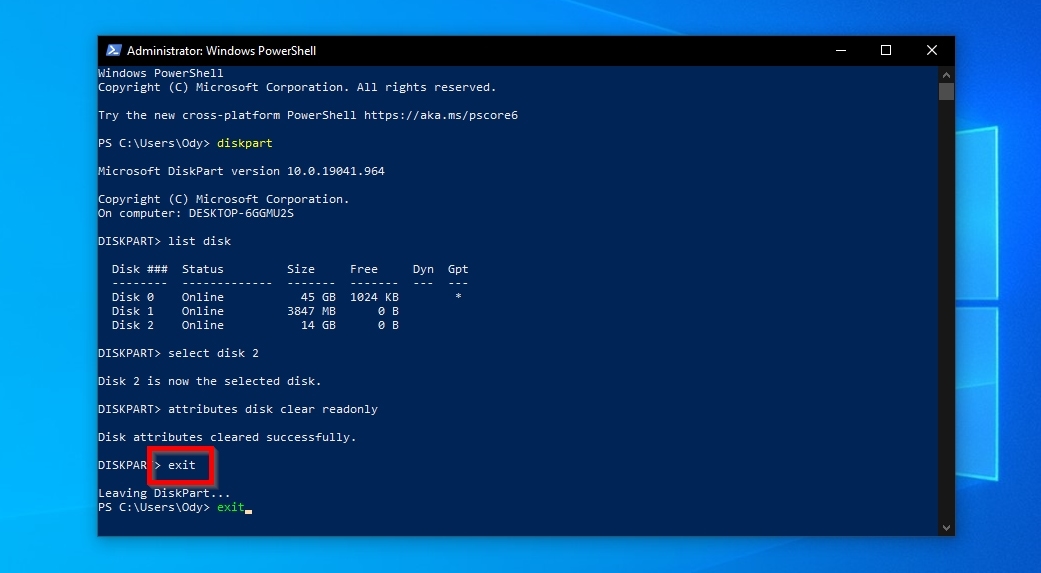
- Type exit two times to terminate the app, and exit the terminal’s window.
Solution 5: Check Hardware Health
A storage device on the brink of failure might appear as “unavailable” to the PC, which in turn could try to communicate the issue to the user with “the device is not ready” errors. Thankfully, it’s easy to monitor an HDD’s or SSD’s health condition using S.M.A.R.T. tools.
To check the S.M.A.R.T. condition of an HDD or SSD using Hard Disk Sentinel:
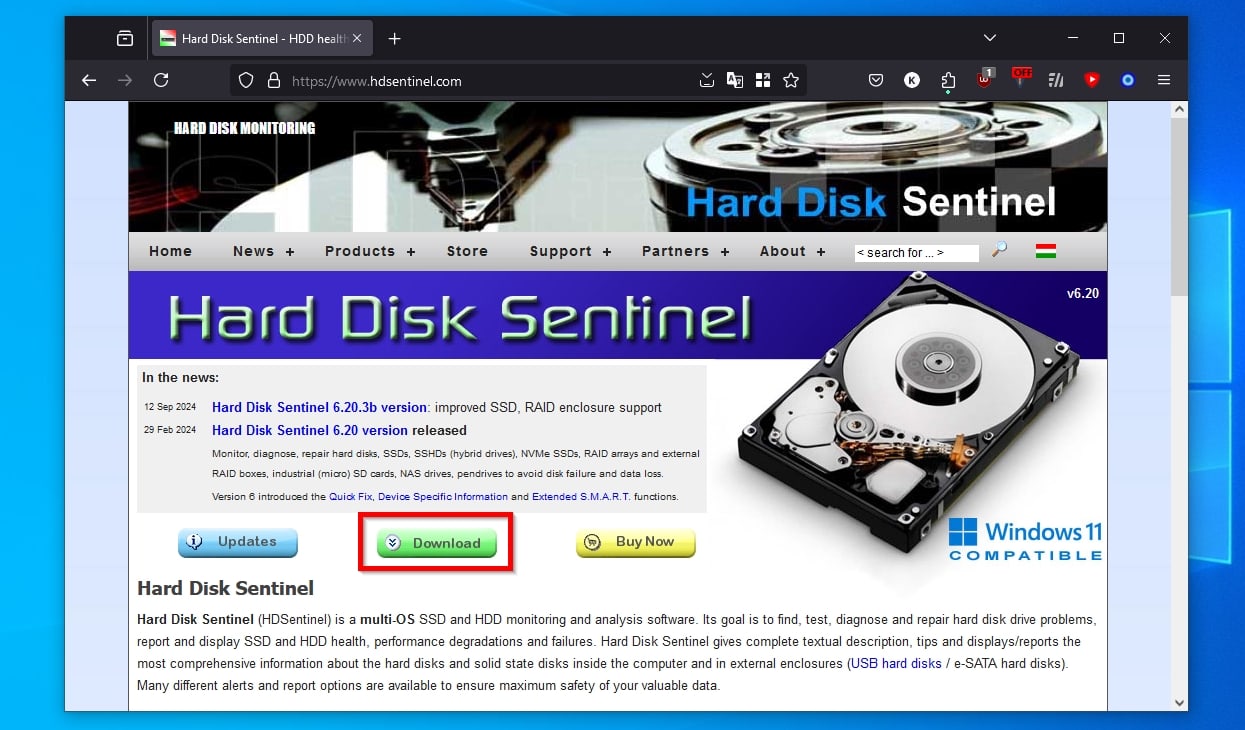
- Download Hard Disk Sentinel from its official site, install, and run it.
- You can see the condition of all detected storage devices at a glance: a green color means they’re working fine, while red means problems.
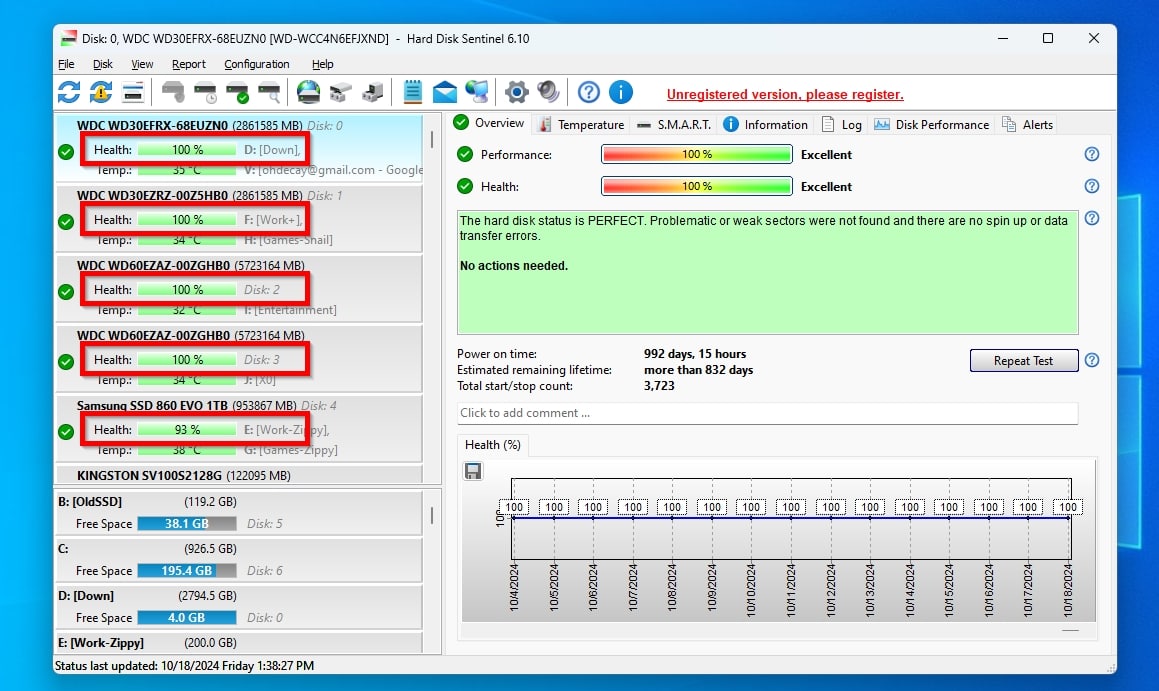
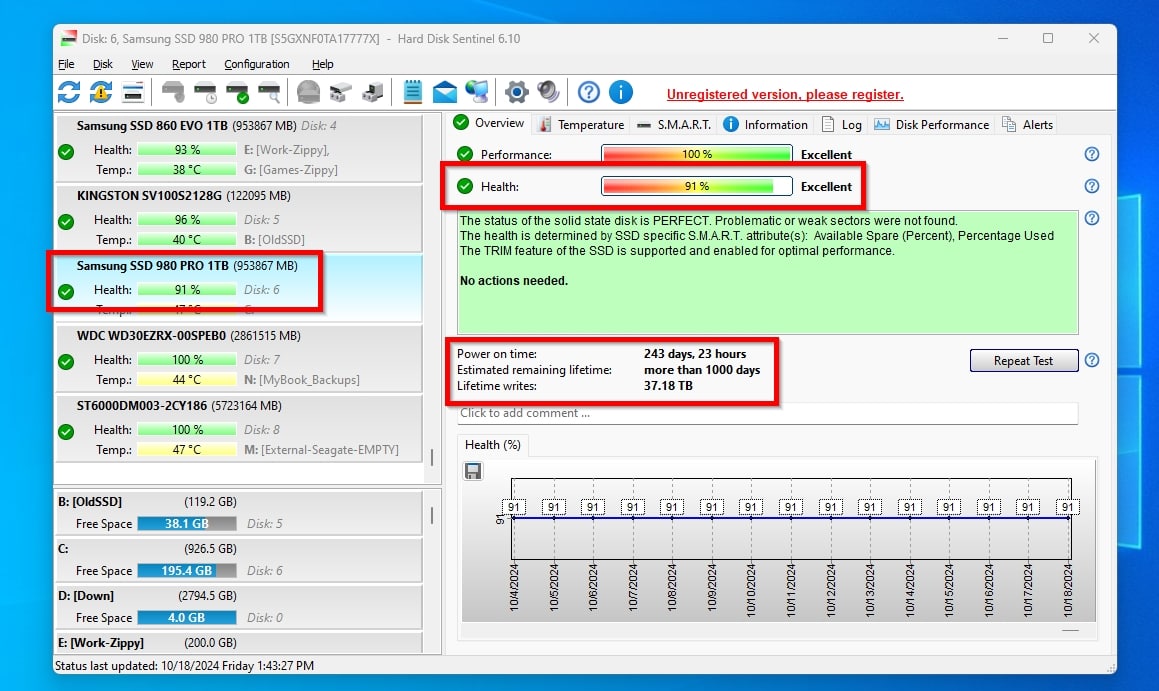
- Hard Disk Sentinel also offers a “health percentage” estimate based on the values of various S.M.A.R.T. parameters. Still, you should only consider it as “an informed guess” and not take it for granted. If a storage device is “88% healthy”, that does not mean you can keep trusting it with your data, even if the app estimates it may last hundreds of days until it fails. Instead, plan its replacement ASAP.
Since I’ll also use Disk Drill in another section of this article, and it also supports S.M.A.R.T. monitoring, if you’d prefer to keep your PC lean and avoid installing multiple apps, you can use that instead to check your storage device’s health. For more information on that, check our article on how to check hard drive health.
Solution 6: Clean a Disk’s Contents
Did you back up the entire disk or, at least, your most important files? If you didn’t, refer to the following sections, which can help you safeguard and/or recover your data off your misbehaving disk.
If you did, though, and you’ve also tried formatting it to render it usable, but the OS insists “it’s not ready”, maybe it’s time for a more drastic solution: nuking everything on the disk by performing a low-level format with a third-party tool.
To perform a low-level format using HDDGuru’s HDD Low-Level Format Tool:
- Download HDDGuru’s HDD Low Level Format Tool from its official site. Depending on your downloaded version, install or extract it, and then run the app.
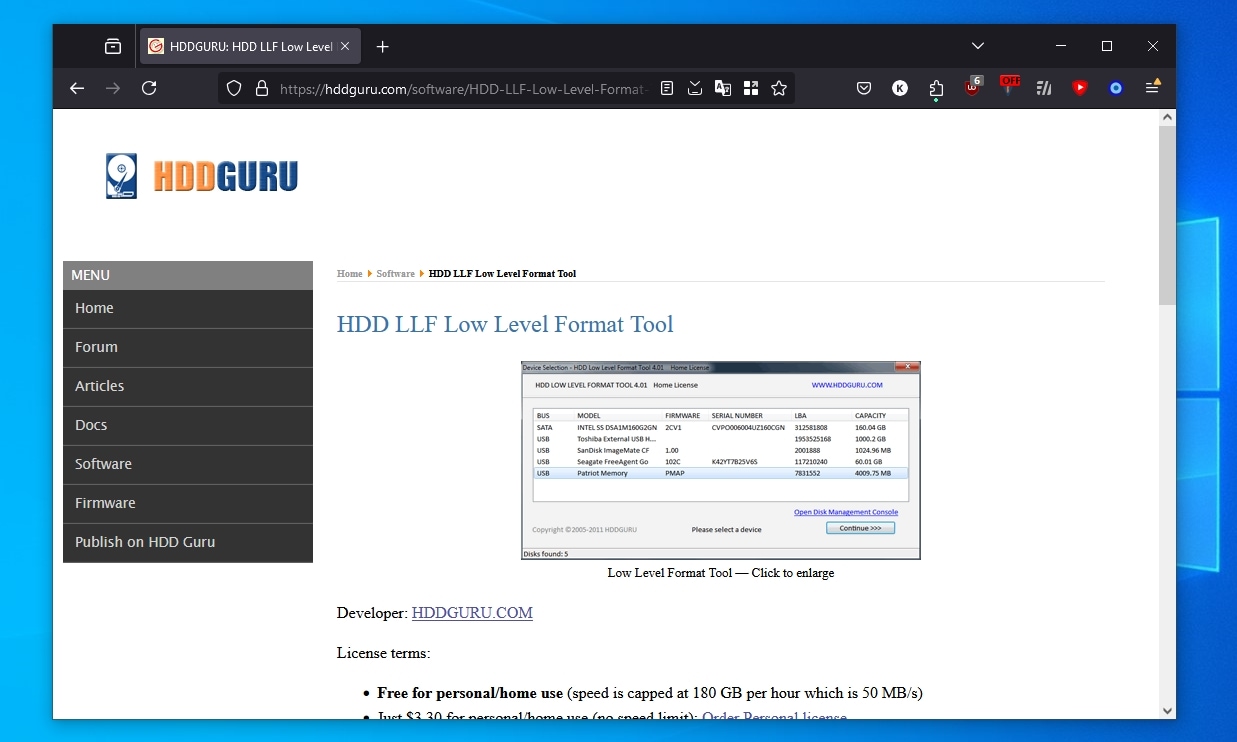
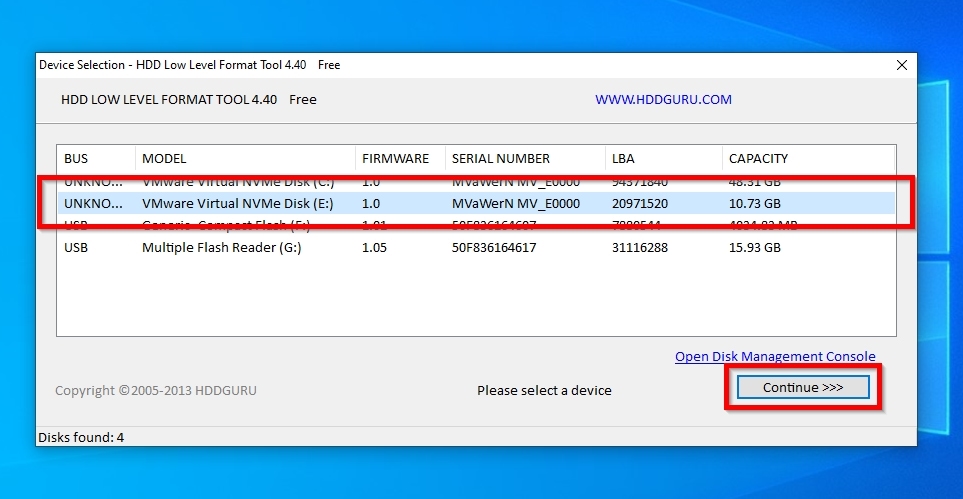
- Select the disk you want to erase, and click Continue.
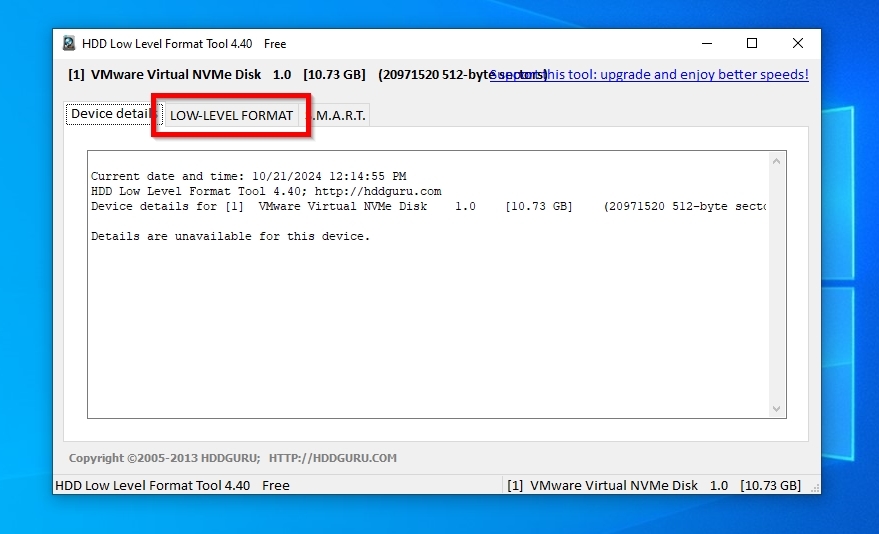
- The tool’s window will change, showing you details about the drive you selected. Move to the LOW-LEVEL FORMAT tab.
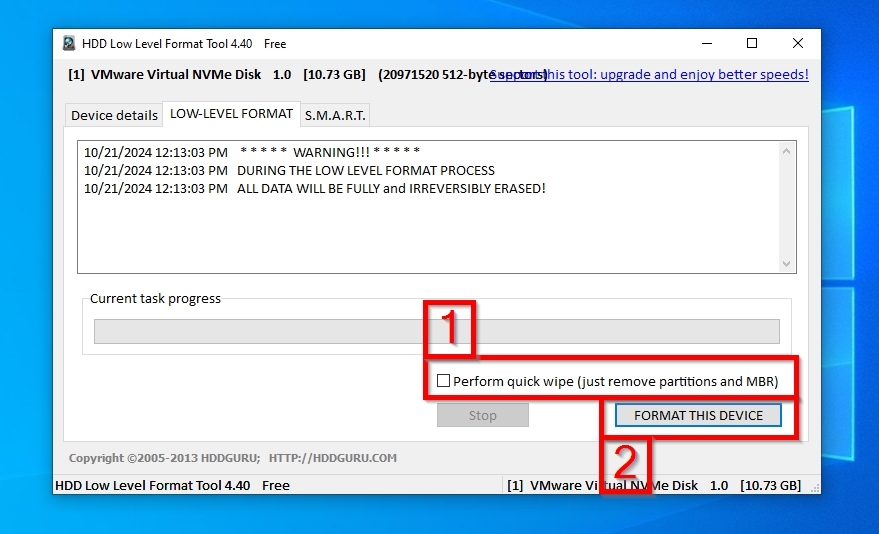
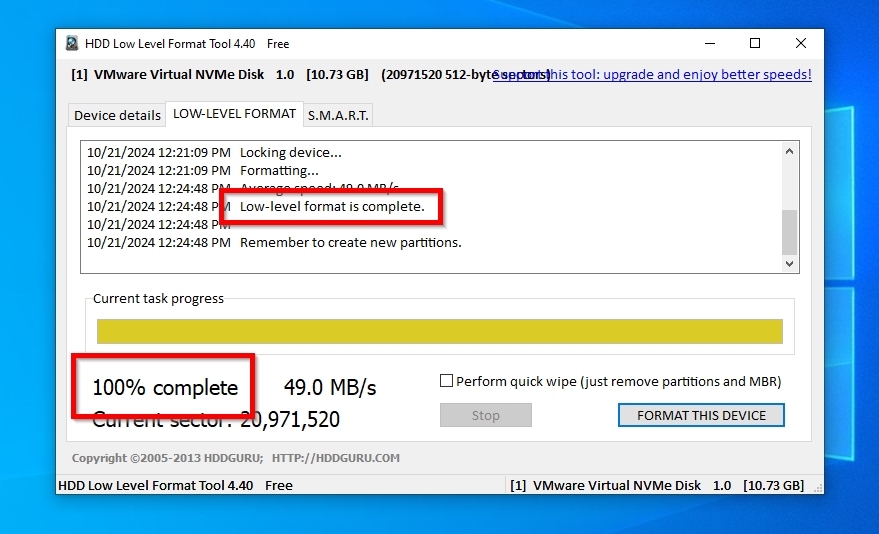
- To ensure everything on the drive will be erased, leave Perform quick wipe (just remove partitions and MBR) unchecked (1). Click FORMAT THIS DEVICE (2).
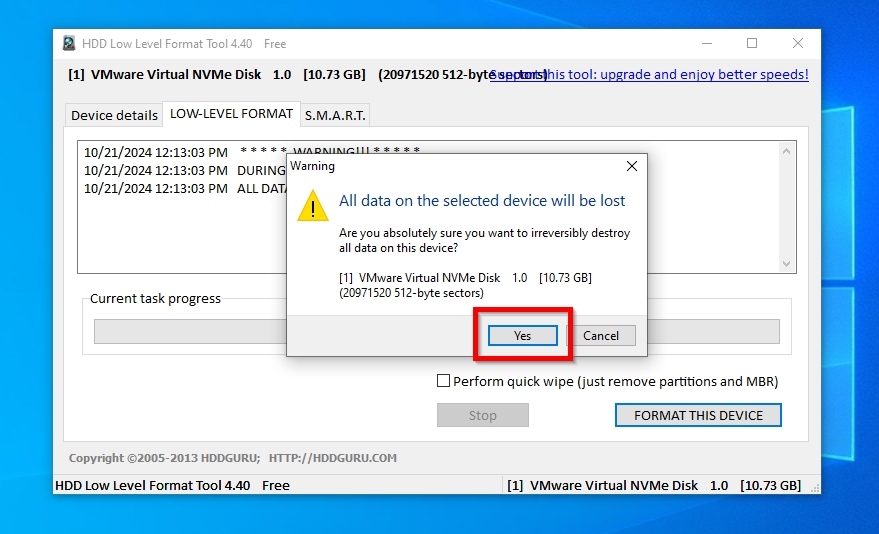
- Acknowledge that All data on the selected device will be lost with a click on Yes.
- When the process indicator reaches “100% complete”, and the app’s log states “Low-level format is complete”, your disk will have been completely erased and, hopefully, perform as new.
Troubleshooting Through Hardware Swapping
Is an M2 drive, SSD, or any other device (even a GPU) not working as it should on your PC? If you have another PC available, temporarily “transplant” the device there. If the problem persists, it’s indeed the storage device that’s at fault. If “it works there”, the problem (probably) lies elsewhere. Keep “transplanting”, mixing, and matching (compatible) parts until you find the culprit: the one that refuses to work on both PCs.
If you can’t pinpoint the root of the issue, the two most probable sources of such errors are the PSU and the motherboard.
Power Supply Units (PSU) are designed to work with specific power loads. If your demanding hardware occasionally “asks more from them”, this can lead to system instability, data corruption, or individual parts “misbehaving” in unexpected ways. And although it’s more probable for a power-hungry GPU to freeze, “blank out”, or display artifacts, occasionally, power problems can prevent a PC from recognizing a hard drive.
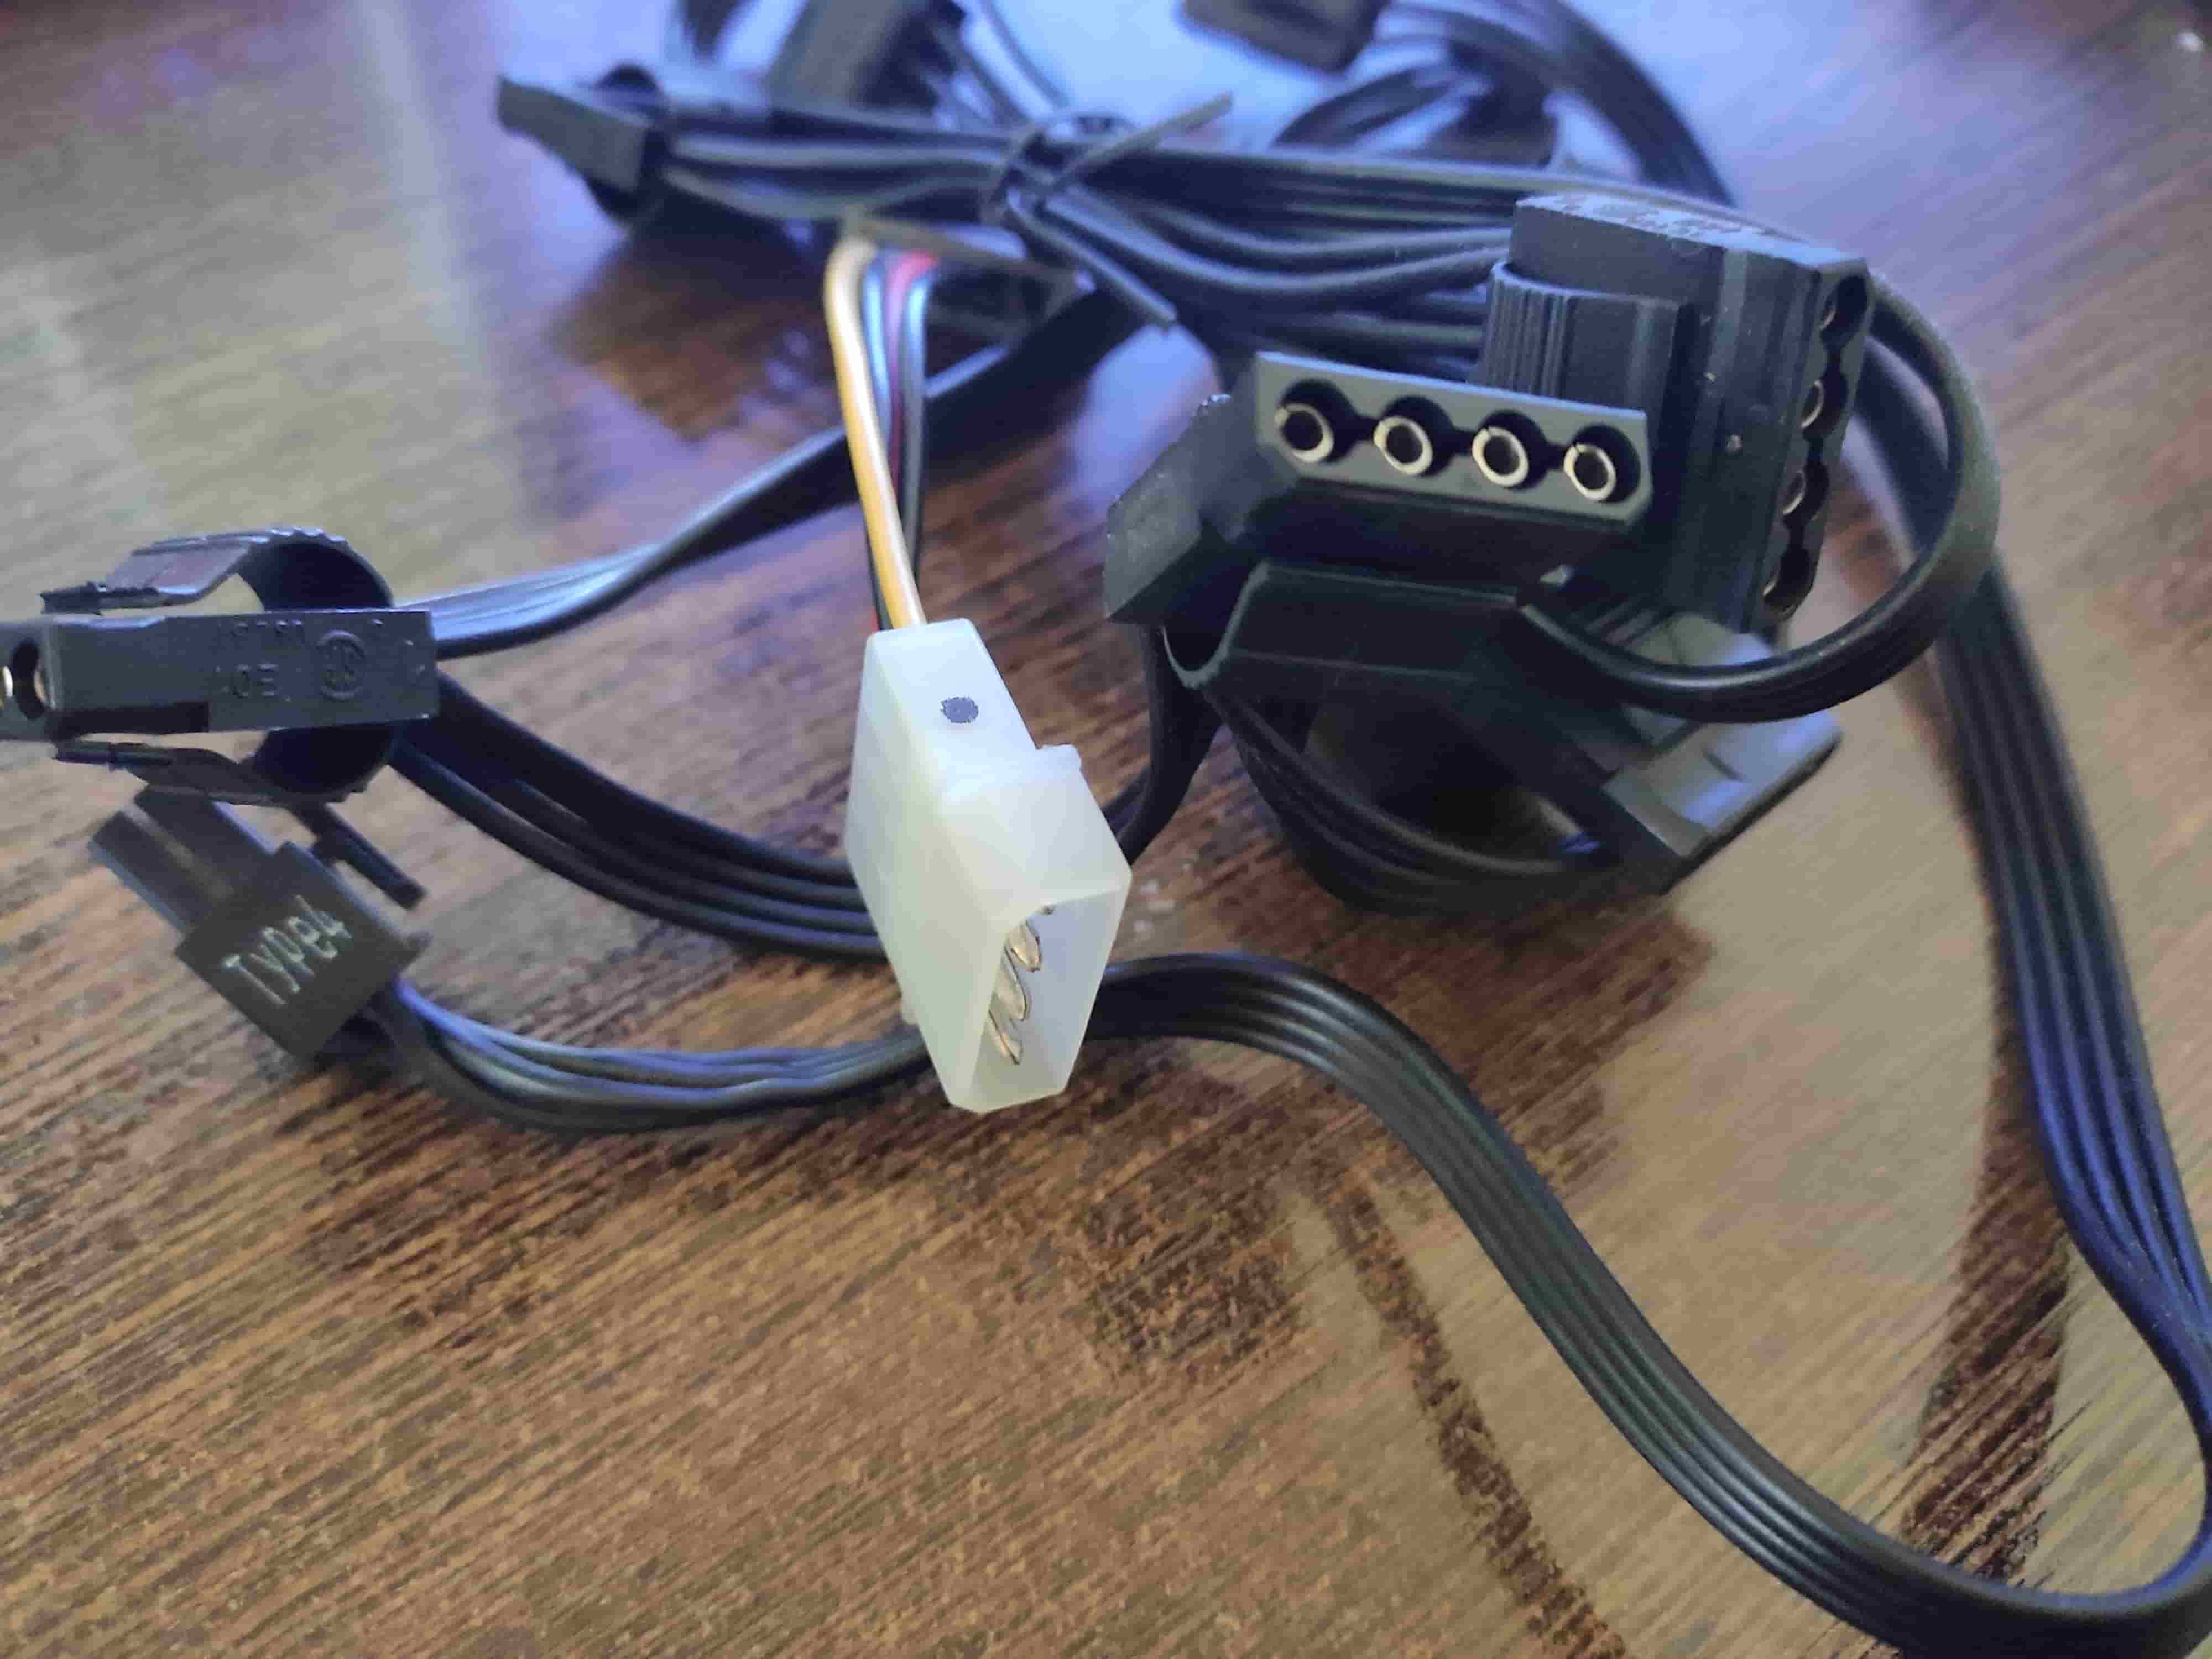
If using a modular PSU, it’s of utmost importance to use the correct cables, and never mix and match cables between brands — or even PSUs from the same manufacturer. Even if they look identical, those cables might differ internally. Wrong cables could lead to hardware like hard drives not working correctly as if they’re not receiving power, or worse, “getting fried” beyond repair.
If it weren’t the PSU, and you’ve eliminated all other potential culprits, what’s left is the motherboard and its storage controllers. However, that’s challenging to troubleshoot for the average user, leaving a professional service or complete replacement as your best option.
Saving Your Files Through Backup & Recovery
Is your disk accessible by some third-party apps despite showing a “device is not ready” error? Does it work without issues on another PC? Take proactive action to ensure your files’ safety: grab a complete backup and copy your files off it as soon as possible. You can use specialized apps for these tasks. Still, I’ll use Disk Drill for this article since it has built-in support for pristine byte-to-byte backups and a stellar data search and recovery engine.
To clone your entire disk into a backup image using Disk Drill and ensure your data will be available even if the disk fails:
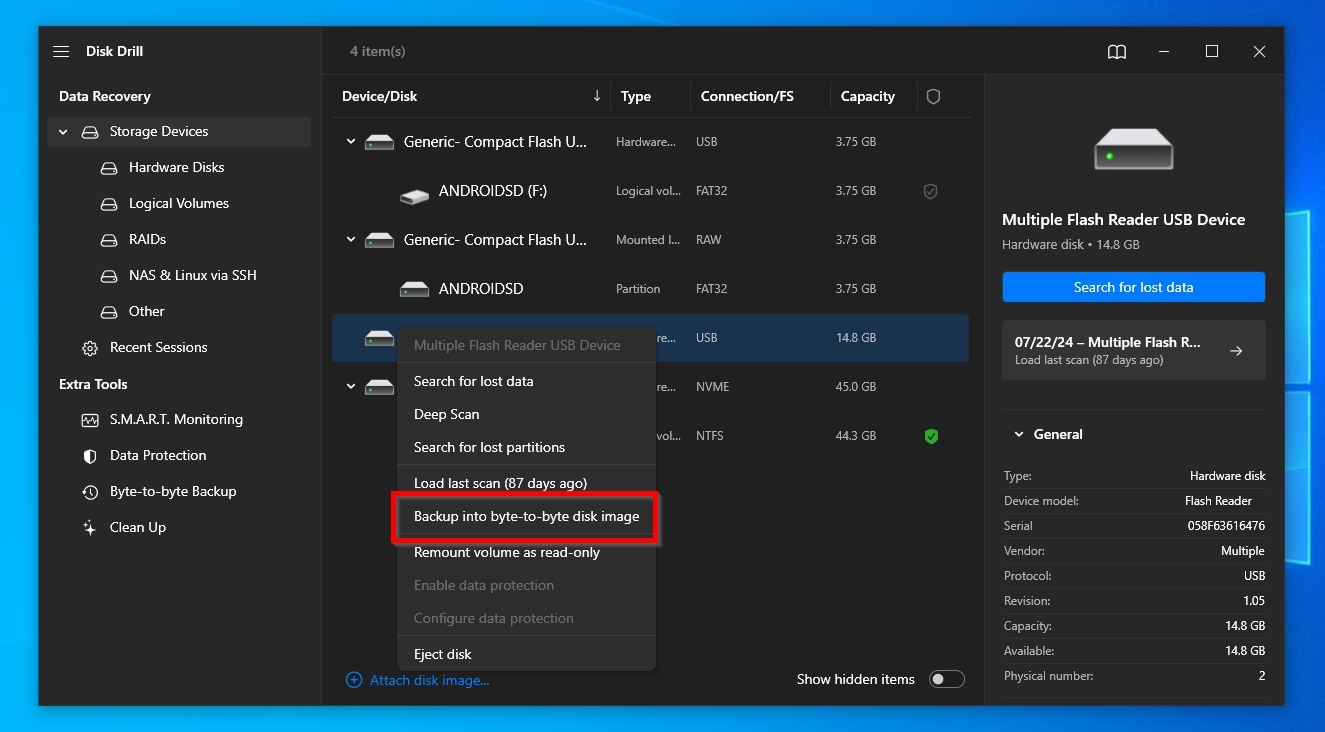
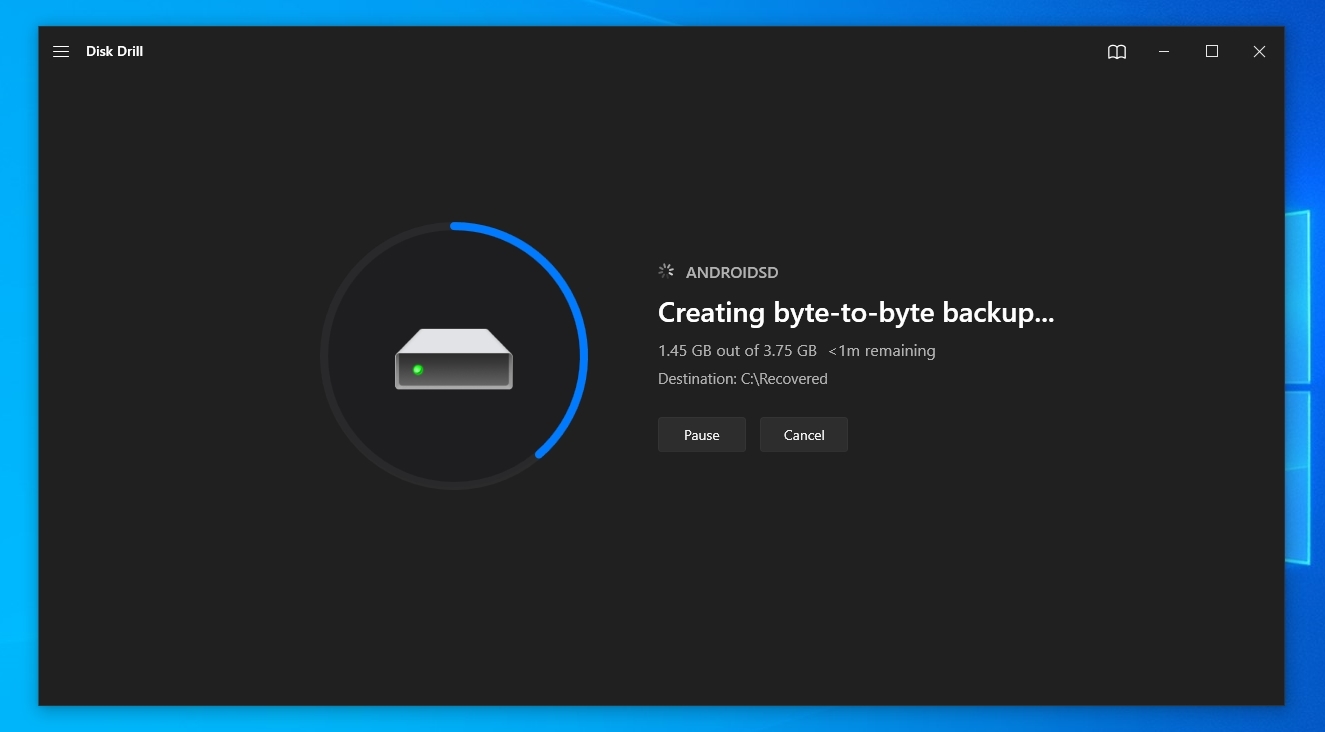
- Download the app from Disk Drill’s official site, install it, and run it. Right-click on the disk you want to clone and select Backup into byte-to-byte disk image.
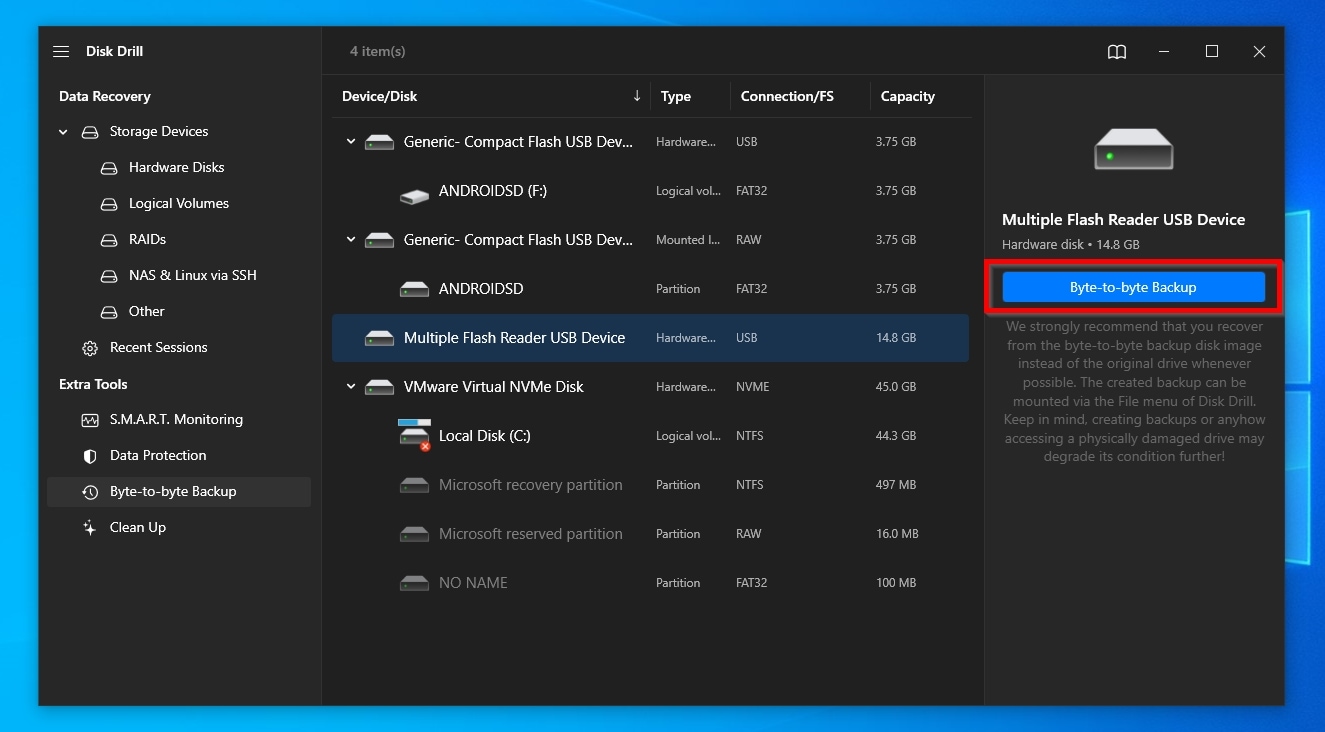
- Click on Byte-to-byte Backup on the right. We suggest you leave all options as they are. Only change the “Path” to another storage device with enough free space to save a clone of the disk you’re backing up.
- Give Disk Drill enough time to complete the backup process.
To recover your files off your disk onto another storage device with Disk Drill:
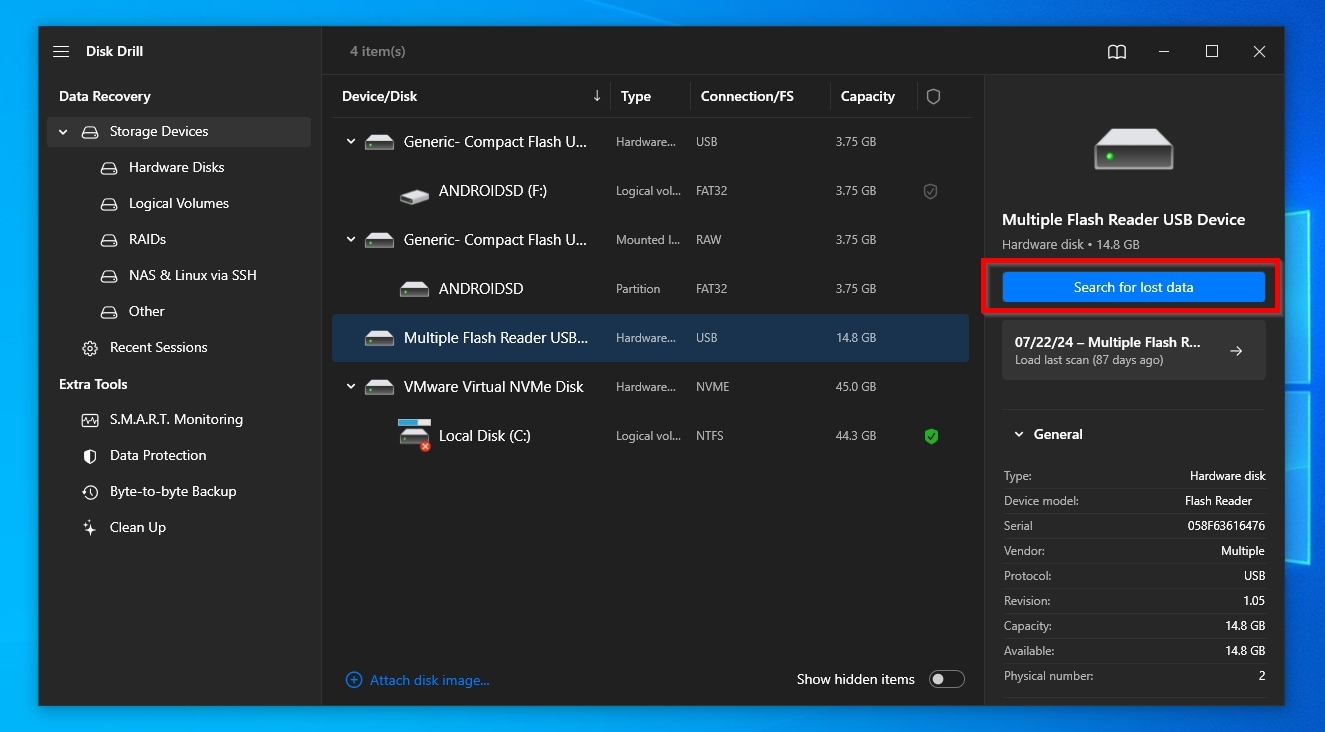
- Return to Disk Drill’s Device/Disk list by clicking on Storage Devices on the left. Click on your disk to select it, and then on Search for lost data.
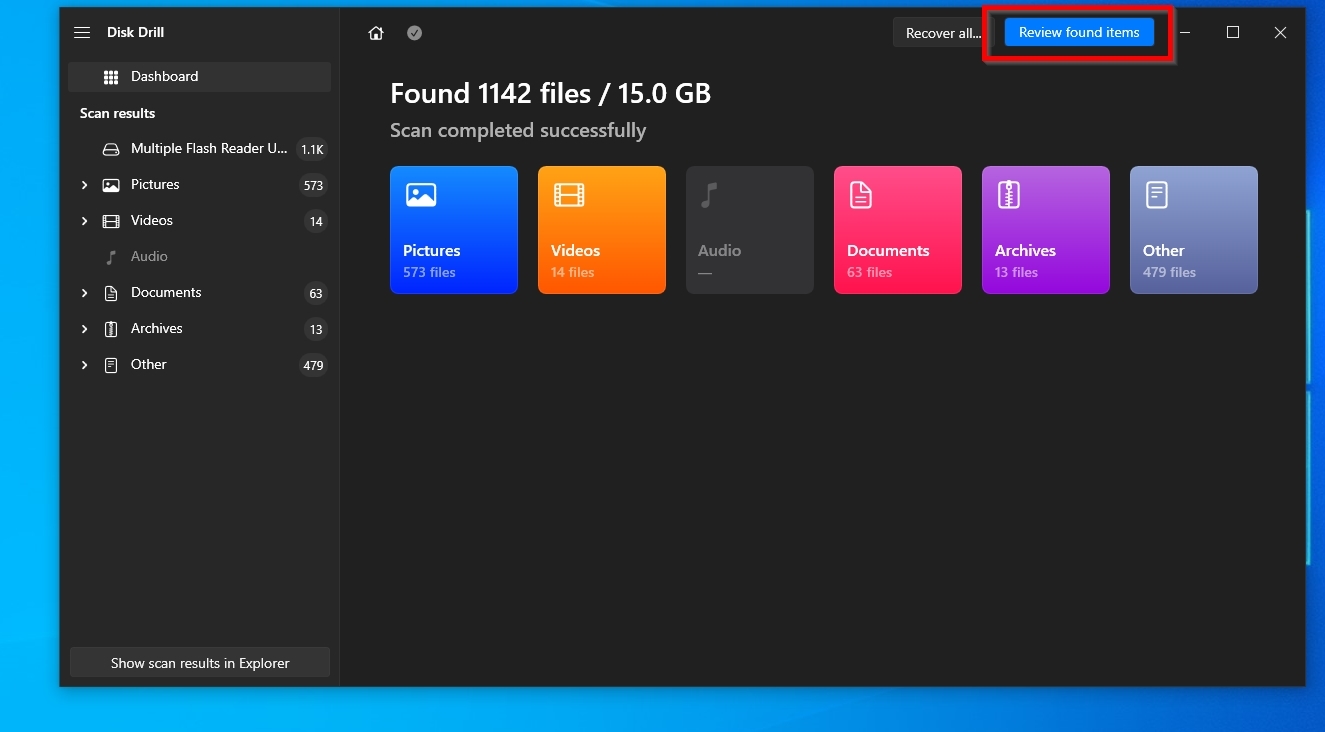
- When Disk Drill’s scan finishes, click Review found items on the top right.
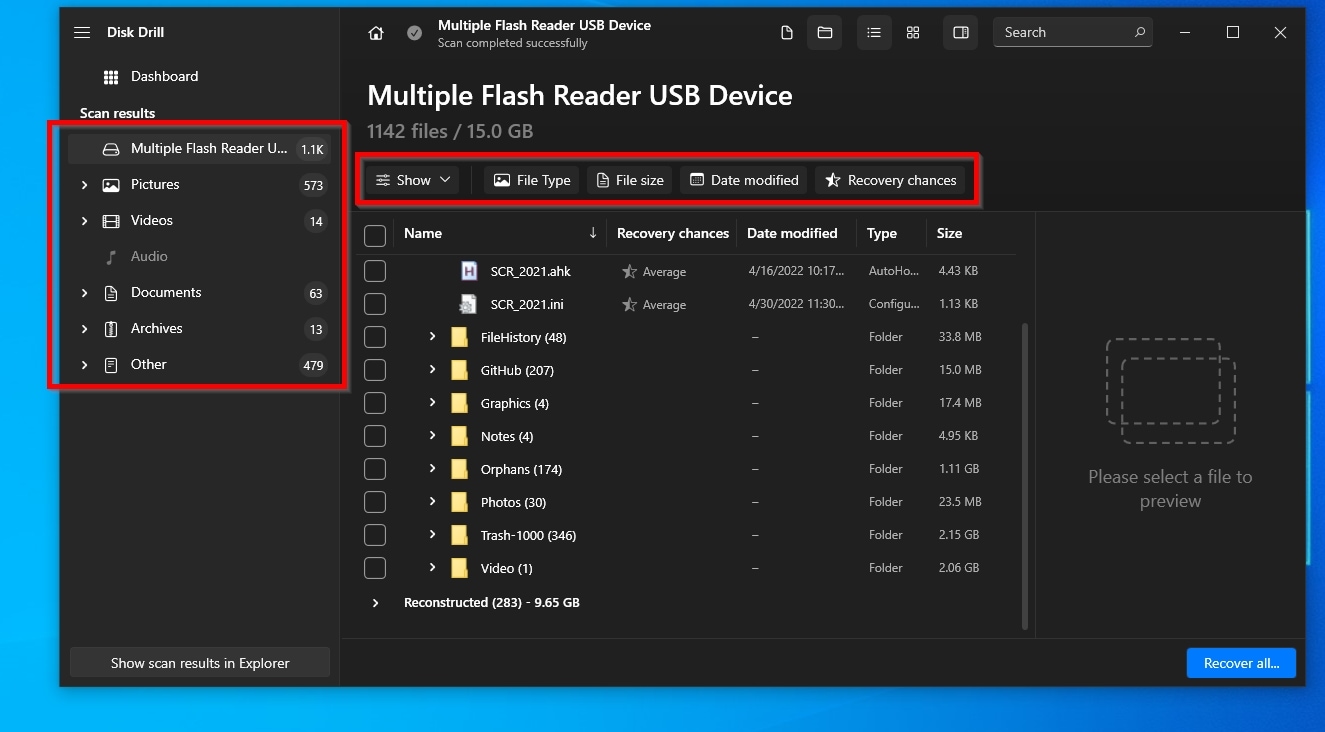
- You can go through the scan’s results manually or use the Categories on the left and the Filters above the list to reduce the number of displayed files based on properties like their type, file size, last modification date, etc., to make the list more manageable.
- You can see a preview of the contents of many types of files on the right of Disk Drill’s results window by clicking on them. If the preview pane isn’t visible, right-click on a file and select Preview, or click on the little hovering eye icon next to its name.
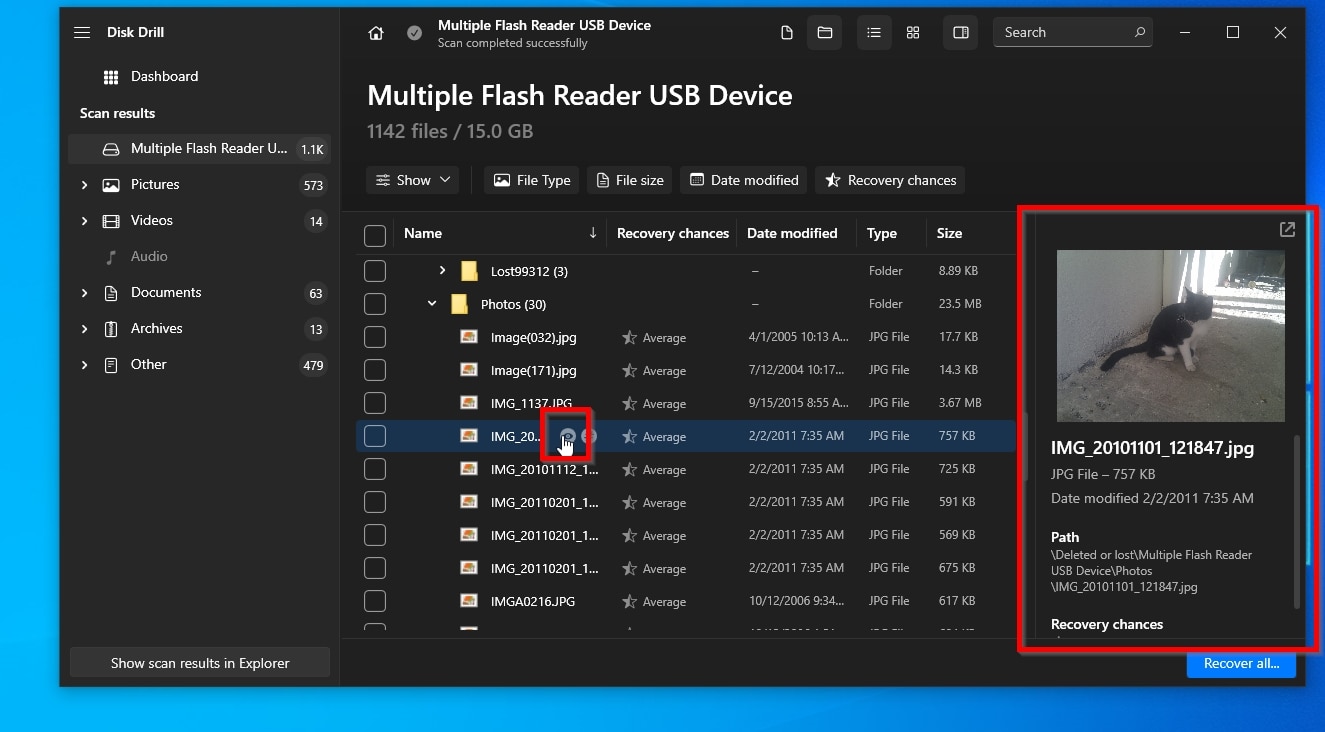
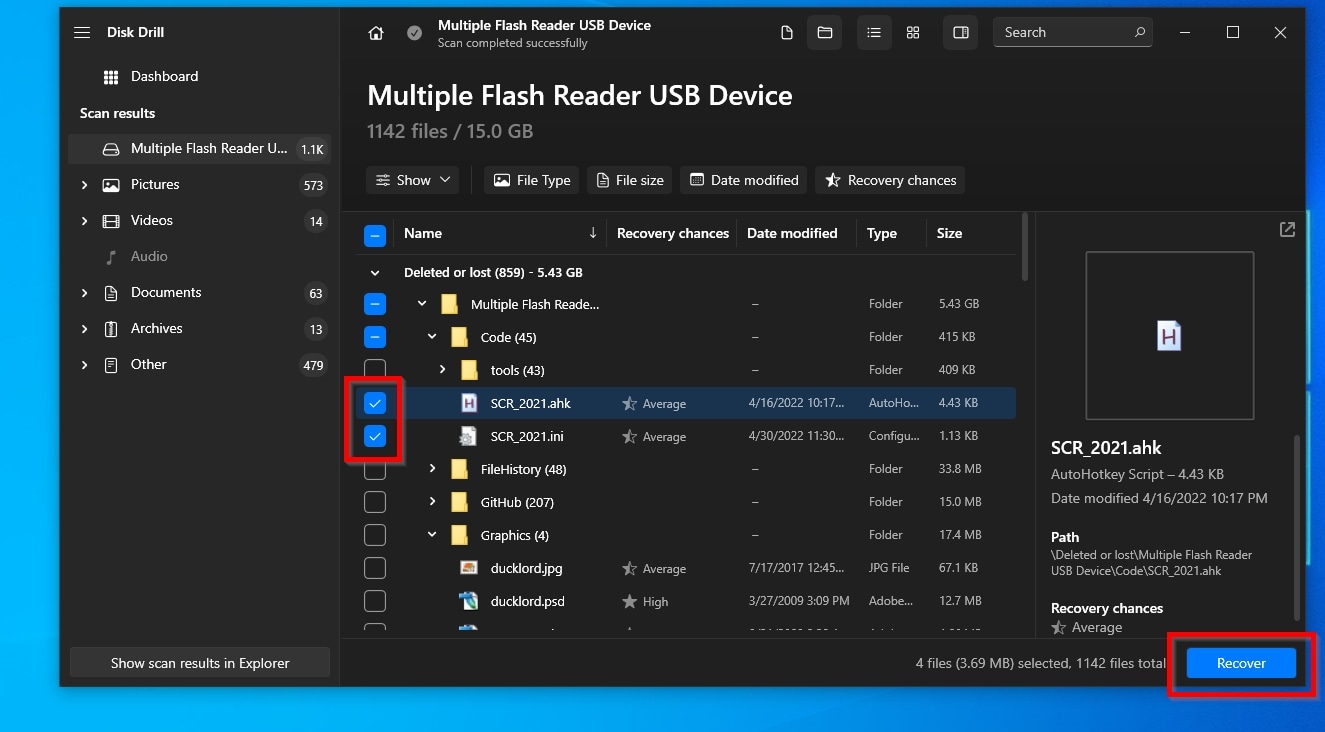
- Place a checkmark on the left of any file you want to recover. When you’ve marked all of them, click Recover on the bottom right.
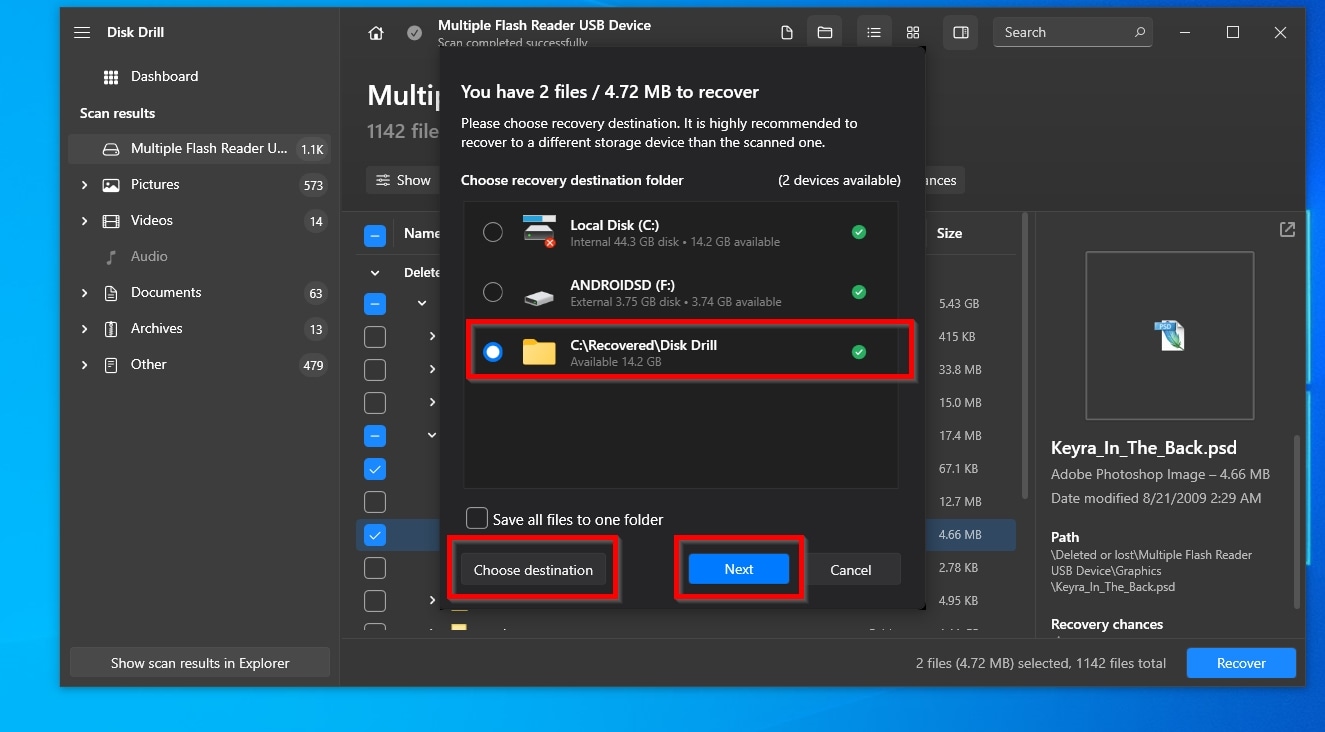
- Disk Drill will present a list of potential destinations. If the one where you want to store the newly recovered files isn’t among them, select a new folder with a click on Choose destination. With a destination folder selected, click Next.
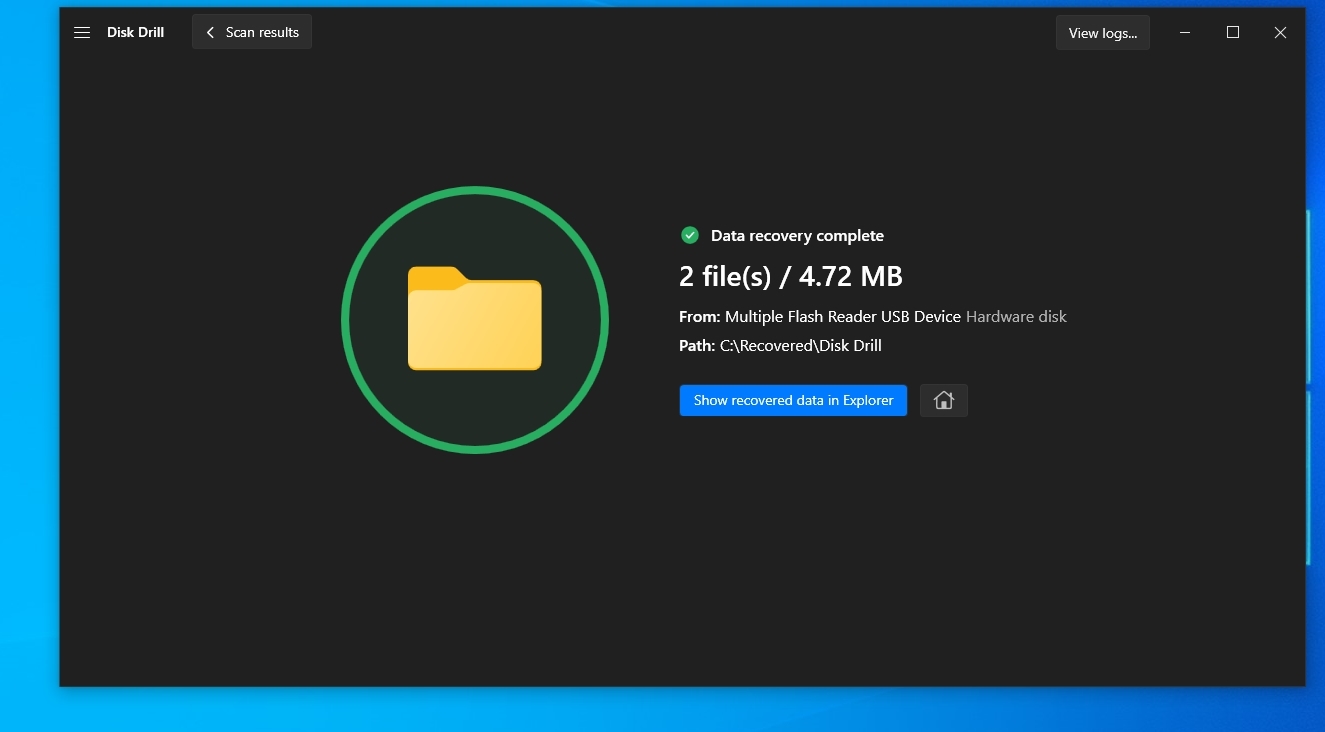
- When the recovery process completes, click Show recovered data in Explorer to pay a quick visit with your OS’s default file manager to the folder where your files were recovered.
Disk Drill is not only trustworthy and safe, but also consistently positively reviewed, and our review was no exception. Still, there are alternatives if you don’t feel it’s the right solution for you. For even more options, check our guide on the best data recovery solutions on the market.
Conclusion
As we saw, even if the message may seem somewhat scary, an error stating that “the device is not ready” when trying to access a disk isn’t equal to total catastrophe. There are many potential causes for such issues; thankfully, most come with relatively easy solutions.
Still, you should always prioritize the safety of your data whenever you meet any storage-related issues. Always keep recent backups of your data and make copies of your most important files. Even if the solution to the problem was as simple as tightening a power cable.
FAQ
Can I quickly fix 'the device is not ready' errors to keep using a disk?
Although there are many “fixes” for “the device is not ready” messages, the one that works best depends on the cause of the issue. Also, such issues may indicate more significant problems. Thus, no single quick fix will work in all cases, and it’s best to pinpoint the actual cause of the issue before you trust the disk with your data again.
I met that error with a memory card! Why is my SD card 'device not ready'?
The error message can appear for any storage device, and that includes SD cards — as well as USB flash drives, external HDDs, etc.
Does a 'the device is not ready' error mean I lost my files?
Not at all! Such errors usually mean that, for some reason, the device “appears busy to the OS”. Because of this, the OS “cannot let you access it”. Does the device have no hardware defects and is detected correctly by your PC? Then, it should be possible to get your data back off your “unready” storage after dealing with the source of those issues. Even if it remains inaccessible “normally”, you should eventually be able to “recover” your files from it onto another storage device.
This article was written by Odysseas Kourafalos, a Editor-in-Chief at Handy Recovery Advisor. It was also verified for technical accuracy by Andrey Vasilyev, our editorial advisor.
Curious about our content creation process? Take a look at our Editor Guidelines.
